If Dell SupportAssist keeps popping up on your computer, you can refer to this post in which several solutions are provided. Partition Magic offers steps and screenshots of each method, so simply follow the instructions to complete the operation.
What Is Dell SupportAssist
Dell SupportAssist is a technology that improves your support experience with Dell. To be specific, it aims to offer a smoother, more reliable, and faster PC experience. It tells you when to make updates, including urgent and recommended driver updates.
MiniTool Partition Wizard FreeClick to Download100%Clean & Safe
Additionally, it can also remove viruses, detect issues, and optimize settings. It prevents troubleshooting and disruptions using automated, proactive, and predictive support. As you see, it can detect and fix issues on your Dell computer.
However, sometimes Dell SupportAssist itself prompts errors. For instance, you may encounter errors like Dell SupportAssist has detected a failing component, Dell SupportAssist keeps popping up, Dell SupportAssist high memory usage, etc.
Here, the focus comes to “SupportAssist splash screen keeps popping up” issue, which can prevent you from logging in. I will show you how to fix it.
Method 1: Disable Secure Boot
Secure Boot is a feature that ensures device boots up only through the software trusted by OEM (Original Equipment Manufacturer). This stops any malicious program from taking control of your PC during the startup process.
That’s why you should enable Secure Boot. However, you may need to disable it in this scenario to troubleshoot the discussed issue. How to do that? Here are the steps.
Step 1: Restart the computer and repeatedly press the BIOS key after the PC loads up. Then you will boot into BIOS.
Step 2: Locate the Secure Boot tab and click on it.
Step 3: Tap on Secure boot and set its status to Disabled.
Step 4: Press F10 > Enter key on the keyboard to save changes and exit BIOS.
Step 5: After that, your computer will boot with the changed settings. Then check if Dell SupportAssist keeps popping up. After the issue is fixed, enable Secure Boot in BIOS.
Method 2: Change UEFI to Legacy
If disabling Secure Boot doesn’t work, try changing UEFI to Legacy. This operation can bring the login screen after boot. Then you will be able to log into Windows properly. Now, follow the steps below to change UEFI to Legacy.
Step 1: Restart the computer and boot into BIOS.
Step 2: Head to Boot tab and choose Legacy as the boot mode.
Step 3: Save changes and exit the BIOS.
Step 4: After the computer boots up, check if Dell SupportAssist keeps popping up on Windows. If not, uninstall Dell SupportAssist and change Legacy to UEFI.
Method 3: Perform a Clean Boot
According to user reports, performing a clean boot can solve the “SupportAssist splash screen keeps popping up” issue. You can also have a try.
Step 1: Open the Run window by holding the Windows and R keys.
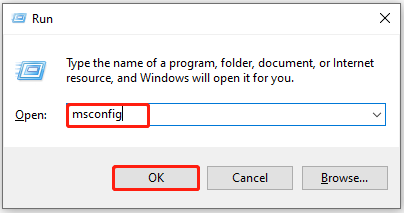
Step 2: In the Run dialog window, type msconfig and click OK to open System Configuration.
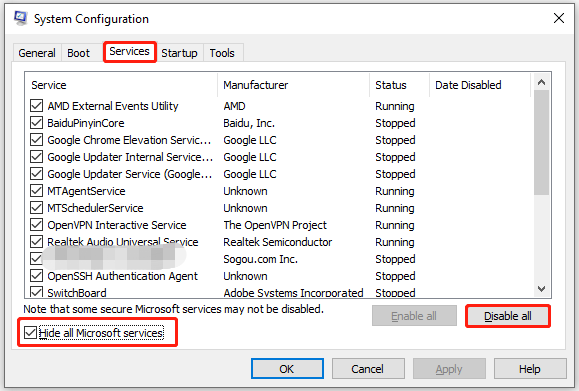
Step 3: Navigate to the Services tab, tick the Hide all Microsoft services option, and click Disable all.
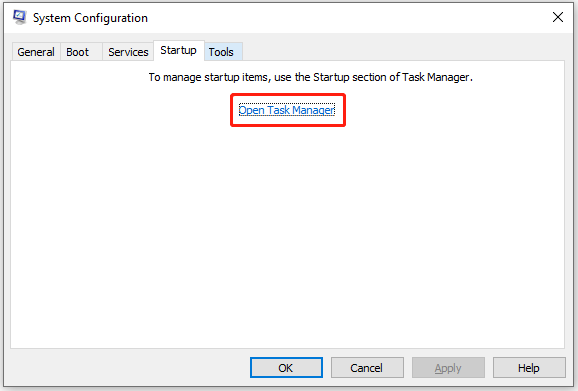
Step 4: Switch to the Startup tab and click Open Task Manager.
Step 5: Disable all startup programs by right-clicking on them and hitting Disable.
Step 6: Click Apply > OK in the System Configuration window.
Step 7: Choose Restart in the prompted window.
Method 4: Reinstall Dell SupportAssist
The last resort is to reinstall Dell SupportAssist. This removes glitches or issues with the program itself, including “Dell SupportAssist keeps popping up” issues. You can also have a try.
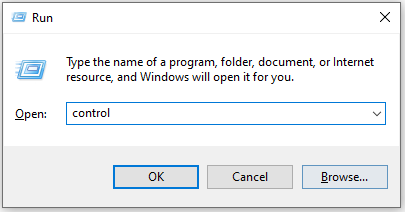
Step 1: Open the Run window, type control, and click OK. By doing so, you can open Control Panel.
Step 2: Set the View by as Category and click Uninstall a program under Programs.
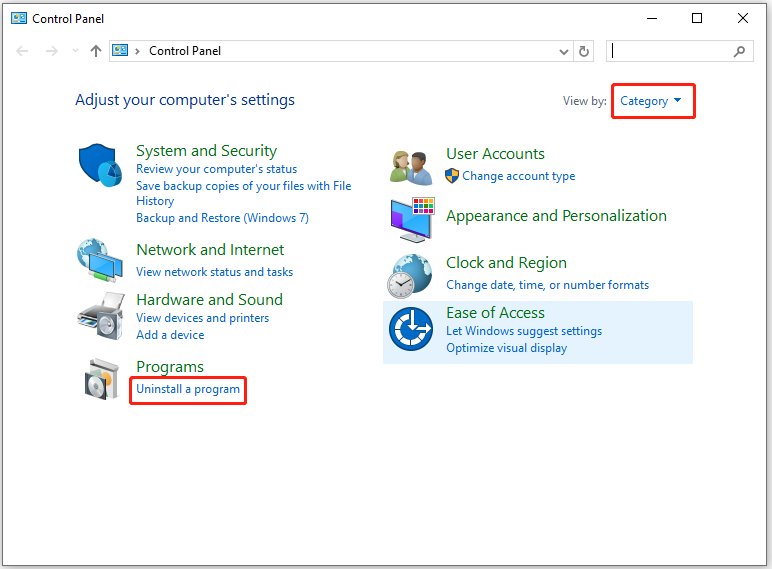
Step 3: Locate and right-click Dell SupportAssist from the list of installed programs. Then hit Uninstall and confirm the operation.
Step 4: Open Services and check if the following services exist.
- Dell Client Management Service
- Dell Data Vault Collector
- Dell Data Vault Processor
- Dell Data Vault Service API
- Dell SupportAssist
- Dell TechHub
Step 5: If you see them, it means that Dell SupportAssist has not been uninstalled completely. Then you need to remove them manually. To do that, run Command Prompt as administrator and then execute the commands below.
- SC DELETE “SupportAssistAgent”
- SC DELETE “DDVDataCollector”
- SC DELETE “DDVRulesProcessor”
- SC DELETE “DDVCollectorSvcApi”
Step 6: Open File Explorer and navigate to C:\ProgramData. Then check if the SupportAssist folder exists. If it exists, delete it.
Step 7: Open the Dell folder and delete the SupportAssist folder from there. After that, restart the computer.
The End
This post tells you how to fix “SupportAssist keeps on popping up” issue in 4 different ways. If Dell SupportAssist keeps popping up on Windows, try these methods now!

User Comments :