About Core Isolation and Memory Integrity
Core isolation, a security feature, protects your computer from various threats including some ransomware attacks. It adds an additional layer of security by separating certain functions of the OS into a virtualized environment.
As for memory integrity, it is a subset of this technology, which ensures code running in the kernel is trustworthy and stops attacks from inserting malicious code into high-security processes. However, sometimes you will encounter the Core isolation memory integrity “Page not available” error.
When this error occurs, you may receive the error message “The page you are trying to access has no supported features and is not available. Besides, this issue makes your PC vulnerable to malicious attacks. Hence, it’s necessary to solve the error immediately.
Related article: Is Windows Defender Enough? More Solutions to Protect PC
Method 1: Run Windows Security
Step 1: Type Windows Security in the search box and then click Open under the target app.
Step 2: Click Device security in the left panel of Windows Security.
Step 3: Click Core isolation details to move on.
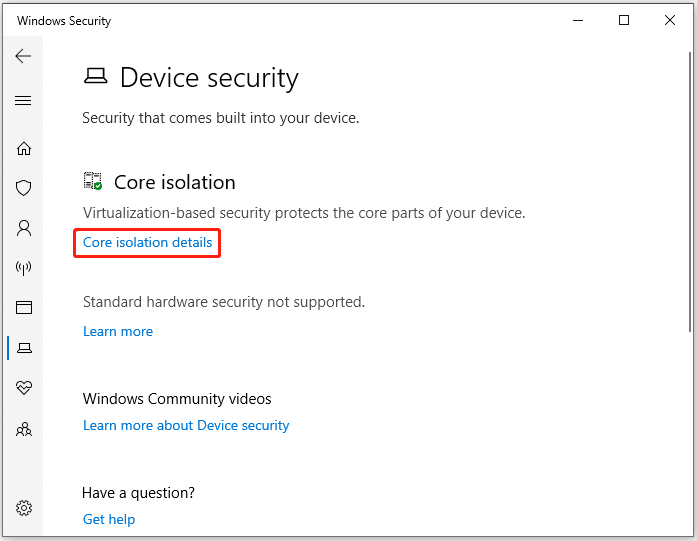
Step 4: Then turn on the Memory integrity option.
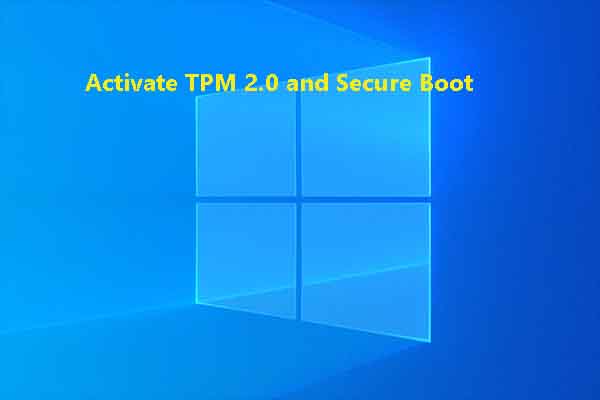
Method 2: Enable TPM and Secure Boot in BIOS
You should ensure that your PC meets the system requirements of Windows 11. Otherwise, you will receive the “Windows 11 Core isolation page not available” issue. Though you can bypass some of the system requirements and install Windows 11 on unsupported devices, this may cause some critical features to missing like Core isolation memory integrity “Page not available”.
The must-have features for Windows 11 include TPM, UEFI, secure boot, and DEP. If you have bypassed them, you should enable them when the error occurs. The following steps show you how to enable TPM and secure boot in BIOS.
Step 1: Power off your PC and restart it. Then keep pressing the BIOS key while the PC starts. By doing so, you will enter the BIOS setup.
Step 2: Press F2 or choose the Advanced Mode option from the side menu to enter the Advanced Mode. Then pick the Boot option.
Step 3: Go to the Settings bar and double-click the Miscellaneous tab. After that, you can view the Intel Platform Trust Technology (PTT) option.
Step 4: Click on the Intel Platform Trust Technology option and choose Enable from the drop-down menu.
Step 5: Locate and click the Secure Boot tab and enable the Secure boot option.
Step 6: Press F10 > Enter to save the changes and exit the BIOS.
Method 3: Enable Virtualization in BIOS
Virtualization Technology (VT) is required to run Core isolation or memory isolation properly. It enables the CPU to work as if you have several independent computers. If Virtualization is disabled, you can’t enable Core Isolation or Memory integrity, causing Windows 11 Core Isolation page not available.
So, you can try enabling Virtualization in BIOS to solve the problem.
Step 1: Enter the BIOS on your computer.
Step 2: Go to Advanced Settings > System Configuration.
Step 3: Find the Virtualization Technology setting and set it to Enabled.
Step 4: Save the changes and exit BIOS. Then your computer will automatically restart.
Step 5: After the PC restarts, check if the Core Isolation page not available on Windows 11 issue is fixed.
Method 4: Enable Memory Integrity via Registry
You can also enable memory integrity by changing value data in Registry Editor. Before proceeding, you’d better back up Registry or even Windows in case anything happens. To make a Windows backup, you can use PC cloning software – MiniTool Partition Wizard. It allows you to clone the whole system disk or migrate OS to SSD/HDD.
MiniTool Partition Wizard DemoClick to Download100%Clean & Safe
Then follow these steps to enable memory integrity via BIOS.
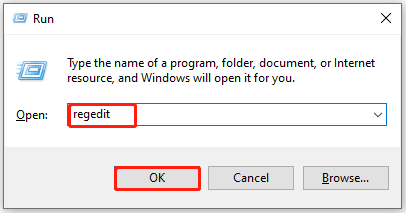
Step 1: Right-click the Windows icon on the desktop to open the Start menu. Then click the Run option.
Step 2: Type regedit in the Run window and click OK. If you receive a User Account Control window, click Yes to allow the operation.
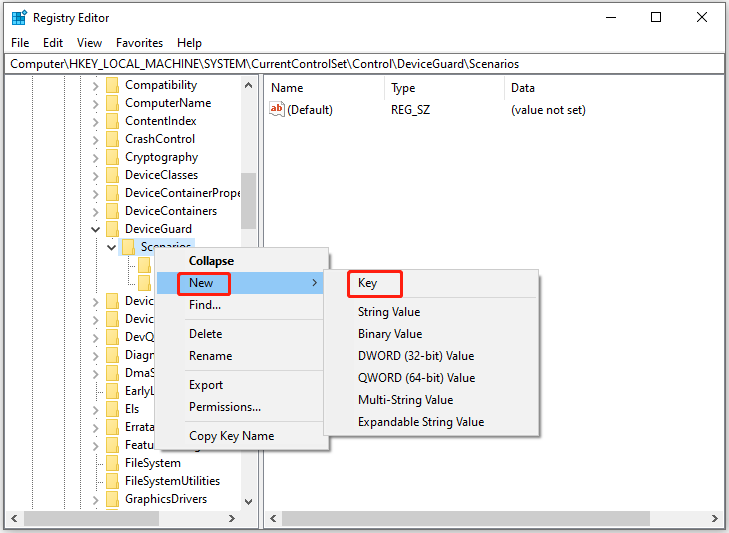
Step 3: In the Registry Editor window, follow the path below to locate the destination. If there’s no HypervisorEnforcedCodeIntegrity key, create one by right-clicking the Scenarios folder and selecting New > Key. Then rename the key as “HypervisorEnforcedCodeIntegrity”.
HKEY_LOCAL_MACHINE\SYSTEM\CurrentControlSet\Control\DeviceGuard\Scenarios\HypervisorEnforcedCodeIntegrity
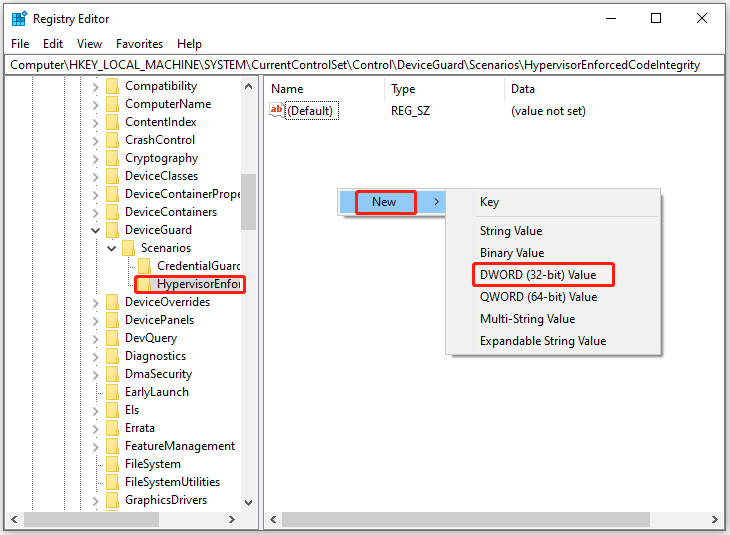
Step 4: After you locate the HypervisorEnforcedCodeIntegrity key, right-click the empty space in the right pane and choose New > DWORD (32-bit) Value. Then name the new DWORD “Enabled”.
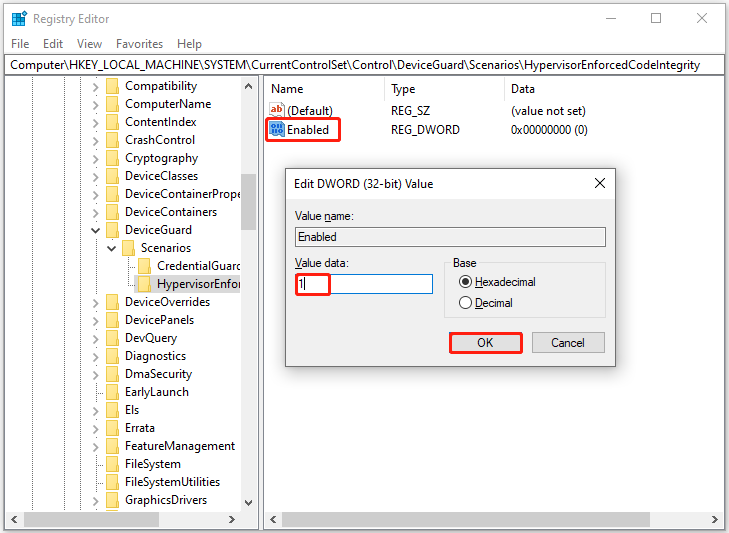
Step 5: Double-click on the new DWORD and set the value data to 1. After that, click OK to save changes.
Step 6: Restart the computer.
Method 5: Update Windows to the Latest Version
According to some user reports, updating Windows to the latest version also fixes the “Core isolation page not available on Windows 11” issue. You can have a try!
Step 1: Open Settings by holding the Windows and I keys simultaneously.
Step 2: Click Update & Security > Windows Update.
Step 3: Then click the Check for updates button. After a while, available updates will be displayed.
Step 4: Click the Download and install button next to the updates.
Step 5: Wait until the process ends.
You can also manually install updates:
- Windows 11 update KB5043355
- Windows 11 24H2 KB5043080
- Windows 11 24H2 update KB5041571
- Windows Server 2022 update KB5040437
Method 6: Reset Windows
Resetting Windows is the last resort to the Core isolation memory integrity “Page not available” error. If none of the above methods work, reset your computer to the factory state by following these steps.
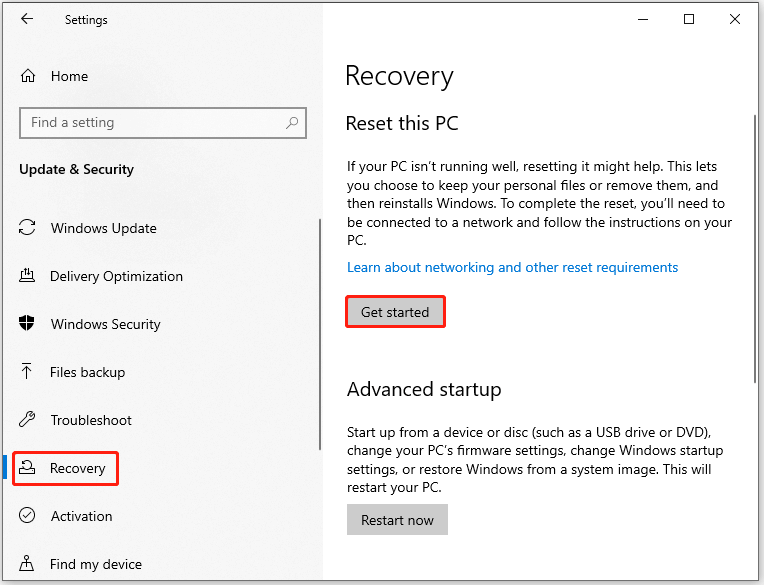
Step 1: Open Settings and click Update & Security.
Step 2: Click Recovery in the left panel and tap on the Get started button.
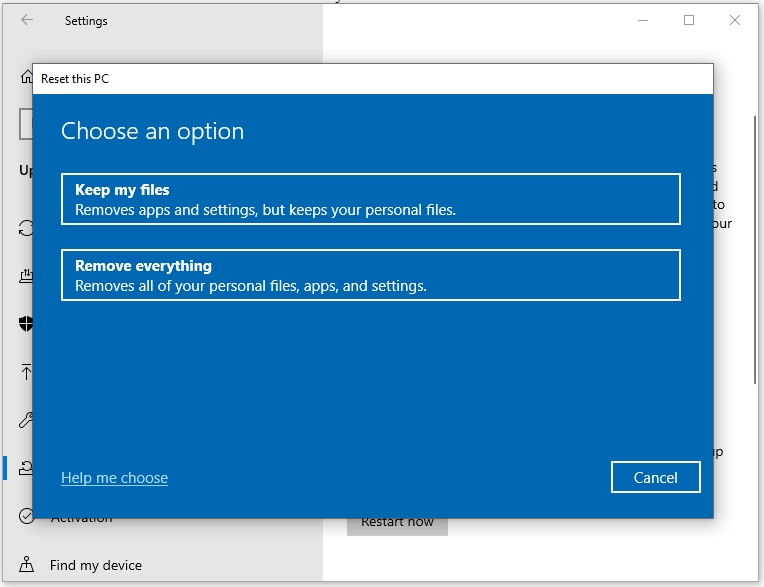
Step 3: Select Keep my files or Remove everything based on your need.
Step 4: Follow the on-screen instructions to complete the process.
Related article: How Long Does It Take to Reset a PC? Find Answers and Speed Up It
Conclusion
There are 6 troubleshooting methods for the Core isolation memory integrity “Page not available” issue. You can try them when you receive the memory integrity page not available error.
About The Author

Position: Columnist
Having writing articles about computer tech for a long time, I am rather experienced especially on the aspect of computer optimization, PC enhancement, as well as tech terms explanation. The habit of looking through tech forums makes me a great computer issues collector. And then, many articles related to these issues are released, which benefit plenty of users. Professional, effective, and innovative are always the pursuit of an editing worker.
User Comments :