Do you want to know how to copy write protected files to another drive? If there any way to do that? In this post, MiniTool Partition Wizard provides you with a step-by-step guide on how to do that.
Write protection, known as the read-only status, protects your files from being moved, changed, or modified. But sometimes, you find that your files, folders, or drives are write-protected for no reason. Therefore, you also cannot modify, move, or write any data to these files until the problem is resolved. If you try to copy write protected file to another drives, a small window will pop up saying that your drive/file/folder is write-protected and cannot be moved.
Well, how do copy write protected files to another drive? In the following part, we introduce two ways to help you to do that.
Also read: How to Fix the USB Drive Read Only Issue on Windows 10
How to Copy Write Protected Files to Another Drive
Here we introduce 2 ways to help you move write protected files to another drive.
Way 1. Remove Write Protection
The first thing you may consider is to remove write protection, and then copy files to another drive. To remove the write protection, you can try the steps below.
Step 1: Press the Win + E key to open File Explorer.
Step 2: Navigate to the folder or a file that is write-protected. Then right-click on it and choose the Properties option.
Step 3: On the Properties window, select the General tab. Make sure the Read-only option is unchecked. Then click on the Apply button to save the change.
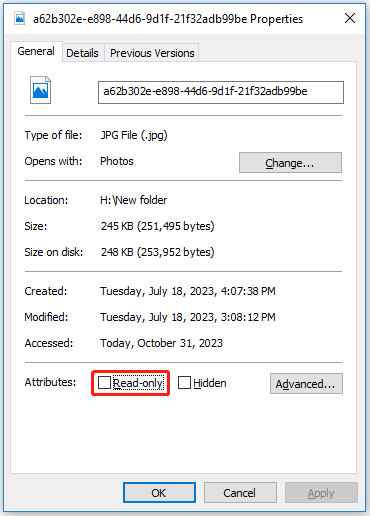
After removing the write protection, you can copy the files to another drive.
This method is usually used to remove write protection from a file or folder. If your hard drive, SD card, or USB drive is in this situation, you can check if there is a lock switch. Then turn off the switch. If not, after copying your data, format the write-protected disk with MiniTool Partition Wizard.
Way 2. Use MiniTool Partition Wizard to Copy
When you’re unable to copy write protected files to another drive in Windows 10/11, you should take advantage of third-party free disk partition software. MiniTool Partition Wizard is a great choice. It can help you clone all files on a partition or disk to another hard drive, USB pen drive, or other storage device in the Windows system.
MiniTool Partition Wizard FreeClick to Download100%Clean & Safe
Step 1: Download and install MiniTool Partition Wizard on your PC. Then launch it to enter its main interface.
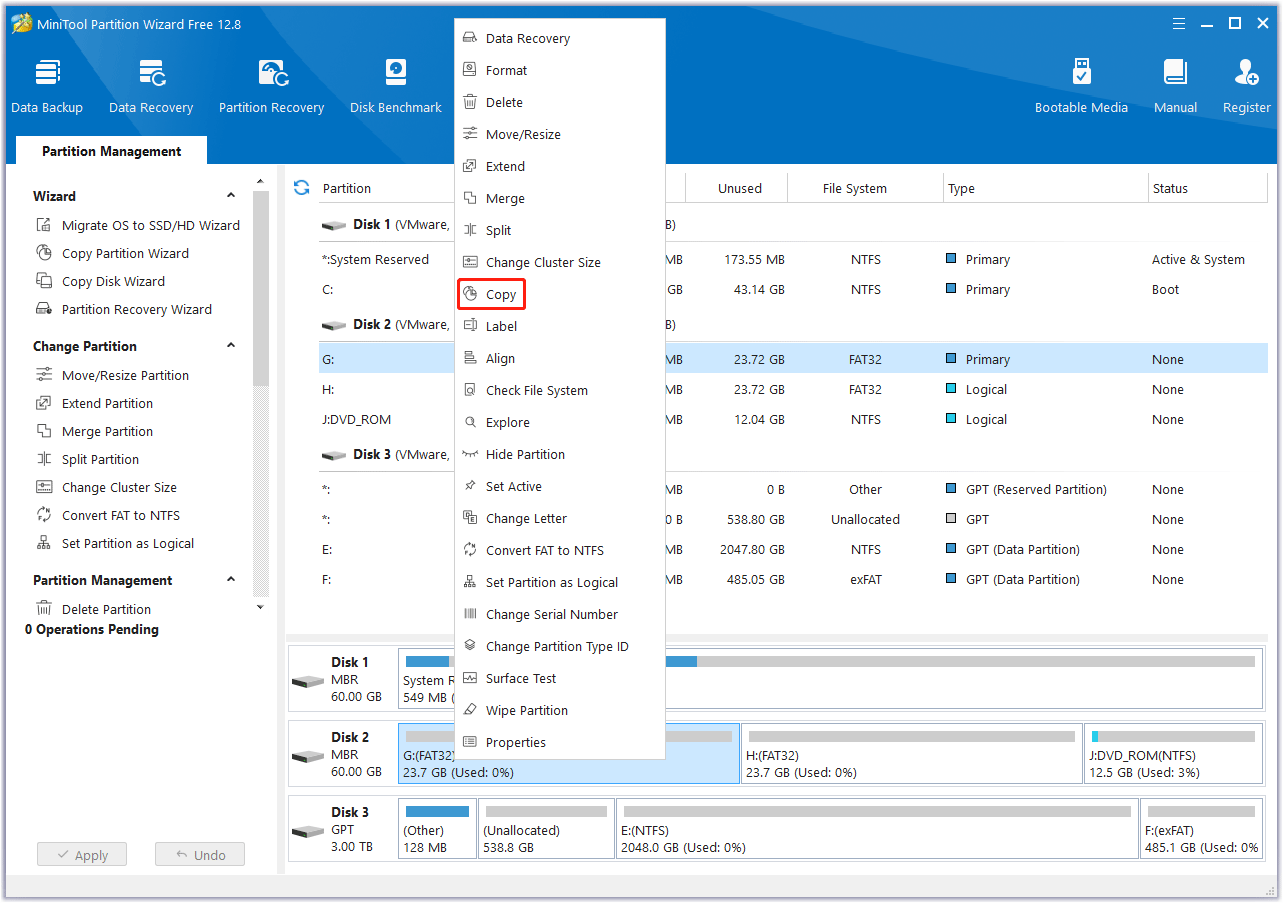
Step 2: Right-click on the disk that contains write protected files, and then select Copy from the list.
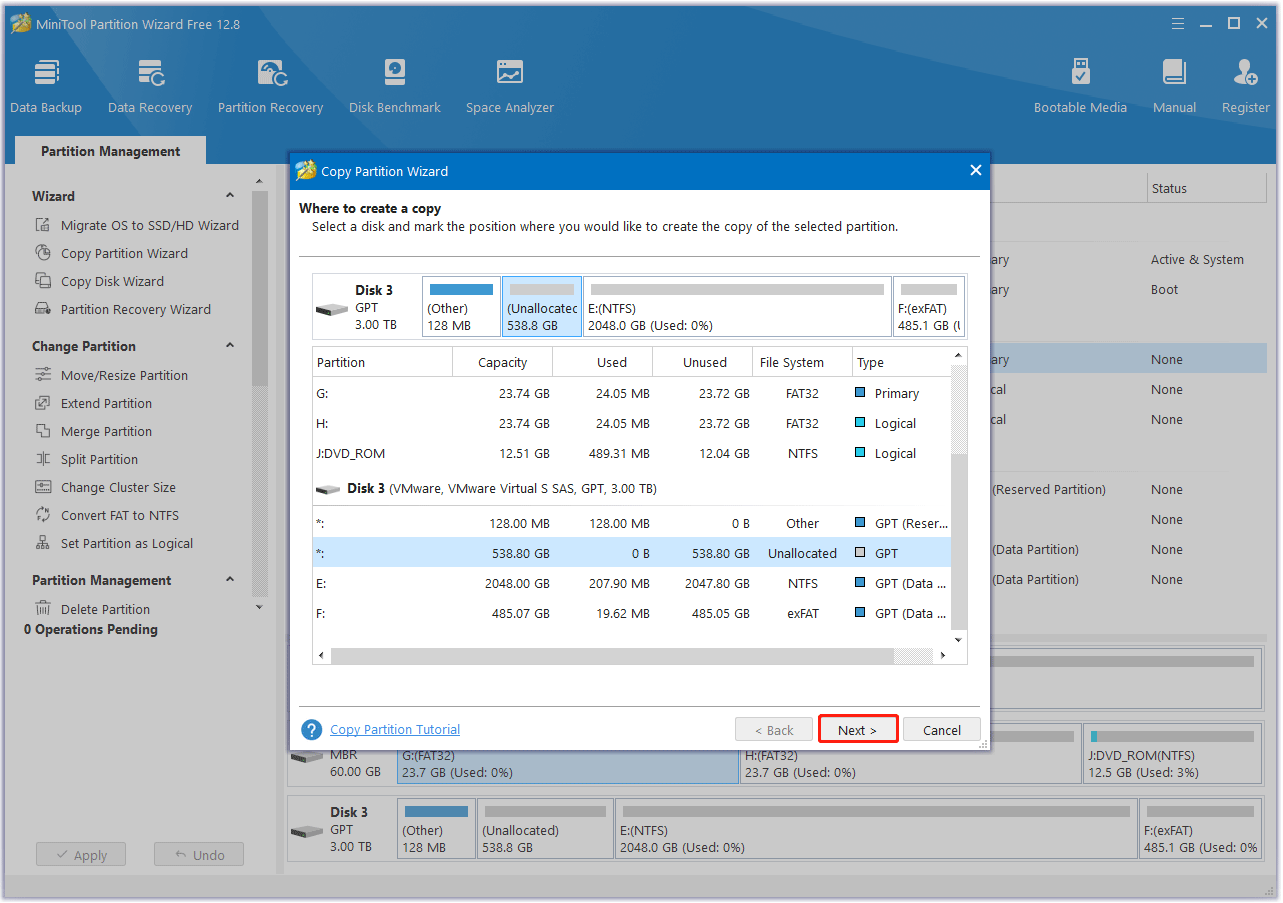
Step 3: In the new pop-up window, select an unallocated space as the target partition where the copied data in the source partition could be saved. And click on the Next button.
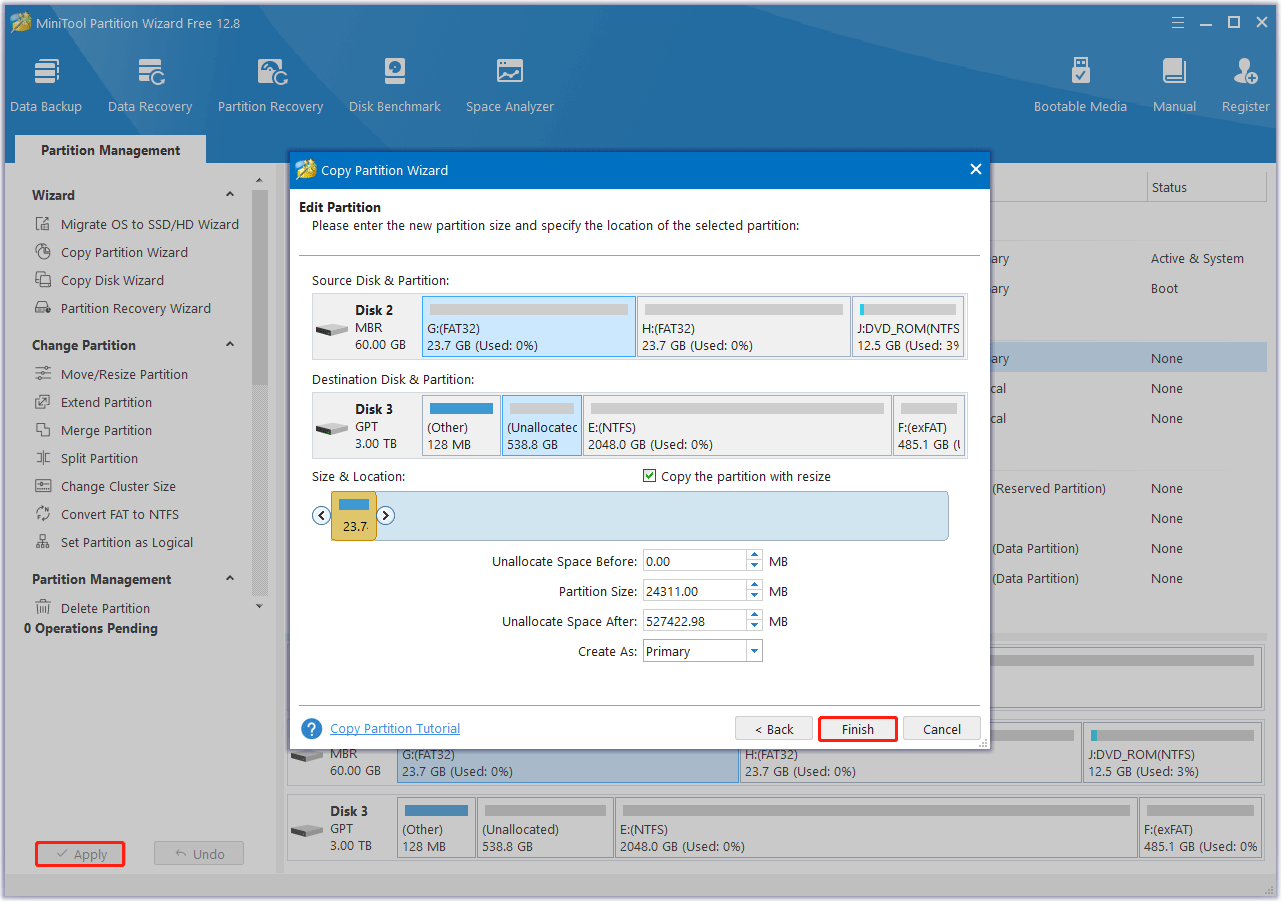
Step 4: According to your own demands, you can resize the partition and change its location. Then click on the Finish button.
Step 5: Finally, click on the Apply button to complete the changes you have made.
Once done, if you want to access the write protected files, you also need to remove the write protection from the drive.
Bottom Line
This post summarizes two ways to copy write protection files to another drive. If you have any other ways, you can share them with us in the following comment zone.


User Comments :