Ext4 (the fourth extended filesystem), the successor to Ext3, is a journaling file system for Linux. It supports volumes with sizes up to 1EB and single files up to 16TB. Besides, Ext4 offers the Extents feature to greatly reduce disk fragmentation. Also, it’s backward compatible with Ext3 and Ext2, making it possible to mount the two file systems as Ext4.
To learn about Ext2 vs Ext3 vs Ext4, you can read this post: Ext2 vs Ext3 vs Ext4 File System: Which One Should You Use?
NTFS (New Technology File System) is a proprietary journaling file system developed by Microsoft. It was first introduced in 1993 and has been the primary file system for the Windows NT operating system. NTFS has no realistic file size or partition size limits and can save very large files.
In some cases, you may want to convert your hard drive from NTFS to Ext4. If so, you’re not alone. And to help you complete this conversion, there is a complete guide available. You can pay attention to the following content.
How to Convert NTFS to Ext4 Without Losing Data
Since Windows doesn’t support the Ext4 file system, you are unable to convert NTFS to Ext4 with any Windows built-in utility like Disk Management, File Explorer, or diskpart. Fortunately, you can take advantage of a piece of disk partition software to complete such a conversion. Here, we highly recommend MiniTool Partition Wizard to you.
It’s a professional partition manager that enables you to perform various tasks related to your partitions and disks. For instance, you are allowed to create/resize/format/delete partitions, convert the disk to MBR/GPT, migrate OS to SSD/HDD, recover data/partitions, etc.
To convert NTFS to Ext4 without losing data effectively, MiniTool Partition Wizard offers a step-by-step guide below. Just keep reading.
Part 1: Convert NTFS to Ext4 via MiniTool Partition Wizard
MiniTool Partition Wizard can help you convert NTFS to Ext4 with a few clicks. The following are detailed steps.
Step 1: Download and install MiniTool Partition Wizard. Then launch this program to enter its main interface.
MiniTool Partition Wizard FreeClick to Download100%Clean & Safe
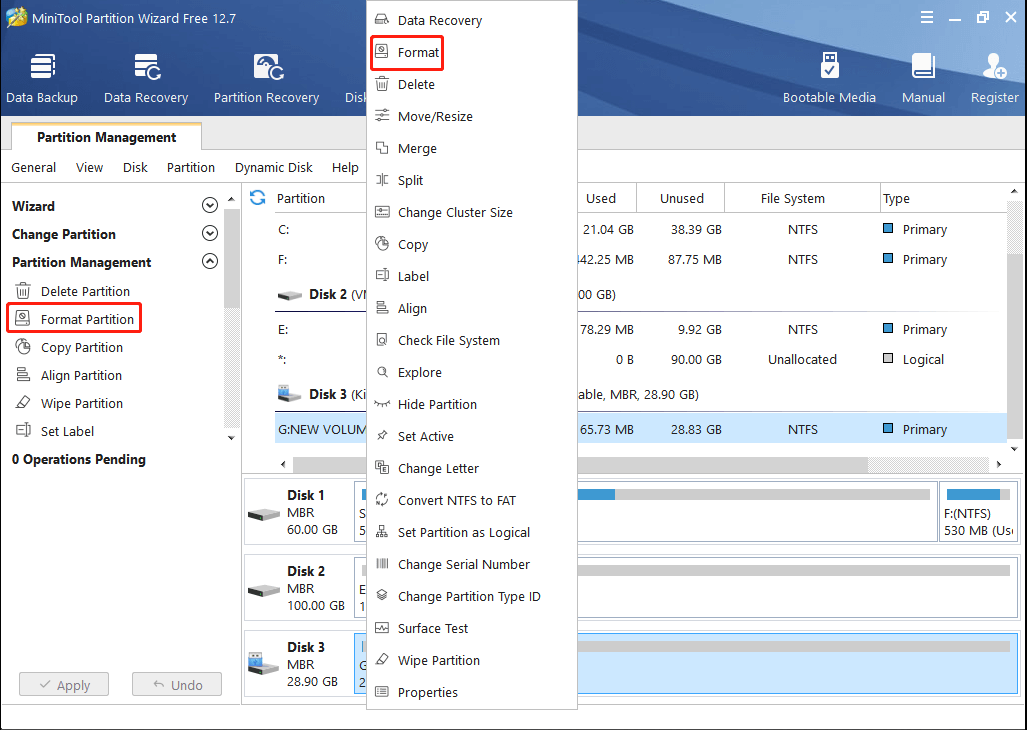
Step 2: Right-click the partition you plan to format and then select Format. Alternatively, you can highlight the target partition and select Format Partition from the left action panel.
Step 3: In the pop-up window, select Ext4 from the drop-down menu. If necessary, you can set a partition label and change the cluster size according to your needs.
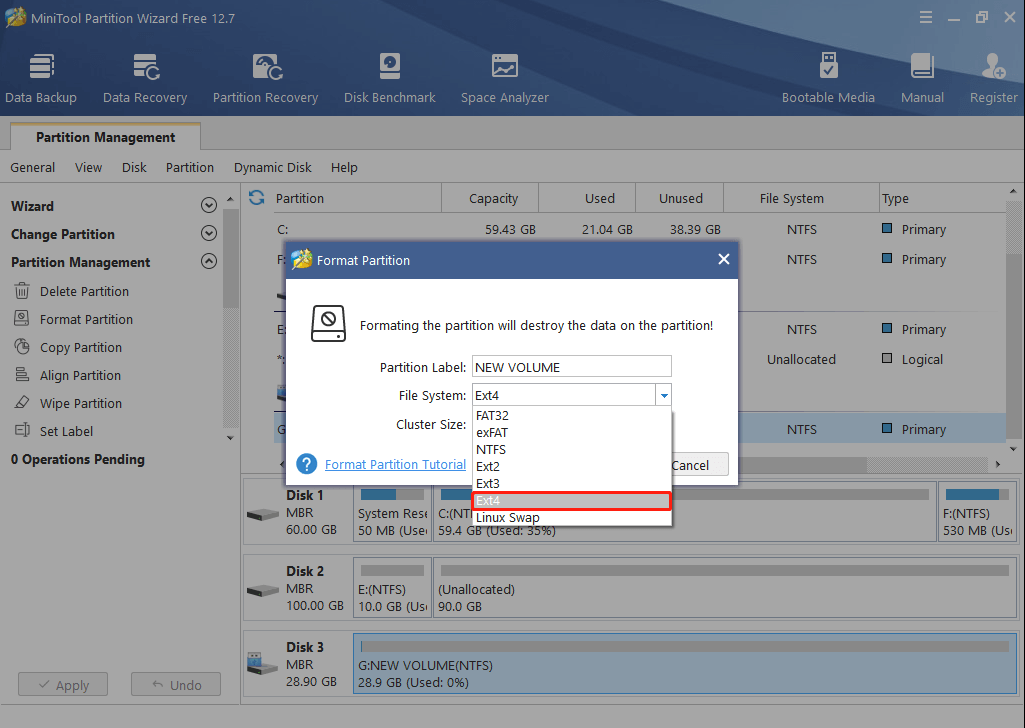
Step 4: After that, click OK to start the formatting process. Then wait patiently until the format is completed.
Part 2: Recover Data from the Formatted Hard Drive
It’s known that format will erase data saved on the hard drive. Therefore, after successfully converting NTFS to Ext4, you need to perform data recovery for this drive. Here’s how to recover data from the formatted hard drive.
Step 1: Launch MiniTool Partition Wizard. Then click Data Recovery at the top-left corner of the main interface.
To use Data Recovery of MiniTool Partition Wizard, you have to upgrade this program to the Pro or a higher edition.
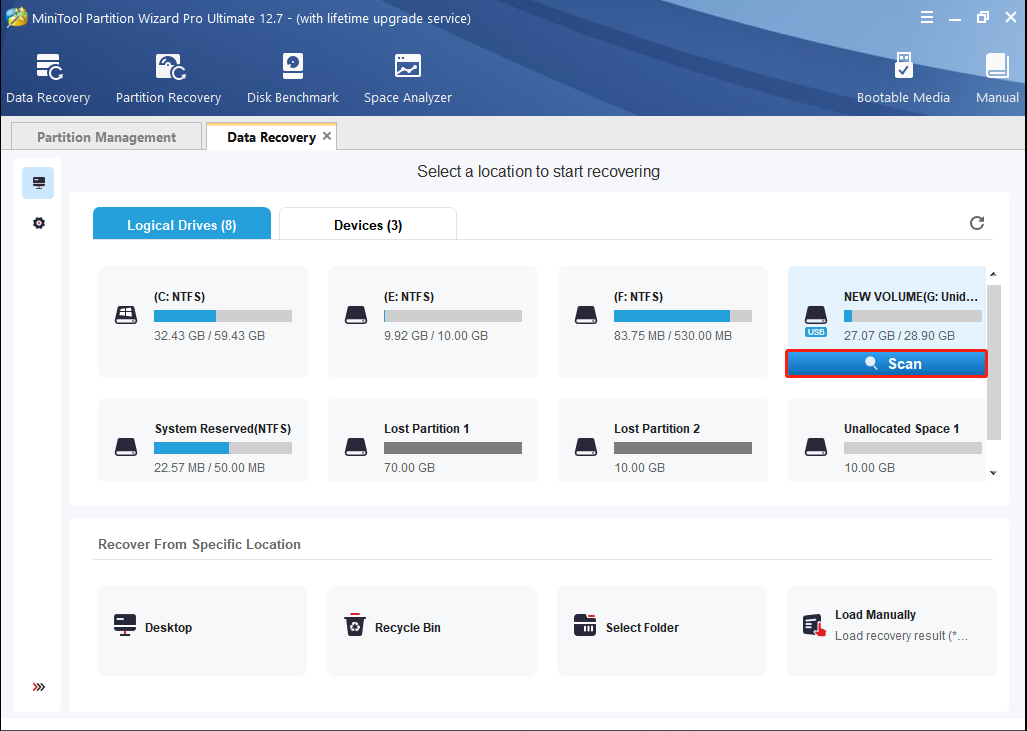
Step 2: In the next window, move your cursor to the target partition and then click Scan.
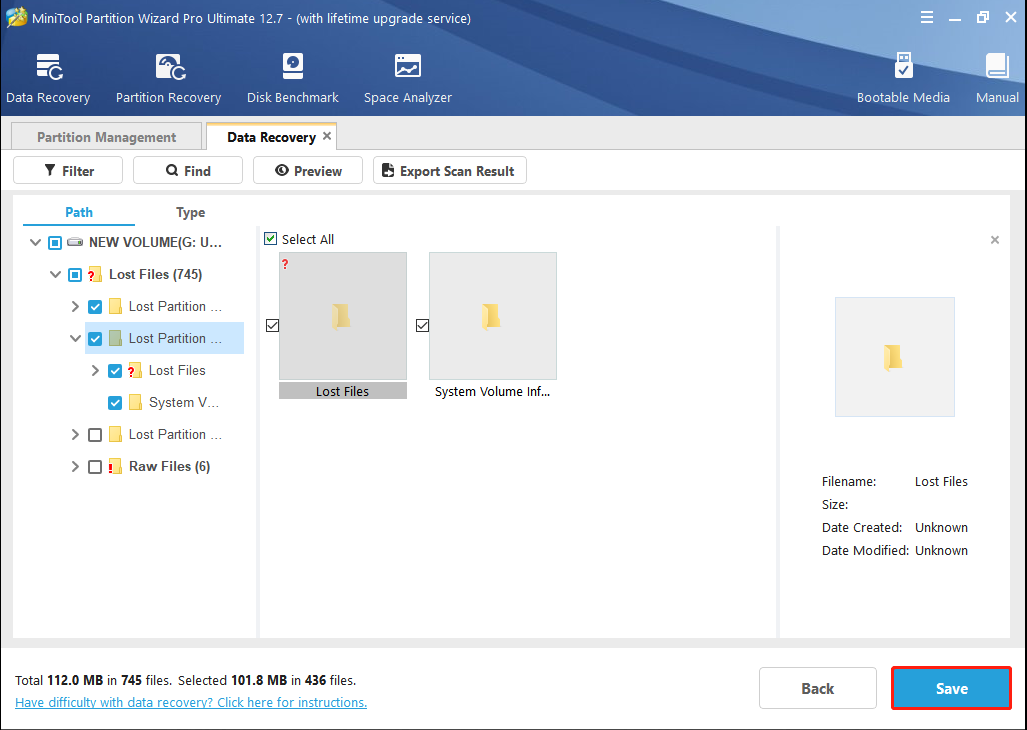
Step 3: Wait for the scan to end. You can see all the lost and deleted data of this partition. Select all the needed files and click Save. Then choose another directory to restore them.
Bottom Line
When you plan to convert NTFS to Ext4 without losing data, you can follow the above steps. If you have any problems with this conversion, you can leave a message in the comment part below.

User Comments :