Are you still using traditional passwords to log in to your computer? More and more people are using PIN codes, fingerprints, or facial recognition to log in on Windows 11. This new Windows Hello authentication method can provide a more secure experience. So, how to configure Windows Hello authentication on Windows 11? This post from Partition Magic will tell you.
Introduction of Windows Hello
Windows Hello (also known as Microsoft Hello) is a biometric-based technology. It is a biometric security system that provides users with a facial recognition login alternative to traditional passwords.
Windows Hello lets you securely log in to your device using facial recognition, fingerprint scan, or personal identification number (PIN). This is a great way to protect your device. Because no one but you can access your computer, and they can’t brute force it like they would with a normal password.
This not only protects your Windows device, but also gives you secure access to Windows systems, applications, online services, and more.
Windows Hello requires specific hardware features to work properly, including facial recognition: an infrared (IR) camera or depth sensor that supports Windows Hello. If your device doesn’t have a compatible camera, you can purchase one that connects via USB.
The following devices support Windows Hello: Surface Pro, Surface Book, Dell XPS 13 9360, HP Spectre X360 13, ASUS Transformer Mini T102HA, and other PCs.
Performance range:
- Performance range of fingerprint sensors: the false acceptance rate must be less than 0.002%.
- Performance range of facial recognition sensors: the false acceptance rate cannot be higher than 0.001%.
MiniTool Partition Wizard FreeClick to Download100%Clean & Safe

How to Configure Windows Hello Authentication on Windows 11
Windows Hello uses biometric authentication based on unique physical features so that information is securely stored on your computer instead of on a server, making it less vulnerable to attack. Plus, signing in with your face, fingerprint, or PIN is faster and easier than typing in a password.
Way 1: Configure Windows Hello Authentication for PIN (Windows Hello)
To create a PIN for your Windows 11 account, here are the steps:
Step 1: Click the Start icon and select Settings to open.
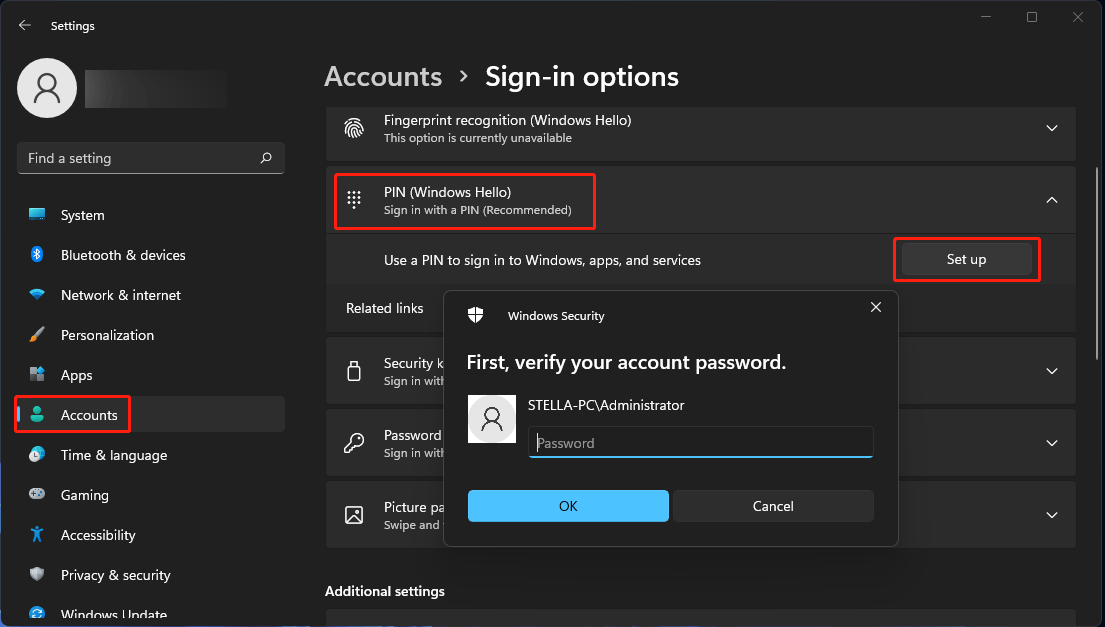
Step 2: In the new pop-up window, select Accounts from the left side. Click the Sign-in options on the right side, and choose PIN (Windows Hello). Click the Set up button, and a new window will come out, you need to write the password and click OK.
Step 3: Confirm the new PIN and click the OK button.
Tip: If you want to change or remove PIN on your account, in the Sign-in option interface, click PIN (Windows Hello), and you will see Change PIN and Remove.
Way 2: Configure Windows Hello Authentication with Fingerprint Recognition (Windows Hello)
You can configure Windows Hello authentication for Fingerprint recognition (Windows Hello). The steps are as follows:
Step 1: Click the Start icon and select Settings to open.
Step 2: Click Accounts, and click the Sign-in options page from the left side.
Step 3: Choose Fingerprint recognition (Windows Hello) from the right. Click the Set up button, and click the Get started button.
Step 4: Now, you can register your fingerprint with the on-screen directions.
Way 3: Configure Windows Hello Authentication with Facial Recognition (Windows Hello)
With the advancement of facial login, you can also use this method to log in on your computer. This login method is safer and more convenient than the traditional password login method.
Step 1: Press the Win key and select Settings to open.
Step 2: In the new pop-up window, select Accounts from the left panel.
Step 3: Click the Sign-in options from the right side, and choose Facial recognition (Windows Hello).
Step 4: Click the Set up button, and click the Get started button.
Step 5: Confirm your account credentials. Create your facial authentication as indicated on the screen.
Step 6: After finishing the face settings, Click the Close button.

Bottom Line
This article shows you how to configure Windows Hello authentication in 3 ways: PIN (Windows Hello), Fingerprint Recognition (Windows Hello), and Facial Recognition (Windows Hello). You can choose a method you like to use to log in to your computer.
About The Author

Position: Columnist
Cecilia is a new member of MiniTool. She works as an English editor on the MiniTool team. She likes to learn articles about computers and is passionate about partition management and Windows operating systems. She is committed to allowing readers to use simple, efficient, and fast methods to solve the computer problems they encounter. To provide more professional solutions, she will continue to learn and master computer knowledge.
User Comments :