To get Windows updated successfully, it is necessary to check Windows Update size. In this post, MiniTool Partition Wizard provides you with two available methods to check Update size in Windows 10. You just need to pick one from them.
Why Check Update Size in Windows 10
You don’t have to worry if you have an Internet connection without a data usage limit. However, you need to know the Windows Update size if you’re on a metered connection before downloading and installing the update. Then you should switch to a fast and stable network.
Besides, you need to check Windows Update size and then check if you have enough free space to install the update. Otherwise, you will receive various Windows update errors. Here comes the question: how to find Windows Update size.
If you fail to update Windows due to insufficient space, you can increase disk space by using MiniTool Partition Wizard. Additionally, it can also help you recover lost files after the update, fix hard drive errors, delete files that can’t be deleted, and solve other issues related to hard drives.
MiniTool Partition Wizard FreeClick to Download100%Clean & Safe
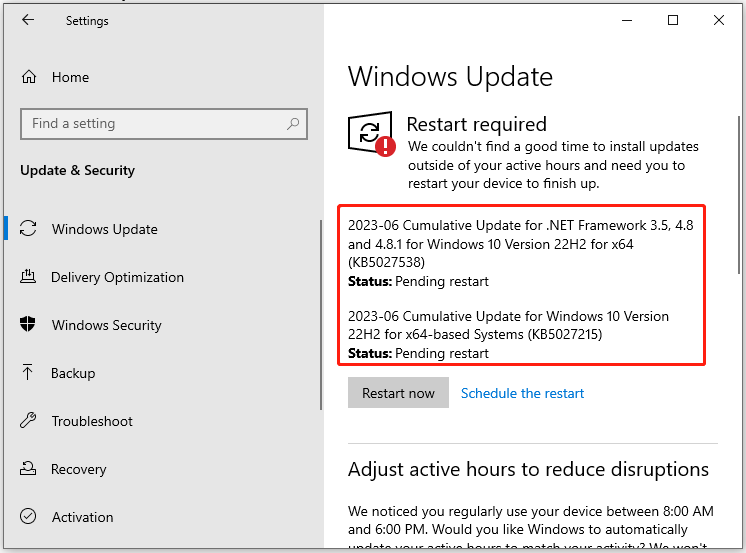
Though Settings will list available updates, it won’t display the update size. Fortunately, there are some ways to find Windows Update size. This post lists two methods to do it. You can have a try!
#1: Check Windows Update Size via PowerShell
PowerShell is a utility that comes with the Windows system. It helps you perform various operations by running command lines. To check Windows Update size via PowerShell, just follow these steps.
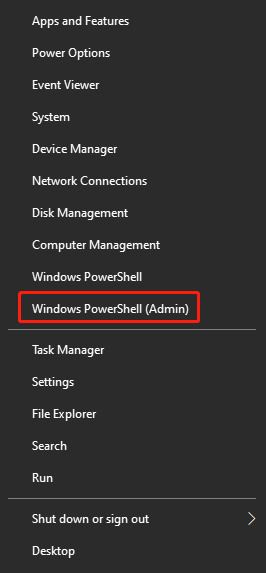
Step 1: Right-click on the Windows icon and then click Windows PowerShell (Admin).
Step 2: In the Windows PowerShell window, install the Nudget module by typing the command below and hitting Enter.
Install-Module -Name PSWindowsUpdate -Force
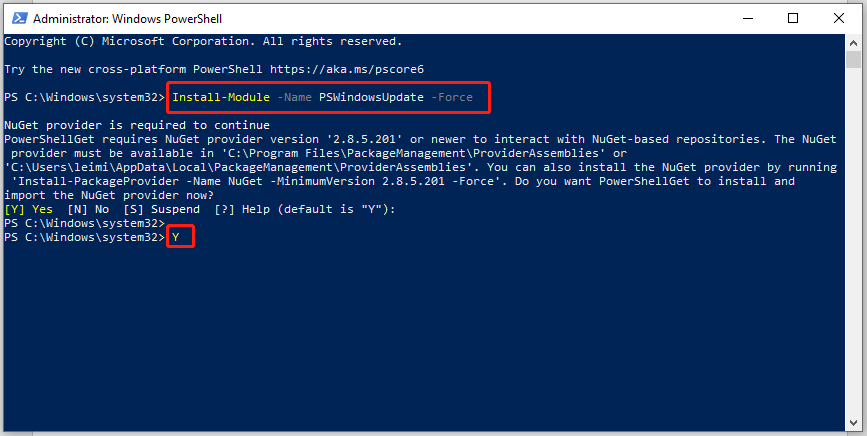
Step 3: Install the Windows Update PowerShell module by running the command below.
Install-Module -Name PSWindowsUpdate -Force
The -Force flag will remove all the prompts and make the installation smooth. If you want, you can also remove the -Force flag and execute the command.
Step 4: Run the following command to change the execution policy from Restricted to RemoteSigned. PowerShell will stop you from importing or executing the downloaded scripts by default. Hence, you should change the execution policy before importing the module.
Set-ExecutionPolicy RemoteSigned
Step 5: Input A and press Enter to confirm the operation.
Step 6: Import thePSWindowsUpdate module by running the command below.
Import-Module PSWindowsUpdate
Step 7: Now, execute the Get-WUList command. By doing so, all the available updates and their sizes will be listed.
This command takes you a few seconds to return the results.
#2: Check Windows Update Size via Windows Update MiniTool
Windows Update MiniTool is a free tool that helps you check Update size in Windows 10 before you download the update. The following steps show you how to find Windows Update size by using Windows Update MiniTool.
Step 1: Download Windows Update MiniTool from Majorgeeks. Then unzip the downloaded zip folder.
Step 2: Depending on the system architecture of your system, install the corresponding. As my system is 64-bit, I install the 64-bit version of Windows Update MiniTool. Double-click on the wumt_x64.exe file and follow the on-screen instructions to complete the operation.
Is my computer 64 bit or 32 bit? If you have the same doubt, read this post now!

Step 3: Click on the Check for Updates icon in the left panel.
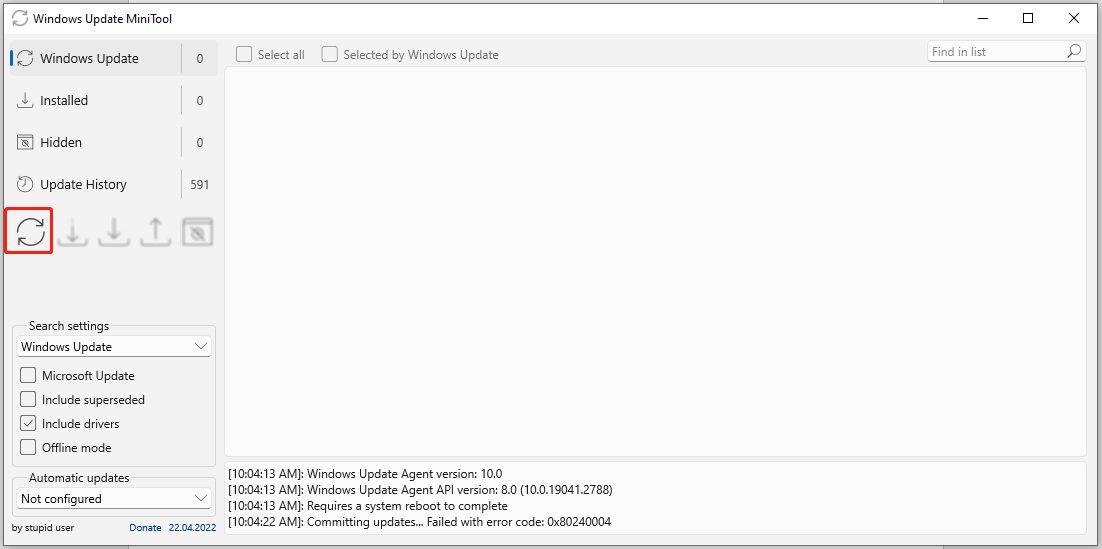
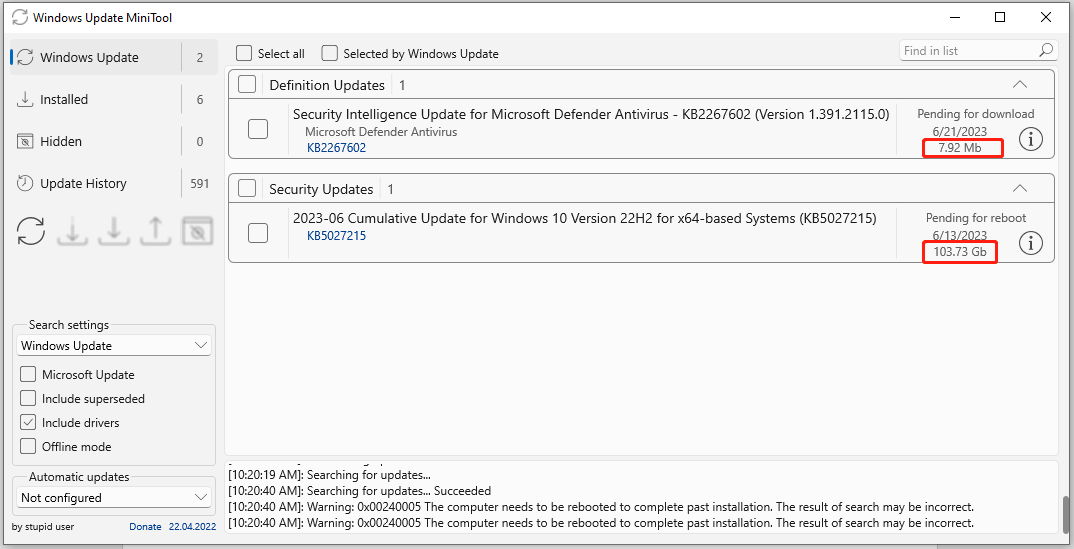
Step 4: After a while, all the available updates for Windows 10 will be listed in the window. You can check Windows Update size behind each update.
To install the listed update, check the checkbox in front of it and click the Download icon to get it downloaded.
This post shows you how to check Windows Update size by using PowerShell and Windows Update MiniTool in detail. Based on your preference, choose a way from them to complete the operation.

User Comments :