Can I change disk numbers? How to change drive numbers on Windows 10/11? A lot of people are confused about these questions. Now, this post from MiniTool Partition Wizard discusses them in detail.
When opening Disk Management, users will find each hard disk is assigned a unique number once it’s recognized by Windows, such as disk 0, disk 1, etc. Usually, people can change drive letters using the Windows tool. So, many of them ask “Can I change disk numbers on Windows”. Here’s a user report from the answers.microsoft.com forum:
How to switch disk numbers: I want Disk 0 to be Disk 1 and Disk 1 to be Disk 0. Hi, I bought a Desktop it came with an M.2 MVME PCIe SSD and HDD. The Win10 is in the SSD. But the SSD is listed as disk1 and the HDD is listed as disk0 in Disk Management. How can I switch around them?https://answers.microsoft.com/en-us/windows/forum/all/how-to-switch-disk-numbers-i-want-disk-0-to-be/264e529c-818f-450e-ae4b-5a9b31148fb4
How Does Windows Assign the Disk Numbers
For motherboards with SATA ports, the disk number is determined by the location of the SATA port when the drive is plugged. That’s to say, the disk ID number assigned to the HDD, SSD, or other storage devices is the physical location of a SATA port.
Usually, the first hard drive with Windows OS installed will be assigned Disk 0 in Disk Management if it’s connected to SATA ports. However, if you are using an NVMe M.2 SSD, it will show as the last disk number even if the SSD is the boot drive because it’s connected to an M.2 slot. So, there is no way to change disk numbers for NVMe M.2 SSDs on Windows.
Can I Change Disk Numbers
So, can you change drive numbers on Windows? The answer is not positive. As discussed above, the disk number is determined by the SATA port order on your motherboard. The location of these physical ports can’t be changed. However, if you just want to change disk numbers of the slave hard drive or set the boot drive with the correct order which is Disk 0, it’s possible to achieve that using the following guide.
How to Change Disk Numbers on Windows 10/11
How to change disk numbers on Windows 10/11? After analyzing extensive user reports and references, we summarize 2 accessible ways. Let’s try them in order or choose one that works best for you.
Note: The following operation is only suitable for hard drives connected to motherboards with SATA ports.
Way 1. Migrate OS to a Different Drive and Set It as Boot Drive
As mentioned above, the first hard disk that you installed Windows OS on will show as Disk 0 in Disk Management. If you want to switch disk numbers on Windows 10/11, you can try reinstalling OS to a different drive and set it as boot drive.
So, how to migrate Windows OS to another drive without reinstalling OS? MiniTool Partition Wizard is a good choice. It’s a professional OS migration and disk clone tool that can easily clone hard drive, migrate only OS, and copy partitions on Windows.
MiniTool Partition Wizard DemoClick to Download100%Clean & Safe
Step 1. Connect the new hard disk that you want to show as Disk 0 to the SATA port carefully.
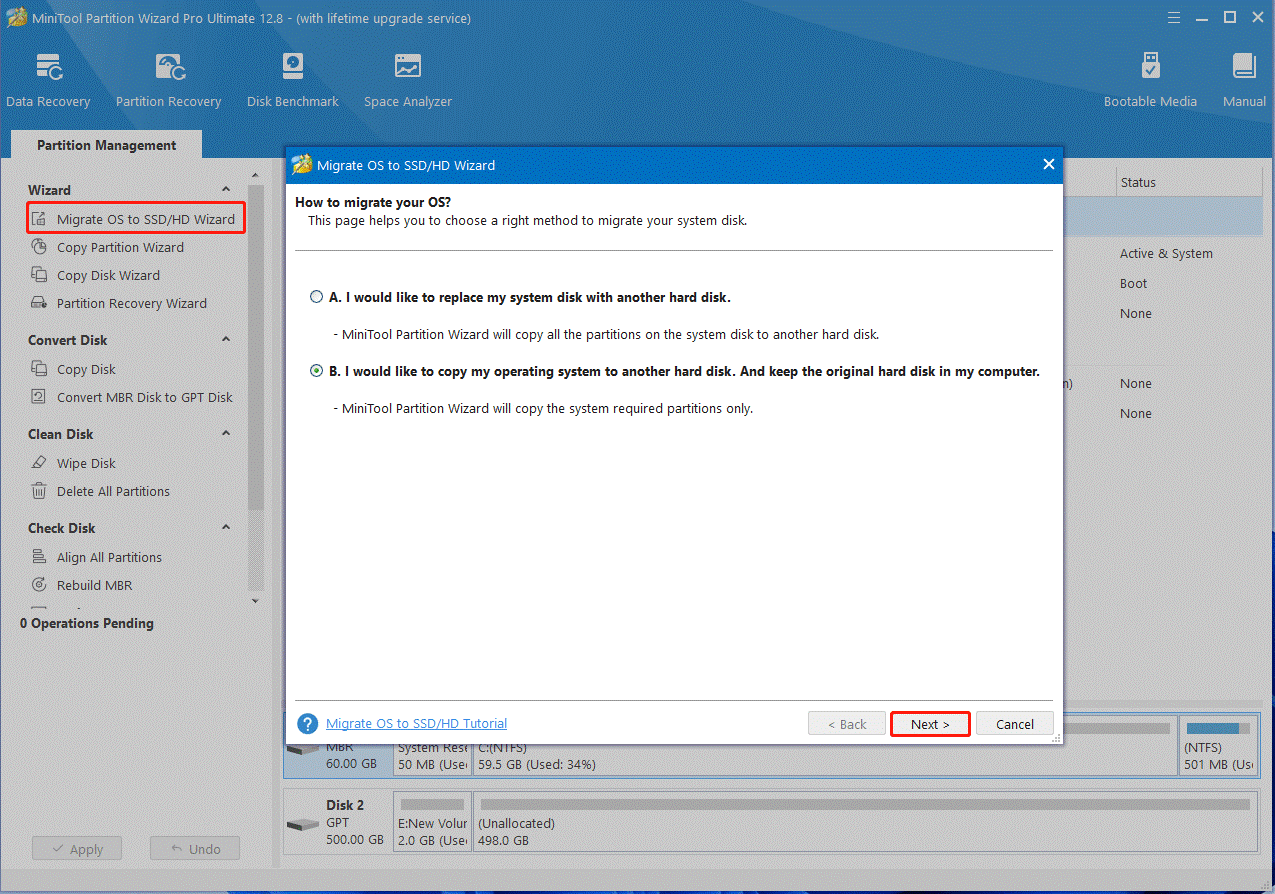
Step 2. Run the MiniTool software to get its main interface, and then click on Migrate OS to SSD/HD Wizard from the left panel, select Option B to copy the OS only, and click on Next.

Step 3. Select the new hard disk as the target disk and click on Next. Then click on Yes to confirm this operation.
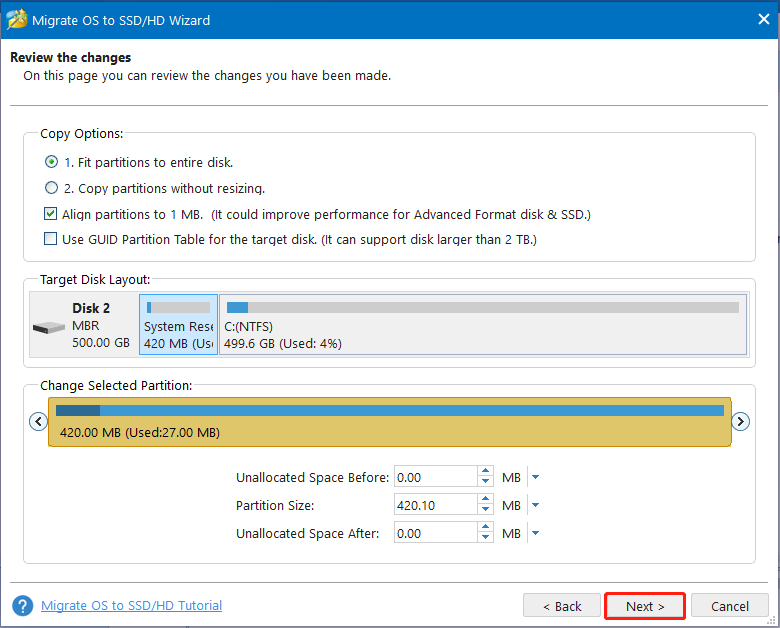
Step 4. Select copy options based on your needs and click on Next.

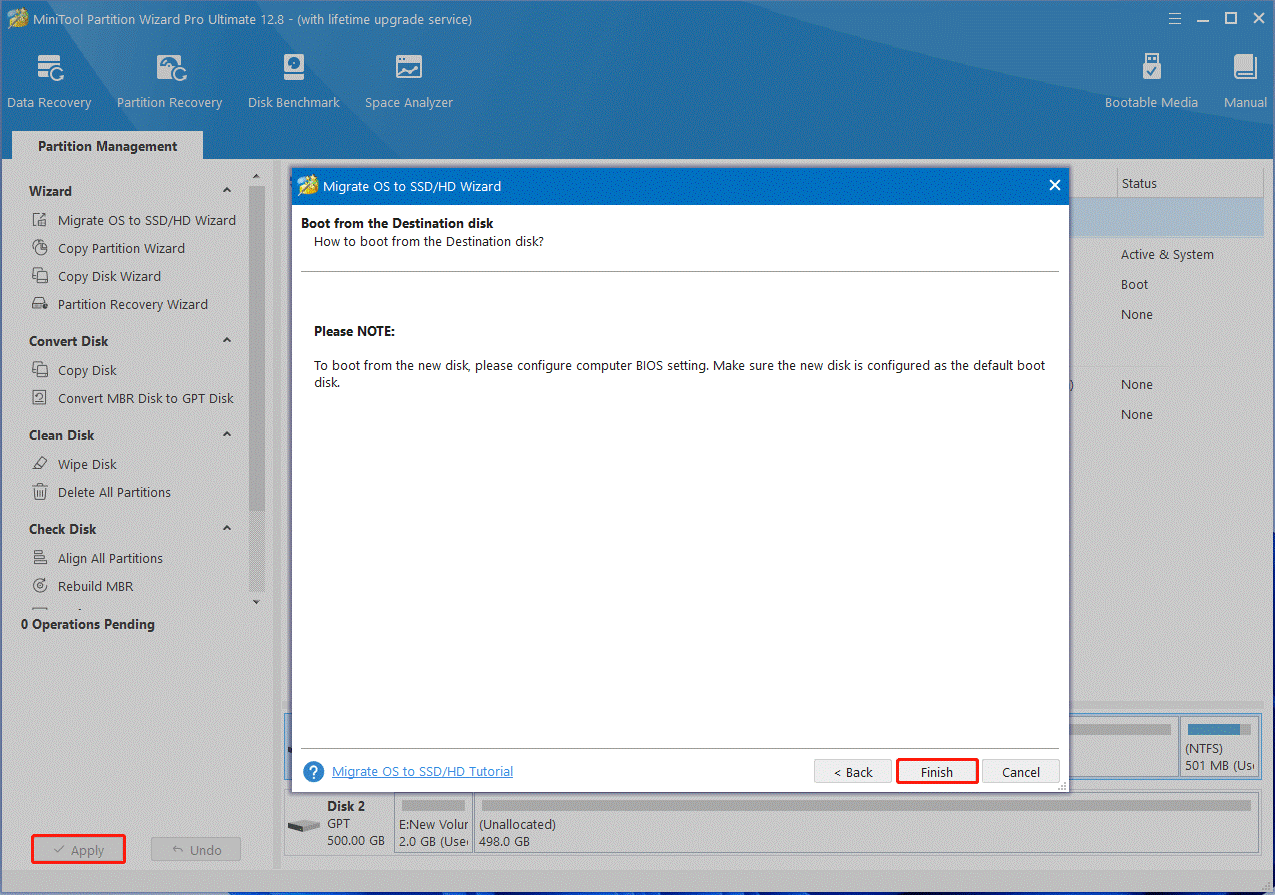
Step 5. Review the note information and click Finish to confirm it. Then click Apply to execute the pending operation.

Step 6. Now, you can set the new hard dive as boot drive in BIOS and see if it shows as Disk 0 in Disk Management. If you don’t know how to change boot drive in BIOS, you can refer to this guide.
Way 2. Use Windows Registry Editor
In addition, some users from the tenforums.com forum reported that they can switch disk numbers using Registry Editor. It can change the disk number assigned to a particular disk. Here you may have a try.
Step 1. Press the Win + R keys to open the Run dialog box, and then type regedit in it and press Enter. Then click on Yes to confirm it.
Step 2. In the Registry Editor window, navigate to the following path from the left search bar:
HKEY_LOCAL_MACHINE\SYSTEM\CurrentControlSet\Enum\SCSI
Step 3. Expand the SCSI folder and find the subkeys. Then expand each subkey until you find the hard disk that you want to change its disk number.
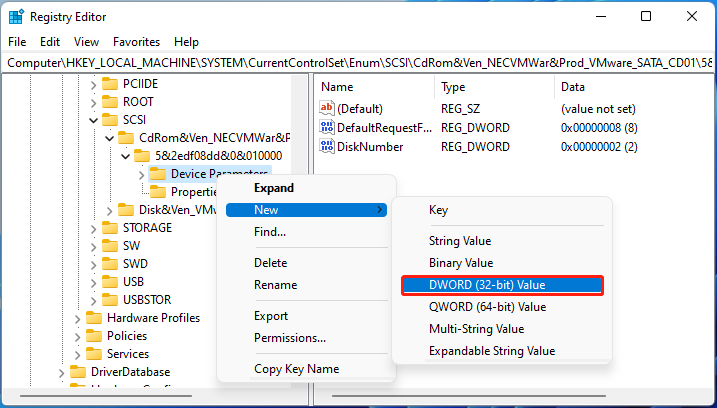
Step 4. Find and right-click the Device Parameters subkey, and select New > DWORD (32-bit) Value, name the new DWORD as DiskNumber, and change its value data to your desired disk number. Here make sure to choose a number that is not already assigned to another disk.

Step 5. Exit the Registry Editor and restart your computer for the changes to take effect.

![Is an Extended Partition Be Bootable & How to Do? [Answered]](https://images.minitool.com/partitionwizard.com/images/uploads/2024/01/can-extended-partition-be-bootable-thumbnail.jpg)
User Comments :