If you meet the CACHE_INITIALIZATION_FAILED and don’t know how to fix it, check the 5 ways in this Partition Magic article to see if the CACHE_INITIALIZATION_FAILED bug check 0x66 can be fixed.
Generally, the CACHE_INITIALIZATION_FAILED blue screen of death error occurs after the installation of Windows 10 64-bit related hardware or software. The error may appear during program installation, when loading Microsoft Corporation drivers, or during Windows startup or shutdown. Let’s take a look at what causes this error.
What Causes the CACHE_INITIALIZATION_FAILED Error
CACHE_INITIALIZATION_FAILED error is usually caused by problems with related hardware, software, and drivers. Here are some possible reasons why the CACHE_INITIALIZATION_FAILED error appears:
- Damaged or outdated Windows 10 64-bit related drivers.
- Hardware conflicts after installing new Microsoft Corporation hardware or hardware related to CACHE_INITIALIZATION_FAILED.
- Hard drive failure related to CACHE_INITIALIZATION_FAILED blue screen of death.
After knowing the possible causes of the CACHE_INITIALIZATION_FAILED 0x00000066 error, you can continue reading and then try the corresponding solutions to fix this error on your PC.
How to Fix the CACHE_INITIALIZATION_FAILED Blue Screen Error
Have you also experienced the CACHE_INITIALIZATION_FAILED bug check 0x66 error? Don’t worry. This post provides a full guide. Let’s dive in.
Way 1: Update All the Drivers
Outdated drivers may trigger the 0x00000066 CACHE_INITIALIZATION_FAILED error. In this case, you can try updating the outdated driver to fix the 0x00000066 error.
Step 1: Press the Windows logo key + X and select Device Manager to open.
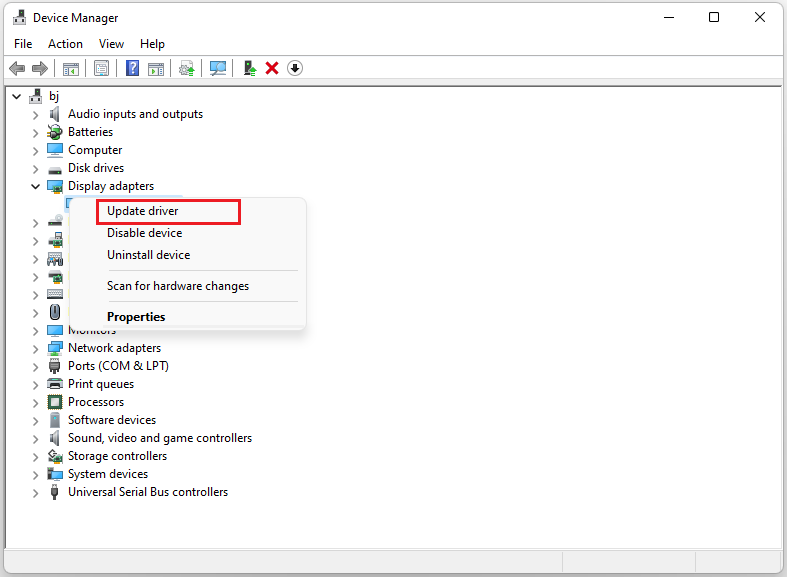
Step 2: Expand the category that includes the device driver you need to update. Right-click the driver and click Update driver.
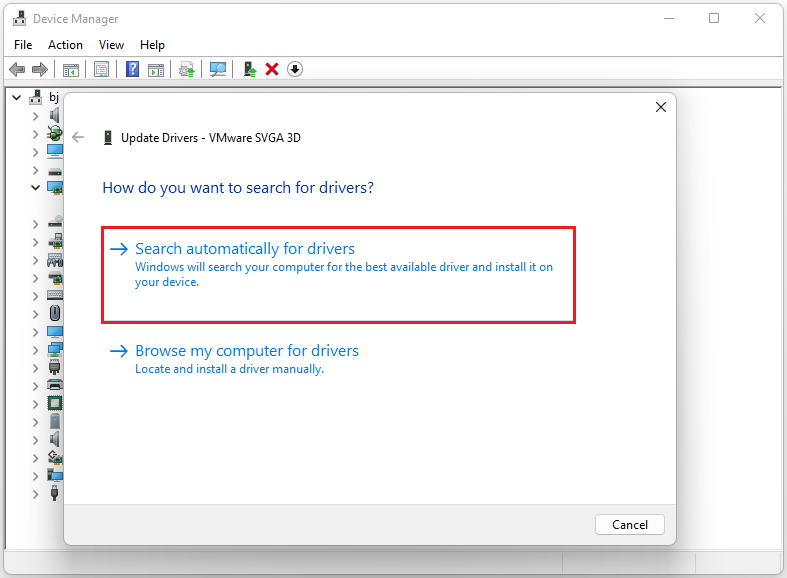
Step 3: In the new window, select Search automatically for drivers.
Way 2: Run DISM and SFC
If you suspect the CACHE_INITIALIZATION_FAILED error is caused by corrupted system files, you can also try running DISM and SFC to help you fix the error. Here are the steps:
Step 1: Open the Search window and type command prompt in the search box. Click Run as administrator from the right side.
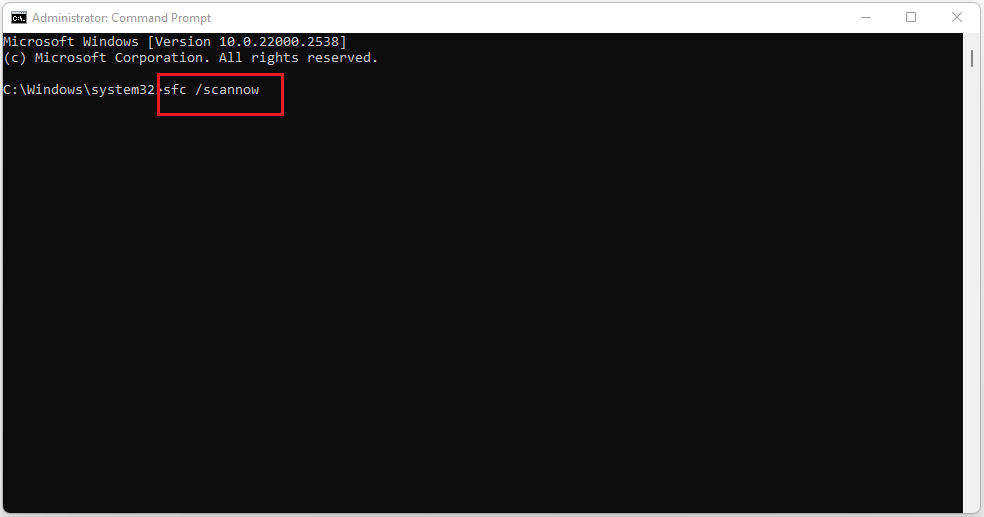
Step 2: In the elevated Command Prompt window, type sfc /scannow and press the Enter key.
Step 3: After finishing, restart your computer to check if the error is fixed. If not, proceed by initiating a DISM scan. Here are the DISM commands:
- DISM.exe /Online /Cleanup-image /Scanhealth
- DISM.exe /Online /Cleanup-image /Checkhealth
- DISM.exe /Online /Cleanup-image /Restorehealth
Step 4: After that, reboot your PC and check if the CACHE_INITIALIZATION_FAILED blue screen error gets fixed.
Way 3: Perform Disk Cleanup
You can try Disk Cleanup to fix the CACHE_INITIALIZATION_FAILED bug check 0x66. Disk Clean-up is one of the Windows built-in cleanup tools. You can use it to free up disk space on a Windows computer. Please follow the steps below:
Step 1: Type disk cleanup in the Cortana search box and choose Disk Clean-up to open.
Step 2: In the new pop-up window, the system drive is selected by default. Usually, the C drive contains unnecessary files. Click OK to continue.
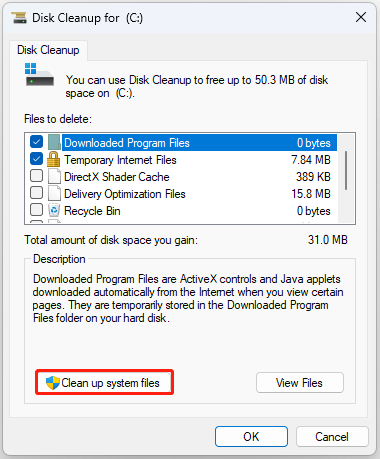
Step 3: You can select the files to delete according to your situation. Then click the Clean up system files option and click OK to start cleaning.
Way 4: Perform a System Restore
You can try to perform a system restore to fix this problem. System Restore is a recovery tool that can restore your computer’s current state to a previous point in time.
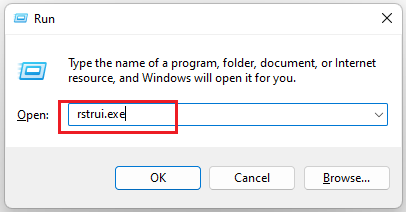
Step 1: Press Windows + R to open the Run box. Type rstrui.exe in the text field, and press OK.
Step 2: Select the Choose a different restore point option and click Next.
Step 3: Select the oldest restore point from the list and click on Next > Finish to complete the progress.
Way 5: Check for Windows Updates
Check your Windows update is a simple way to help you fix the 0x00000066 CACHE_INITIALIZATION_FAILED problem.
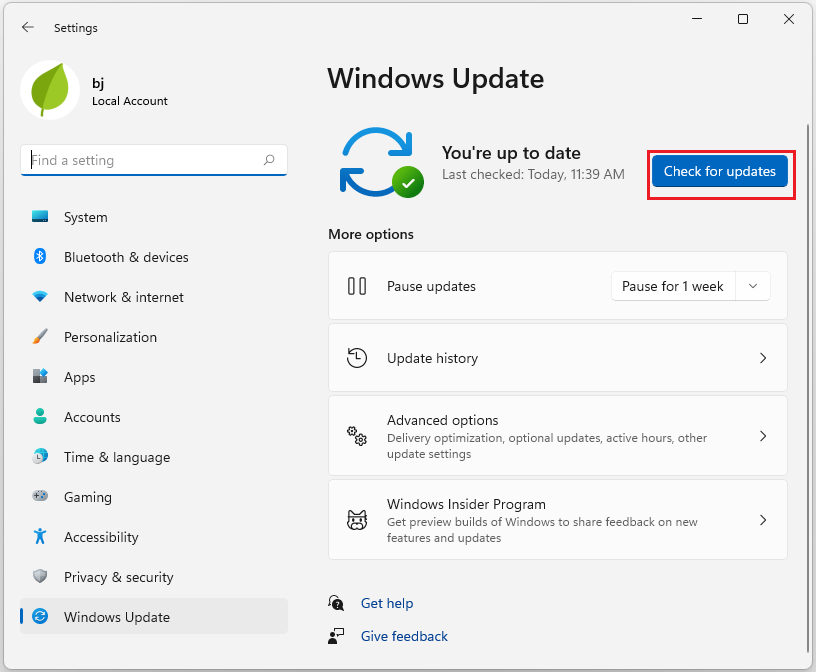
Step 1: Type Check for updates in the Search box and select it to open.
Step 2: Click Check for updates.
Bottom Line
If you encounter the CACHE_INITIALIZATION_FAILED blue screen error, you can try the above-mentioned methods.
Have you ever encountered partitions/disk problems? Do you want to know how to resize/delete/extend/wipe/format partitions? If so, we highly recommend MiniTool Partition Wizard. It is a free powerful partition manager with a wide range of features, it can allow you to clone a hard drive, format USB to FAT32, etc.
MiniTool Partition Wizard FreeClick to Download100%Clean & Safe

![FLOPPY_INTERNAL_ERROR 0x00000037 [A Step-by-Step Guide]](https://images.minitool.com/partitionwizard.com/images/uploads/2024/09/floppy-internal-error-thumbnail.png)
User Comments :