If you are experiencing the incompatible Windows settings BlueStacks error, you should read this post now where 3 available solutions are summarized. They may help you work out the issue.
MiniTool Partition Wizard FreeClick to Download100%Clean & Safe
Fix 1: Disable Certain Windows Features
Certain features on the Windows PC can stop BlueStacks from opening. You need to disable them by yourself.
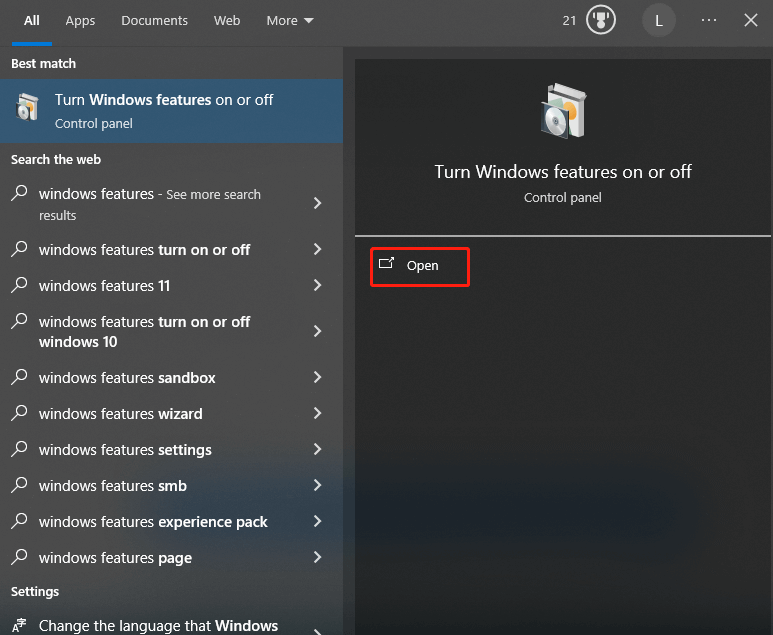
Step 1: Hold the Windows + S keys to open the search box.
Step 2: Type windows features in the text field. Then click Open under the displayed Turn Windows features on or off Control Panel option.
Step 3: In the Windows Features window, find and uncheck the following features. Then click OK to save changes.
- Hyper-V
- Virtual Machine Platform
- Windows Sandbox
- Windows Subsystem for Linux
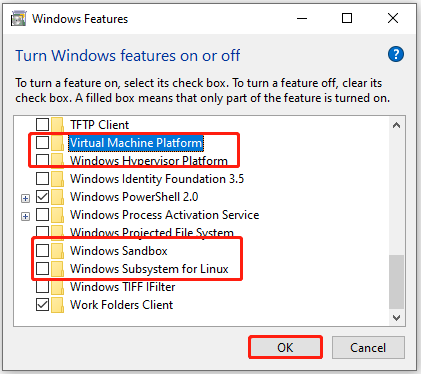
Step 4: Restart your computer to make the changes take effect.
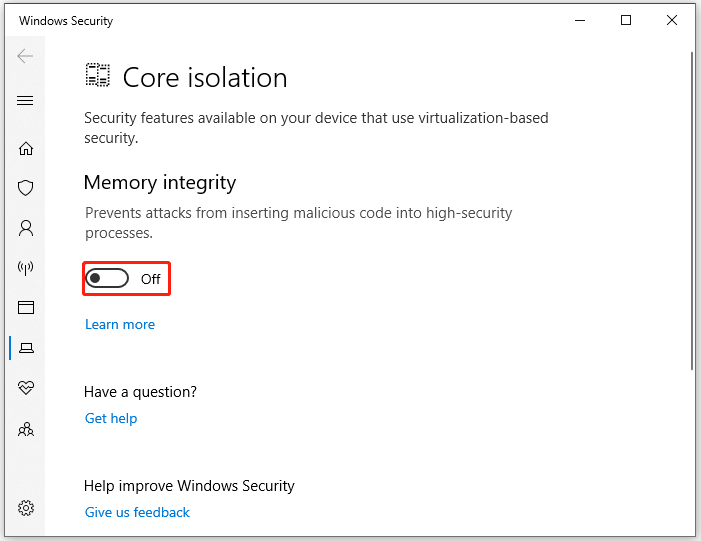
If you can’t find Virtual Machine Platform and Windows hypervisor platform in Windows Features, you need to disable Memory integrity under Windows Defender. Here’s how to do it.
- Type core isolation in the Windows search box.
- Click Open under the listed Core isolation option.
- In the pop-up Windows Security window, toggle off the Memory integrity option.
- In the prompted User Account Control window, click Yes to confirm the operation.
- Close Windows Security and reboot the computer.
Fix 2: Update to BlueStacks 5 Version 5.20 or Above
If you run an outdated BlueStacks version, you can also encounter the incompatible Windows settings BlueStacks error. So, it is highly recommended to update to BlueStacks 5 version 5.20 or above when the error occurs.
You can download the update from the official website of BlueStacks. Then follow the on-screen instructions to finish the installation.
Fix 3: Reinstall BlueStacks 5 Version for Hyper-V
You can uninstall and reinstall BlueStacks from scratch if the BlueStacks Windows 11 incompatible Windows settings error still occurs with Hyper-V enabled.
Step 1: Press Windows + R to open the Run window.
Step 2: Type control in the Run window and hit Enter.
Step 3: In the Control Panel window, find and click Programs and Features.
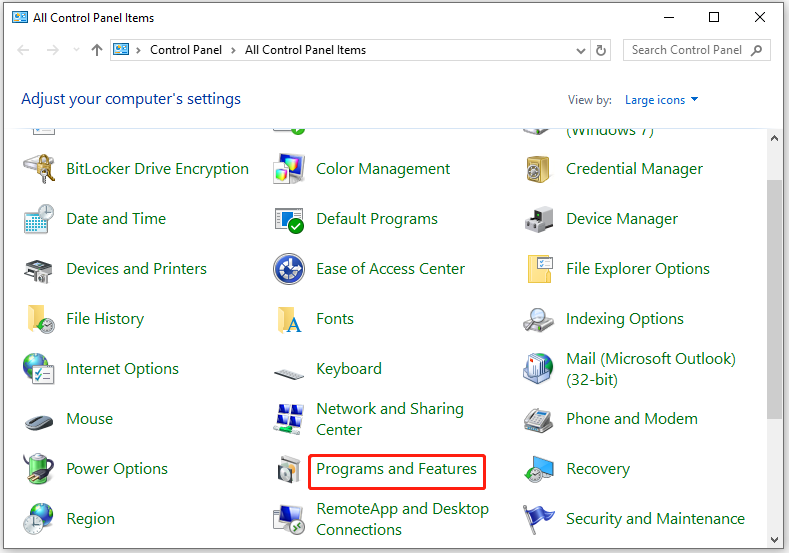
Step 4: From the listed apps, find and right-click BlueStacks and click Uninstall. In the prompted warning window, click Yes to confirm the operation.
Step 5: After the uninstallation process ends, go to the official website of BlueStacks, and then find and click on the Download BlueStacks button.
Step 6: After downloading the setup file, run it and follow the on-screen instructions to complete the operation.
How to fix BlueStacks 5 incompatible Windows settings? Well, this post offers you 3 troubleshooting methods. Try them now!

![Why and How to Disable BIOS Cache or Shadowing [Answered]](https://images.minitool.com/partitionwizard.com/images/uploads/2024/02/disable-bios-cache-or-shadowing-thumbnail.jpg)
User Comments :