Miracast is a wireless display technology that allows screen sharing or mirroring between devices. Have you ever encountered a black screen on Windows 11 when using Miracast? If so, please refer to the following solutions to fix the black screen with Miracast on Windows 11 from Partition Magic.
What Is Miracast?
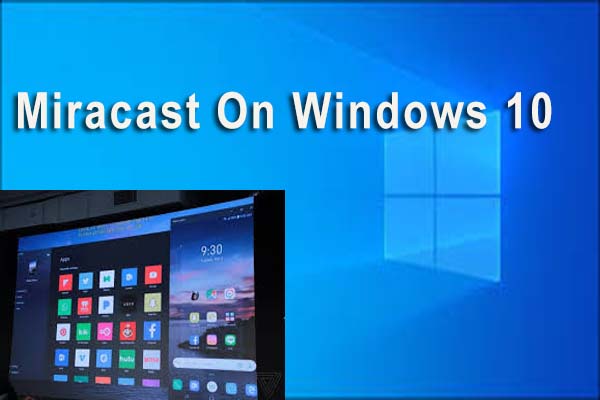
Miracast is a wireless display technology that allows devices to share screen content without a physical connection. With Miracast, you can project the screen content of your phone, tablet, computer, and other devices to a Miracast-supported TV, monitor, or projector.
Recently someone posted on the forum that they were experiencing issues with Miracast black screen on Windows 11. Here’s what one user said:
I am trying to get my Dell XPS 15 9570 to connect to my Sony Bravia TV. I have gotten to the point where I successfully connected the TV and the PC and they both say the connection was successful, but my TV displays a black screen no matter duplication, extension, or second screen only. Is there any way I could get Miracast to work, or are there viable screen-share alternatives?https://answers.microsoft.com/en-us/windows/forum/all/miracast-connects-but-shows-a-black-screen/131822c8-75f9-4619-80a9-1ba3ac8bc06d
How to Fix Black Screen with Miracast on Windows 11
How to solve the problem of a black screen with Miracast on Windows 11? Here are 5 detailed solutions for you.
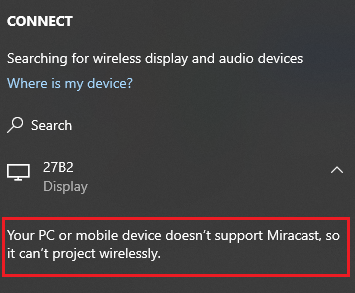
Method 1: Ensure Your Device Supports Miracast
The first step is to check if your device supports Miracast. You can check by pressing the Windows logo key + K. If not, the following “Your PC or mobile device doesn’t support Miracast, so it can’t project wirelessly” message will be displayed.
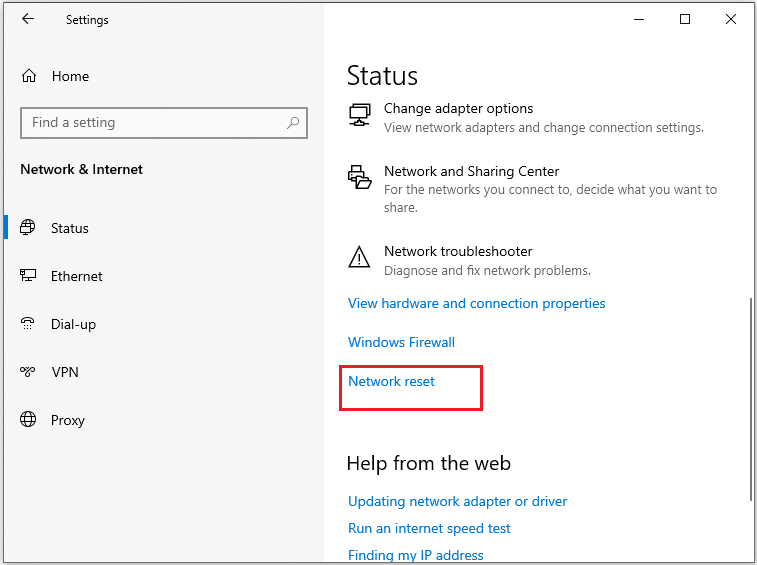
Method 2: Reset the Network Settings
When you encounter a Miracast black screen on Windows 11 problem, you can choose to reset network settings to see if it can solve the problem. Here is the guide:
Step 1: Press the Windows + I keys to open Settings and choose Network & Internet.
Step 2: Click Network reset and follow the on-screen instructions to complete the following operations.
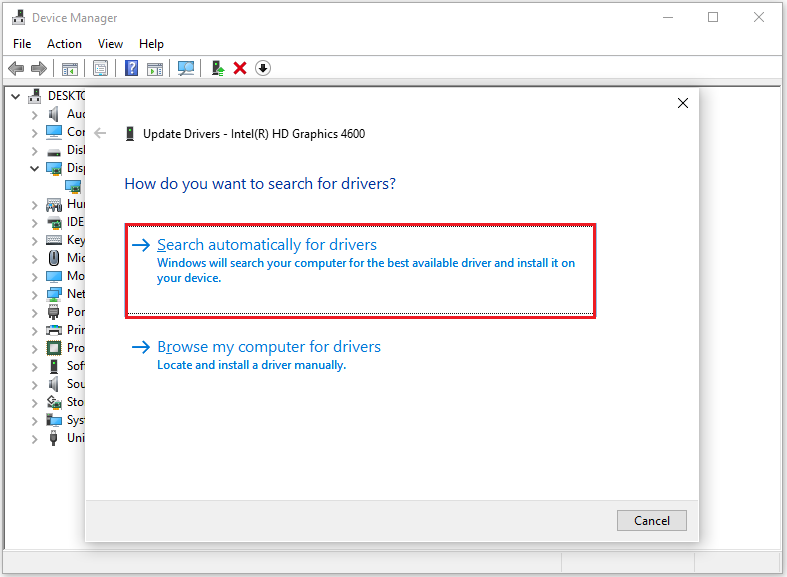
Method 3: Update Graphics Driver
If your graphics card driver is outdated or corrupted, you may experience the black screen with Miracast on Windows 11 issues. In this situation, updating your graphics card driver is necessary.
Step 1: Press the Windows logo key + R together to open the Run dialog box, and then type devmgmt.msc and hit Enter to open Device Manager.
Step 2: Expand the Display adapters, right-click the graphic card driver, and select the Update driver option.
Step 3: Select the Search automatically for drivers option. After selecting the way, follow the on-screen prompts to complete the update.
Method 4: Whitelist Cast to Device Functionality in Windows Firewall
If the previous method doesn’t work, you can also try to whitelist Cast to Device functionality in the Windows firewall.
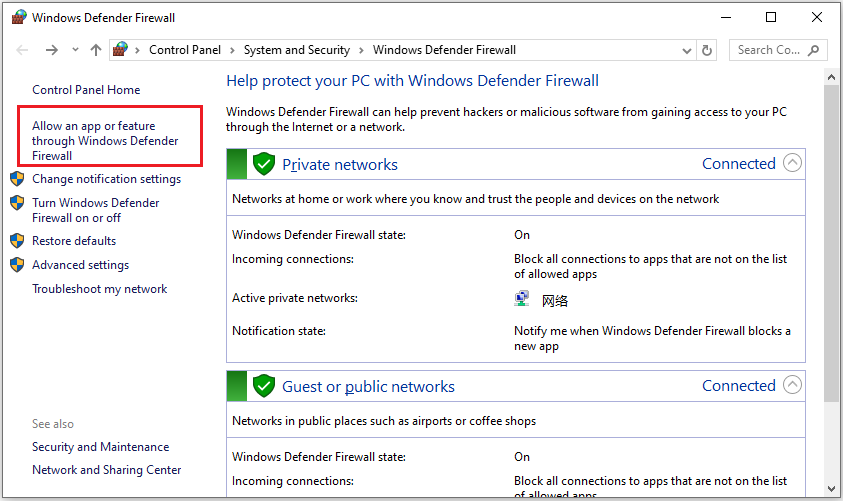
Step 1: Type Windows Defender Firewall in the Search box and click it to open.
Step 2: Click Allow an app feature through Windows Defender Firewall.
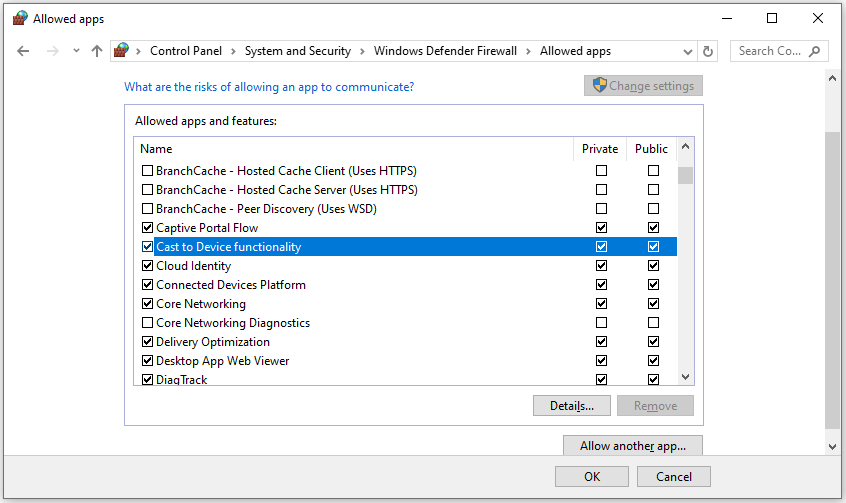
Step 3: Click the Change settings button and find Cast to Device functionality. Make sure both Private and Public boxes are ticked.
Method 5: Temporarily Disable Firewalls
Firewalls or antivirus software can sometimes block Miracast connections, so you can temporarily disable any firewalls or antivirus software.
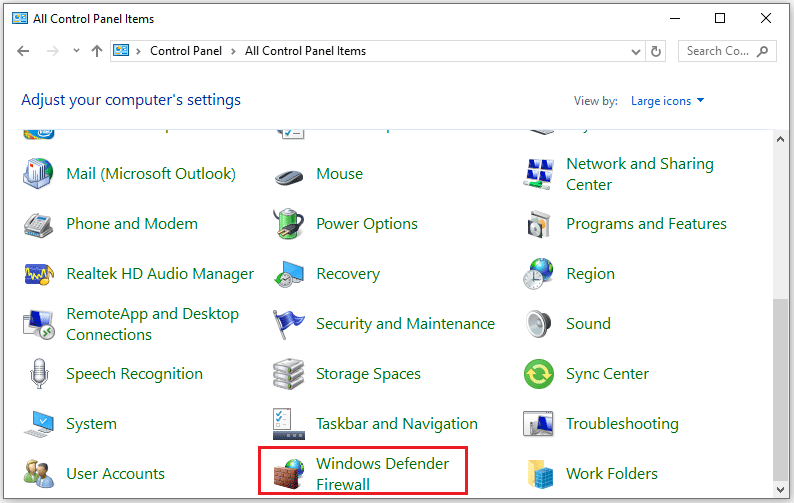
Step 1: Type the control panel in the Search box and click it to open.
Step 2: Click Windows Defender Firewall.
Step 3: Click the Turn Windows Defender Firewall on or off link from the left menu.
Step 4: Check Turn off Windows Defender Firewall (not recommended) under Private network settings or Public network settings or both according to your requirements.
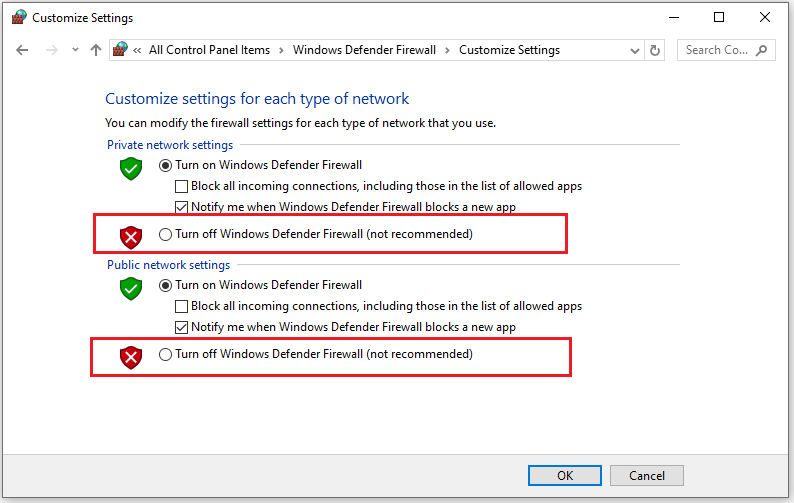
Step 5: Click OK to save the changes.
Bottom Line
When you encounter a black screen with Miracast on Windows 11 problem, you can refer to this article for solutions. I hope this article is helpful to you.
MiniTool Partition Wizard is versatile and powerful. It can also help you format SD card FAT32, change cluster size, convert MBR to GPT, partition hard drives, recover data from hard drives, etc.
MiniTool Partition Wizard FreeClick to Download100%Clean & Safe
About The Author

Position: Columnist
Cecilia is a new member of MiniTool. She works as an English editor on the MiniTool team. She likes to learn articles about computers and is passionate about partition management and Windows operating systems. She is committed to allowing readers to use simple, efficient, and fast methods to solve the computer problems they encounter. To provide more professional solutions, she will continue to learn and master computer knowledge.
User Comments :