When getting a new hard drive disk or SSD, you may consider cloning your Windows OS from the old drive to the new one. It can always improve the PC’s performance. However, sometimes you may boot onto a black screen after cloning disk and setting it as the first boot drive. The only thing you can see on the screen is the cursor.
Fortunately, this post explores several ways to assist in solving the “black screen after cloning Windows 10/11” issue. Simply follow them to see if your problem can be fixed.
Method 1: Change Your Drive Letter
Usually, the issue that Windows boots to black screen with cursor after cloning to SSD/HDD occurs due to the wrong drive letter assignment. So, you can try to fix it by correcting your drive letters. To execute the operation, follow the steps below.
Step 1: When stuck on the black screen after cloning SSD, boot your system into Safe Mode.
Step 2: Right-click the Start icon in Safe Mode and select Disk Management.
Step 3: Make sure the C drive is your system drive and there are no other drives assigned drive letter C. If not, right-click the problematic drive and select Change Drive Letter and Paths to reassign the drive letter.
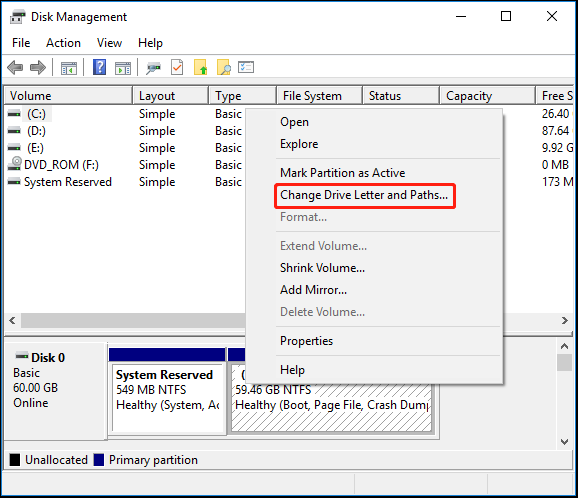
Step 4: Once done, restart your computer from the cloned disk to see if the “black screen after cloning disk” issue persists.
Method 2: Modify Your Registry
It’s also possible to remove the black screen after cloning disk by making some changes to the registry. If your cloned drive boots into black screen, follow the given steps to fix it.
Step 1: Boot your Windows into Recovery Environment (WinRE).
Step 2: Go to Troubleshoot > Advanced options > Command Prompt.
Step 3: In the elevated Command Prompt, type regedit and press Enter.
Step 4: After opening Registry Editor, navigate to the following path:
HKEY_LOCAL_MACHINE\SYSTEM\MountedDevices
Step 5: After that, right-click the value in the right panel and select Delete. Repeat this action until you delete all the values except (Default).
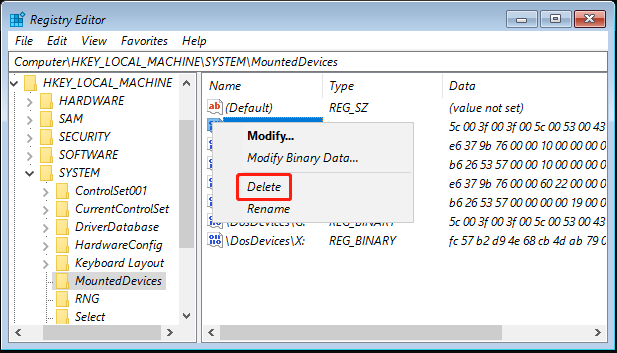
Step 6: After that, reboot the PC and the system will automatically recognize and assign correct drive letters to your hard drives. As a result, the issue the black screen with cursor after cloning disk may not happen anymore.
Method 3: Re-try Disk Cloning
In addition, you can try recreating a cloned system drive if your Windows boots to black screen with cursor after cloning to SSD. As for this, you may need a powerful disk cloning program. Here, we’d like to recommend MiniTool Partition Wizard to you.
It’s a professional and reliable disk cloning program that enables you to clone a hard drive to SSD. Besides, it also allows you to do various tasks related to partition/disk management. For instance, you can use it to partition/resize/wipe hard drive, format USB to FAT32/NTFS/exFAT, recover data from hard drive, etc.
How can you clone the system drive with MiniTool Partition Wizard and avoid the black screen with cursor after cloning disk? Here’s a step-by-step guide.
Step 1: Connect the original and cloned drives to your computer, select the former to boot your PC normally.
Step 2: Download, install, and launch MiniTool Partition Wizard on the computer.
MiniTool Partition Wizard DemoClick to Download100%Clean & Safe
Step 3: Highlight the original system disk and then select Copy Disk from the left action panel. After that, choose the destination disk and click Next. If prompted, click Yes to proceed.
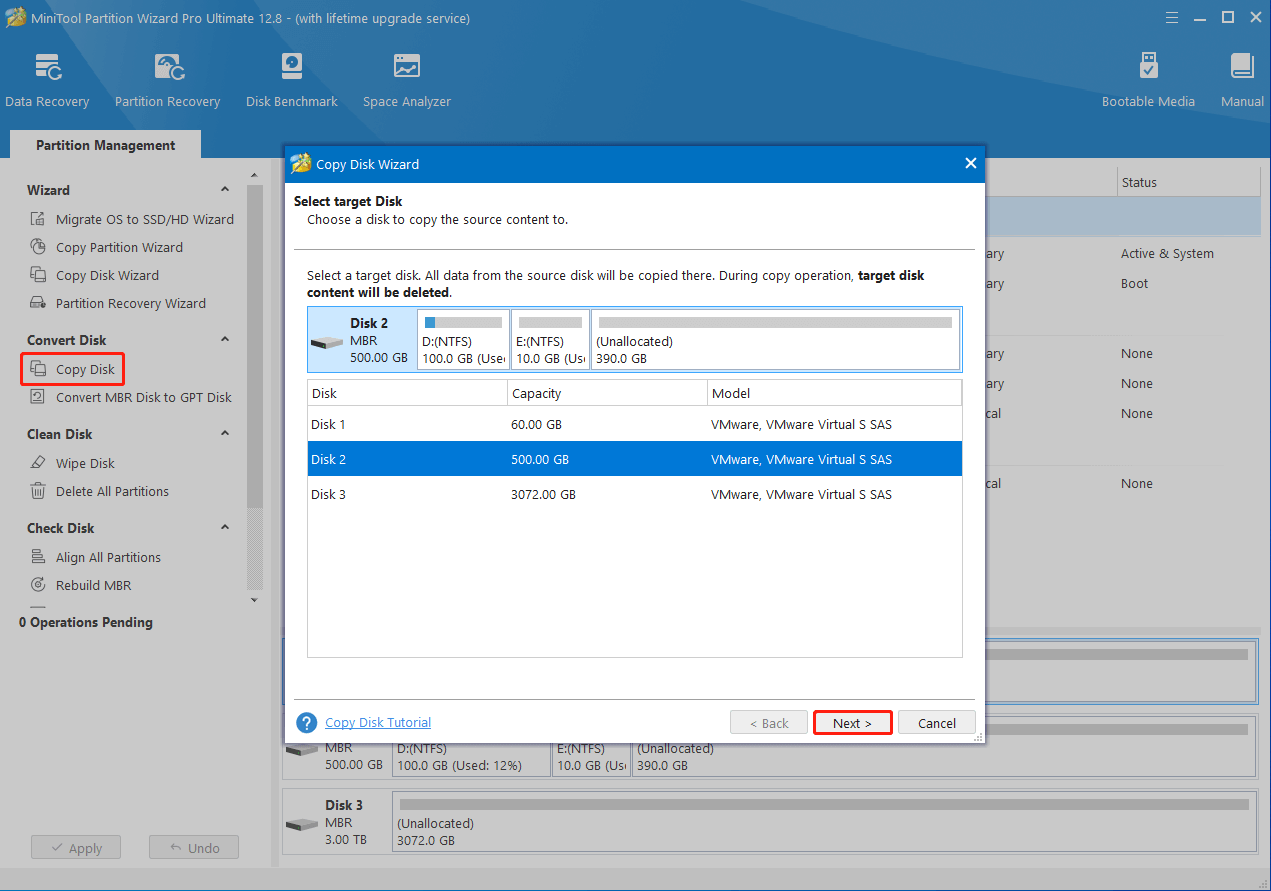
Step 4: In the next window, adjust the copy options and click Next.
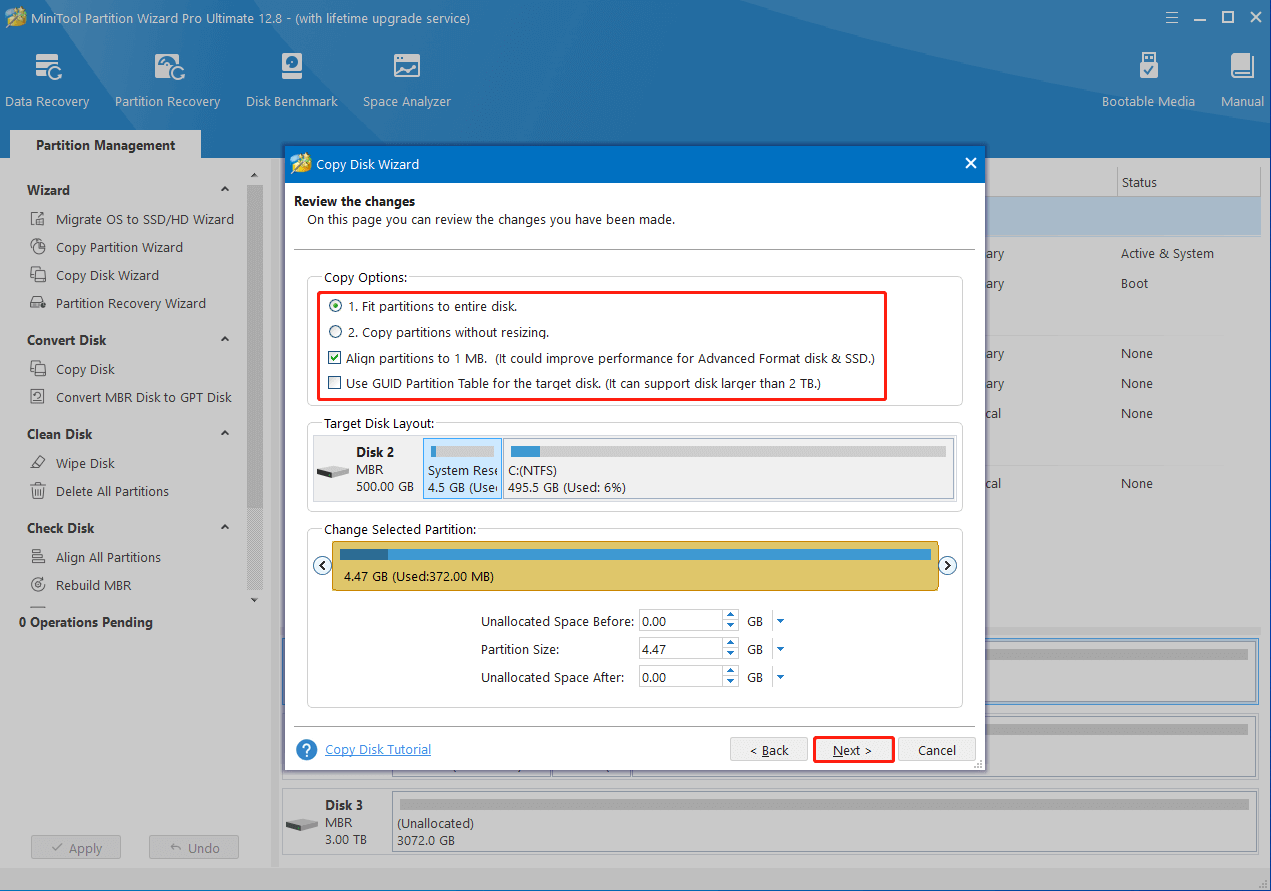
Step 5: Finally, click Finish > Apply to execute the pending operation.
Step 6: Remove the original system drive and then try booting from the newly cloned disk to check if the “black screen after cloning Windows 10” issue disappears.
When facing the black screen after cloning disk, try to fix it with the above methods. If you have any problems with the issue cloned drive boots into black screen, you can leave a message in our comment part below.

User Comments :