A lot of users reported that BitLocker can't recognize USB/external hard drive on Windows 10/11. What causes BitLocker not showing for USB? How to fix it? Now, let’s explore the answers together with MiniTool Partition Wizard.
BitLocker To Go is an effective drive encryption service that can be used to encrypt your data on removable drives, including USB flash drives, external hard drives, SD cards, etc. Sometimes, however, this tool can run into various issues, like “a volume with BitLocker waiting for activation”, “BitLocker not working”, and “BitLocker not showing for USB”. Here’s a true example from the answersmicrosoft.com forum:
Unable to turn on BitLocker for USB drives. When I got to Control Panel > System and Security > BitLocker Drive Encryption, I am unable to see my USB drives. It just says "Insert a USB drive to use BitLocker To Go". Can anyone help?
https://answers.microsoft.com/en-us/windows/forum/all/unable-to-turn-on-bitlocker-for-usb-drives/822a93d5-868a-4590-bc0e-9aa649c158c8?page=2
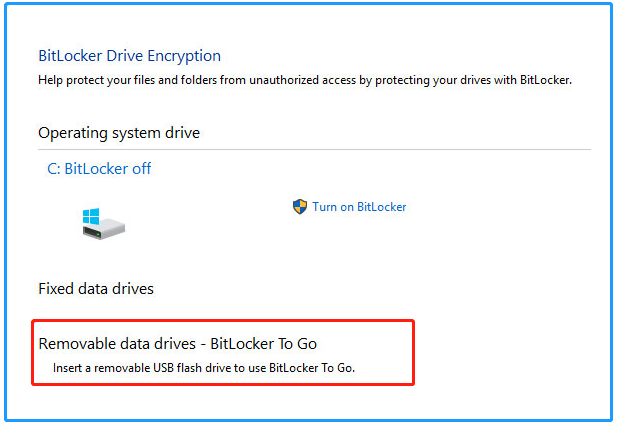
Why BitLocker Can’t Recognize USB/External Hard Drive
What causes the BitLocker not recognizing USB? After investigating extensive user reports from different forums and communities, we find the problem can be caused by various reasons. If the file system of the drive is not compatible with BitLocker, you will encounter the BitLocker not showing for external hard drives/USB.
In addition, the wrong configuration of the Group Policy, disabled BitLocker Drive Encryption service, and active partitions on the drive can trigger the issue as well. Don’t worry. Here we provide corresponding solutions to the problem.
How to Fix BitLocker Not Showing for USB/External Hard Drive
How to fix it if you are unable to turn on BitLocker for USB drive? Let’s try the following 5 methods in order until the problem gets solved.
# 1. Enable BitLocker Drive Encryption Service
If the BitLocker encryption service is not running, you can’t turn on BitLocker for USB/external hard drives. So, make sure that the service is enabled on Windows 10/11.
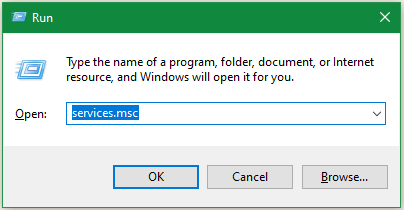
Step 1. Press Win + R keys to open the Run dialog box, type services.msc, and press Enter.
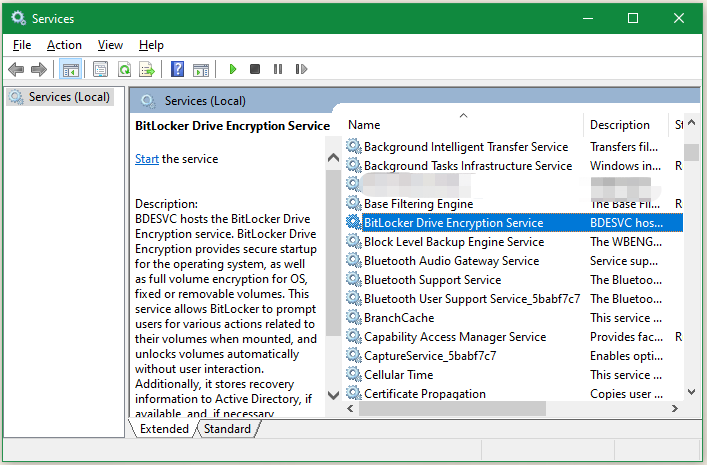
Step 2. In the Services window, scroll down the list of services to BitLocker Drive Encryption Service and double-click it.
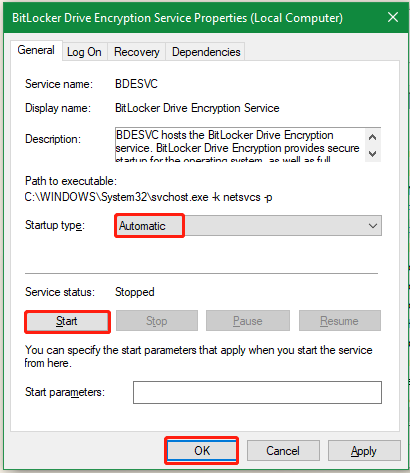
Step 3. Change the Startup type to Automatic and click on Start to start the BitLocker service. Then click OK to close the window.
Now, reconnect your drive to the computer and check if the BitLocker not recognizing USB/external hard drive issue disappears.
# 2. Edit Group Policy to Control the BitLocker
As discussed above, if the Group Policy is misconfigured to ban the system to use BitLocker on external drives, you will encounter the BitLocker not showing for external hard drive problem.
Step 1. Open the Run box again, type gpedit.msc in it, and hit Enter.
Step 2. In the pop-up window, locate the following path via the left navigation bar:
Local Group Policy EditorAdministrative TemplatesWindows Components
Step 3. With the Windows Components folder selected from the left panel, expand the BitLocker Drive Encryption folder from the right panel and double-click the Removable Data Drives folder to open it.
Step 4. Right-click the Control use of Bitlocker on removable drives file and select Edit.
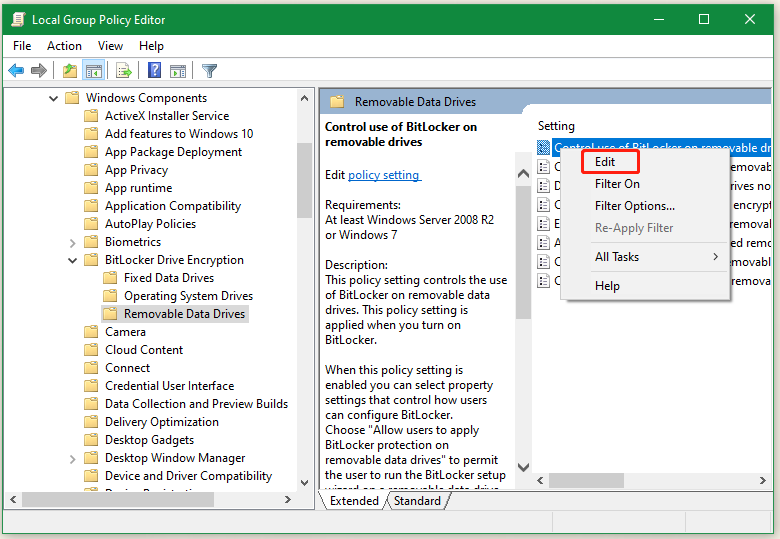
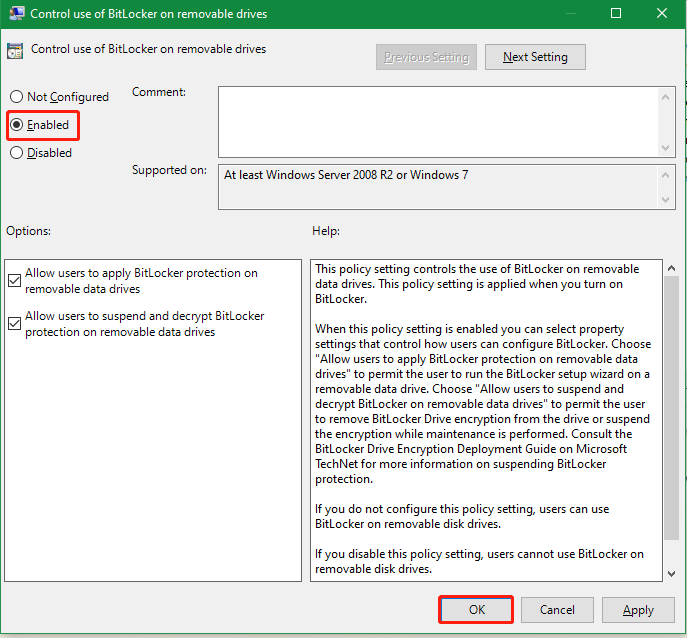
Step 5. Select Enabled and click on OK to save the configuration. Then restart your computer and reinsert the drive to check if the “BitLocker can’t recognize external hard drive” issue is gone.
Make sure you check the boxes next to “Allow Users to apply BitLocker protection on removable data drives” and “Allow users to suspend and decrypt BitLocker protection on data drives”.
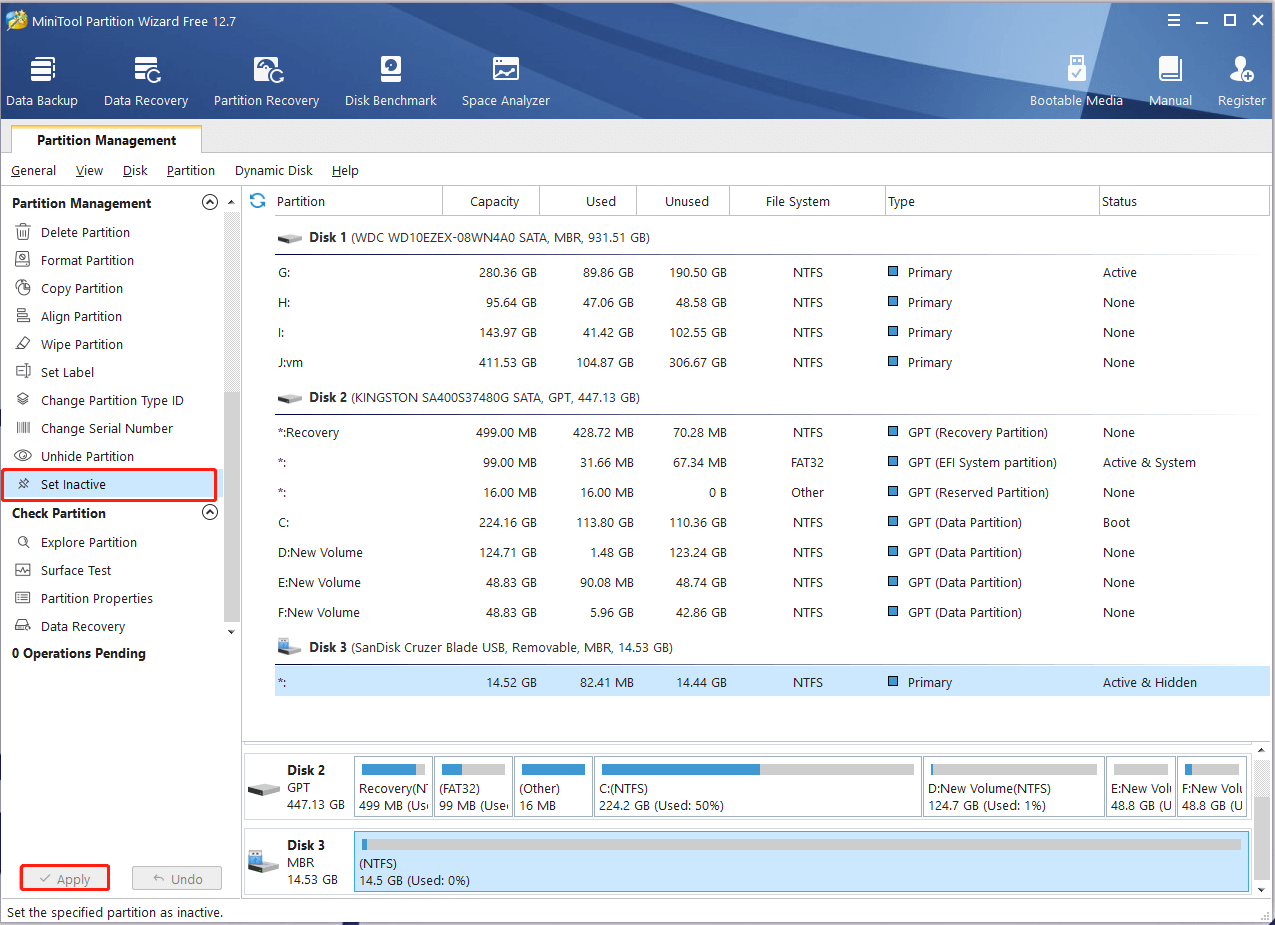
# 3. Set the USB/External Hard Drive as Inactive
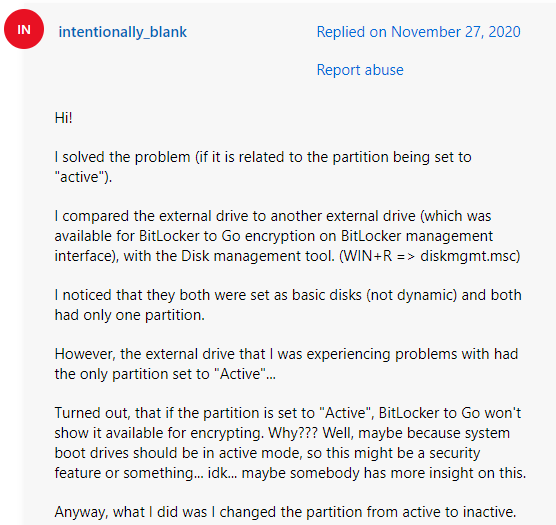
Many people from the answers.microsoft.com forum reported that the BitLocker not recognizing external hard drive issue can be solved by setting the partition on the drive as inactive. If this scenario applies to you, this method is worth having a try.
Step 1. Type diskpart.exe in the Run box and press Enter.
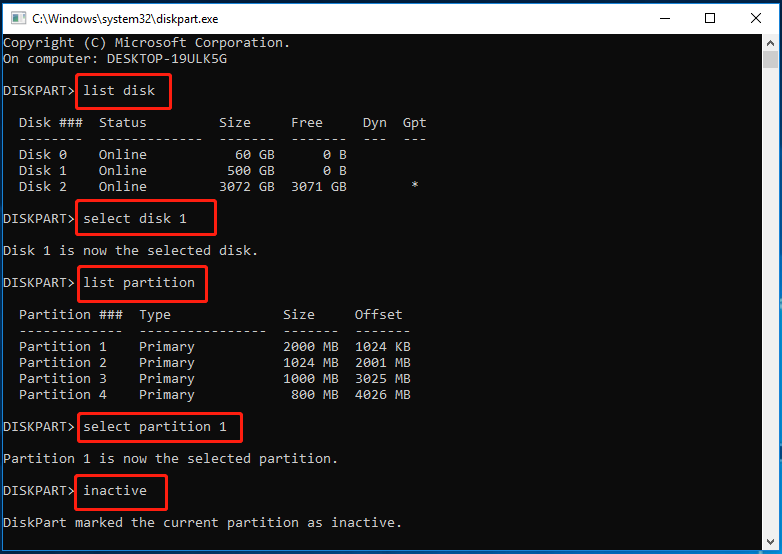
Step 2. In the pop-up window, type the following commands in order and press Enter after each one to inactive the partition on the USB/external hard drive.
- list disk
- select disk * (replace * with the disk number of the USB or external hard drive)
- list partition
- select partition * (replace * with the number of the active partition)
- inactive
Sometimes, however, you may fail to inactivate a partition or encounter some errors using DiskPart. In this case, MiniTool Partition Wizard is a good choice. It is an all-in-one partition manager that can inactivate/activate partitions, partition hard drives, clone system disks, rebuild MBR, change cluster size, and so on.
MiniTool Partition Wizard FreeClick to Download100%Clean & Safe
# 4. Reformat the USB/External Hard Drive
If you still can’t turn on BitLocker for USB/external hard drives, you can try reformatting the drive and creating a new partition. Many people have proved this method to be useful. Let’s have a try.
This operation will erase all data on the USB drive. So, make sure you back up all important data on the drive beforehand.
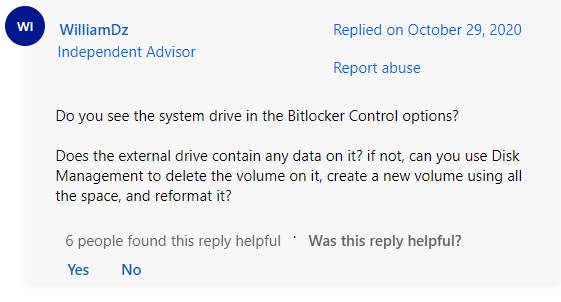
Step 1. Press Win + X to open the context menu and select Disk Management.
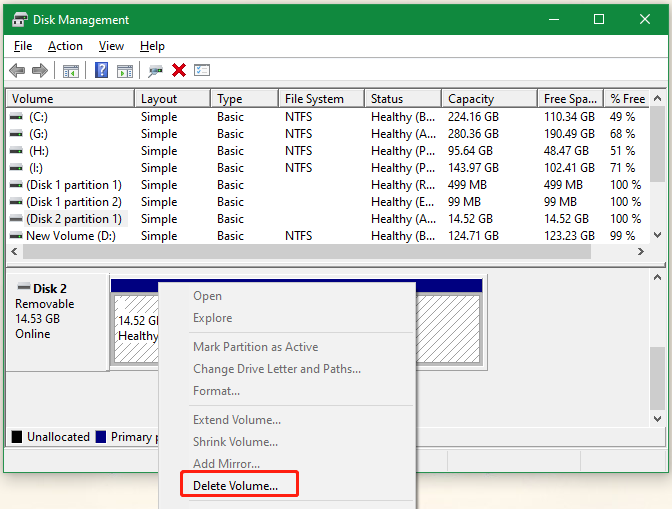
Step 2. Right-click the partition on the USB and select Delete Volume and confirm it.
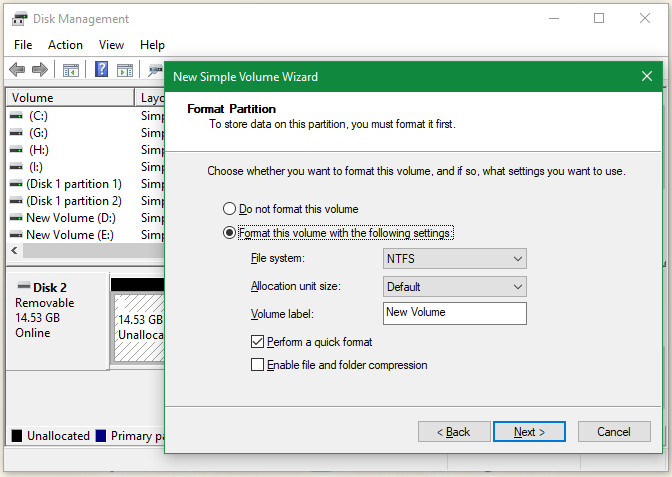
Step 3. Right-click on the Unallocated space and select New Simple Volume, and follow the on-screen prompts to complete the process.
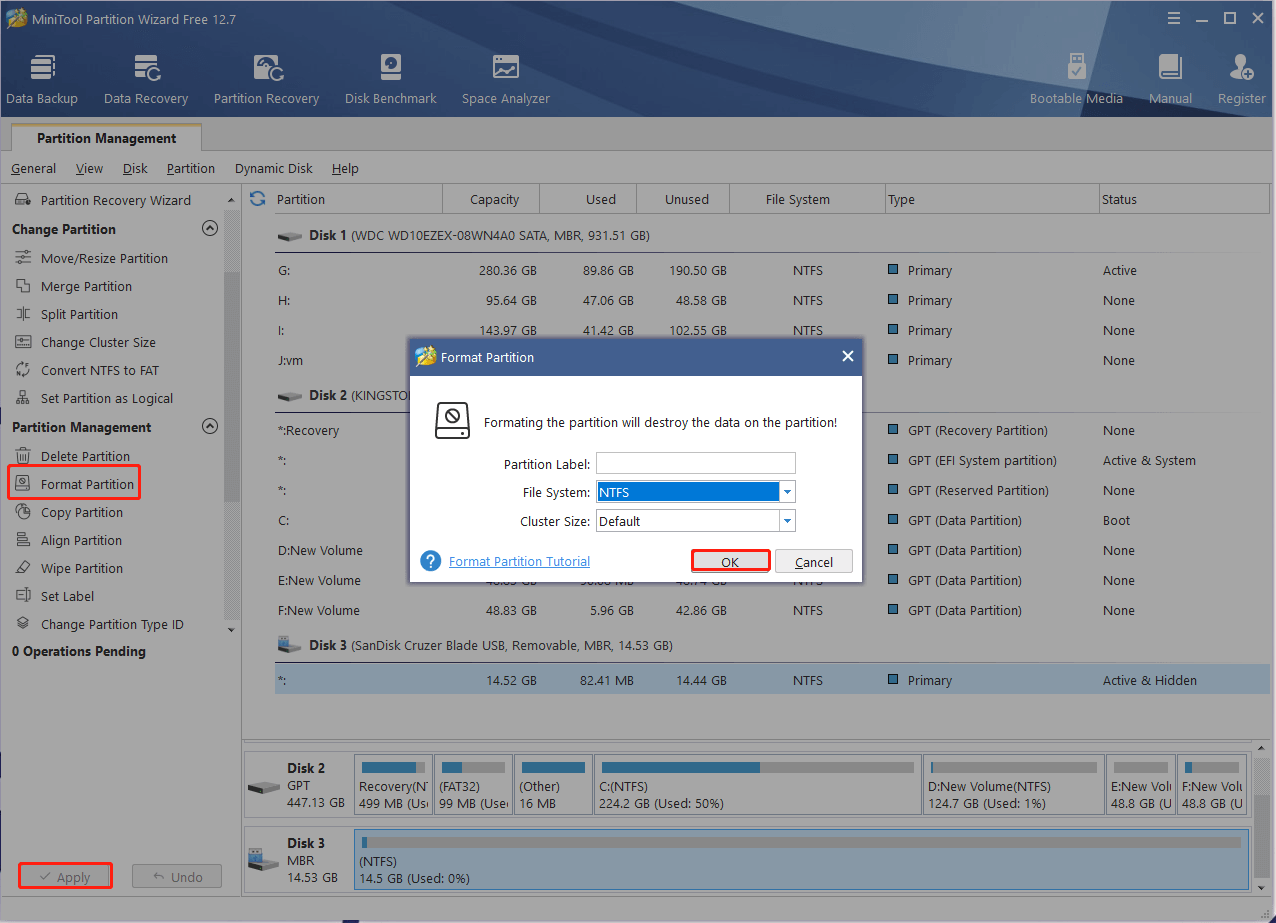
Well, the Windows built-in tool has some limitations when creating/formatting a USB, such as “can’t format a drive larger than 32 GB to FAT32”. Here the MiniTool partition software can format/create/extend partitions, convert NTFS to FAT32 without data loss (and vice versa), and recover lost data easily.
MiniTool Partition Wizard FreeClick to Download100%Clean & Safe
# 5. Perform a System Restore
If the BitLocker not recognizing external hard drive issue just occurs recently, it may be caused by improper configurations or buggy updates. In this case, you can perform a system restore to undo the recent changes and revert the system to an earlier date when the problem doesn’t appear.

User Comments :