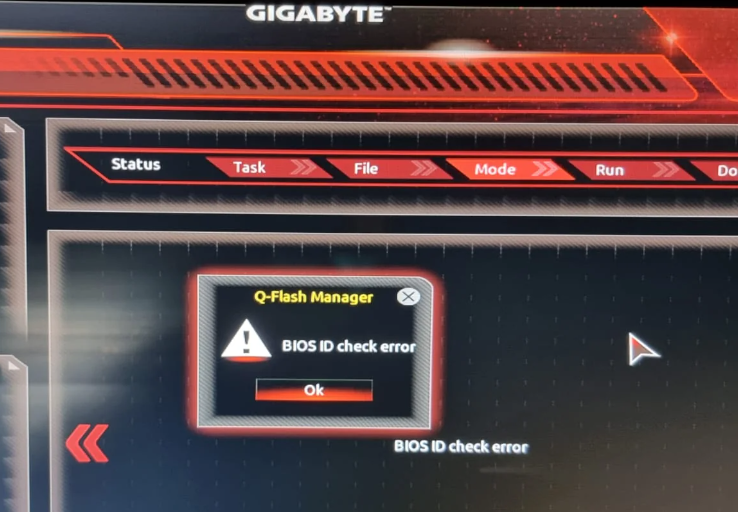
What Causes the BIOS ID Check Error
According to user reports, the BIOS ID check error often occurs when flashing or updating BIOS on a Gigabyte. The main reason is that the BIOS version you downloaded doesn’t match with your motherboard. Besides, some factors like a failed USB flash drive, corrupted BIOS version, poor internet connection, and incompatible external devices are also responsible for the Gigabyte BIOS ID check error.
Here’s a true example from the answers.microsoft.com forum:
Gigabyte BIOS ID CHECK ERROR. I'm currently trying to update my bios and I keep getting the same error message no matter the version. (New to pc's). I have an Acorus B650 M Elite ax MicroATX motherboard, I downloaded the file extracted into a formatted USB went into bios tried and updated and I got that error.https://www.reddit.com/r/gigabyte/comments/16hesrr/bios_id_check_error/
How to Fix BIOS ID Check Error
How to fix the BIOS ID check error when updating BIOS? After investigating extensive user reports from different forums and communities, we summarize 6 feasible troubleshooting methods. Let’s try them in order until the error is removed.
Tip: Before proceeding, make sure you have a stable internet connection and remove all unneeded peripherals.
# 1. Download the Correct BIOS Version According to Your Motherboard
As discussed above, the main cause behind the BIOS update ID check error is related to a mismatched BIOS version. Many users from the Reddit forum reported that the error could be solved after downloading a correct BIOS version.
There are 3 different motherboard versions. If your Gigabyte motherboard is v1.0 or 1.1, click this link to download the BIOS. For the Gigabyte motherboard v1.2, download BIOS from this link. Once downloaded, you can refer to the following guide to flash/update BIOS GIGABYTE:
# 2. Reset BIOS
Resetting BIOS to its default settings can help get rid of some compatibility issues. This method has been proven by some people to be useful. Let’s have a try.
Step 1. Completely turn off your laptop.
Step 2. Start up your computer and immediately press the F2 or Delete key when the first log screen appears. Then you will enter BIOS.
Step 3. Look for an option named Restore Defaults/Reset to Default or something else. Once found, select this option and press F10 to save and exit the BIOS window. Also, you can try pressing the F9 key to reset the BIOS.
# 3. Check Your USB Flash Drive
One of the possible reasons for the Gigabyte BIOS ID check error is related to a corrupted USB flash drive. Besides, the BIOS update requires a USB formatted to FAT32. So, it’s necessary to check your USB drive. Here we highly recommend you use MiniTool Partition Wizard. This free partition manager can format a USB larger than 32GB to FAT32 but also check drive errors.
Let’s follow the guide below to check your USB flash drive.
MiniTool Partition Wizard FreeClick to Download100%Clean & Safe
Step 1. Insert your USB drive into the Windows system properly and launch MiniTool Partition Wizard to enter its main interface.
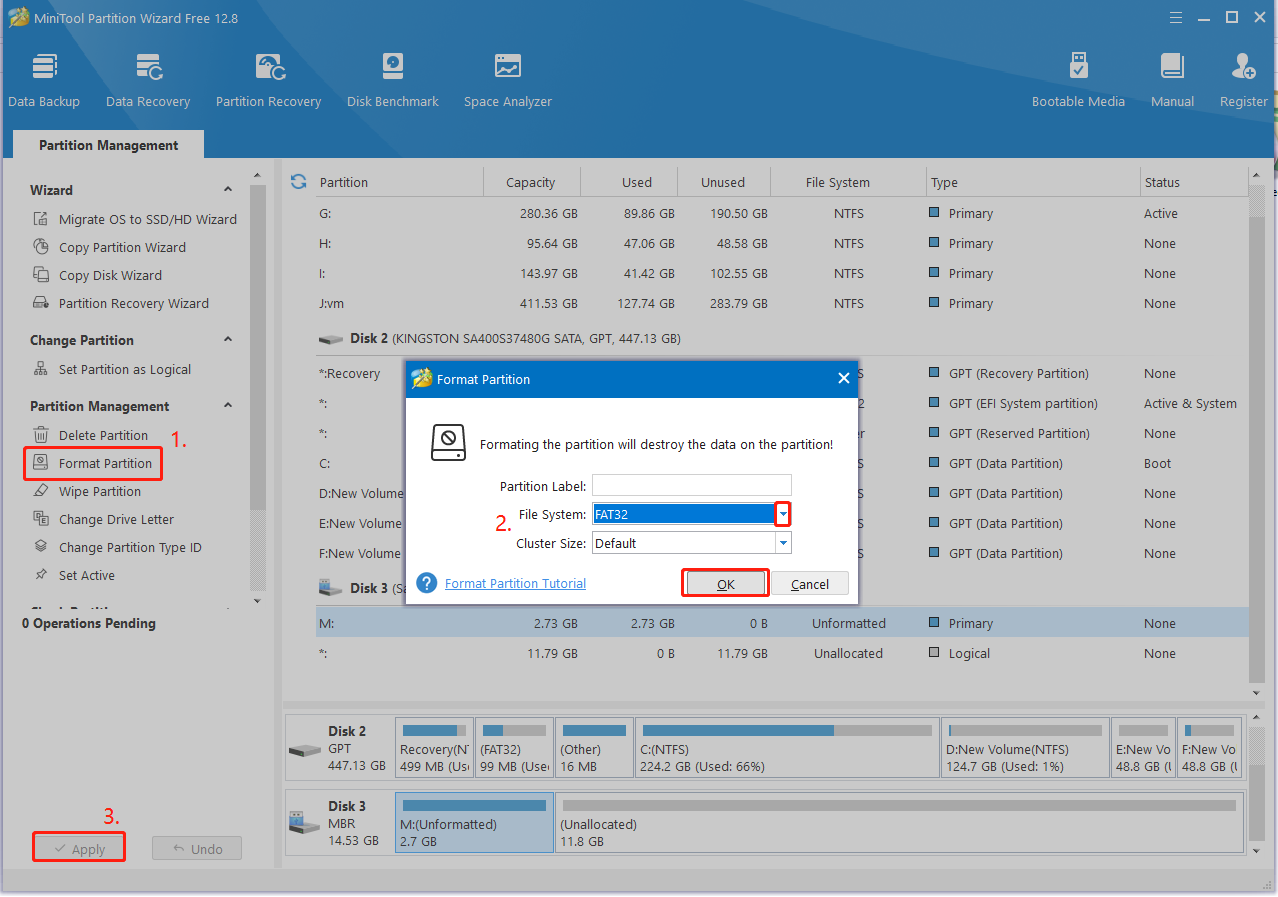
Step 2. Select the USB partition from the disk map and click on Format Partition from the left action panel.
Step 3. Select FAT32 from the File System drop-down menu and click OK to save the change. Then click on Apply to execute the change.
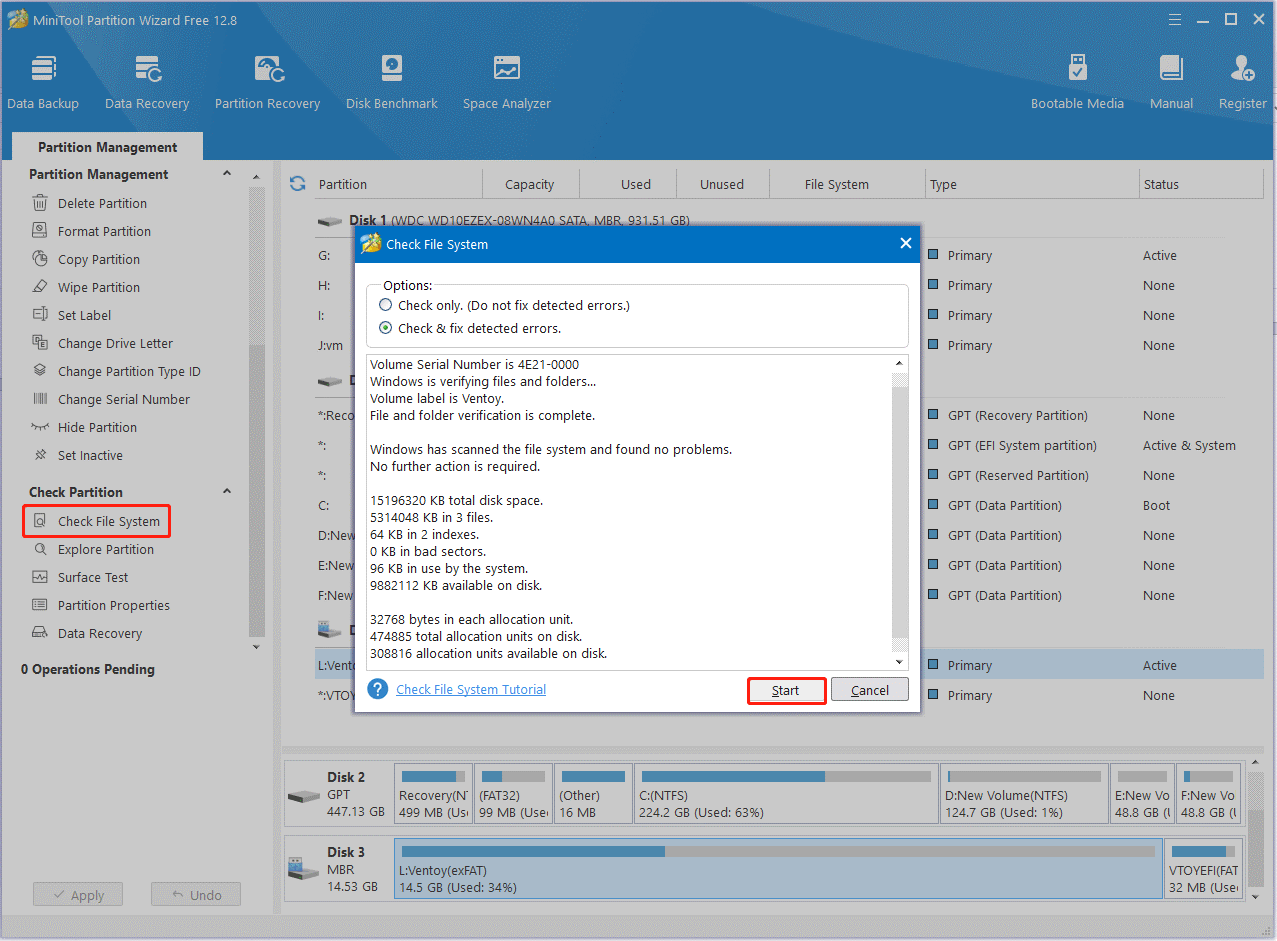
Step 4. You can check if there are corrupted file system on the USB. To do so, select the USB, and click Check File System > Check & fix detected errors.
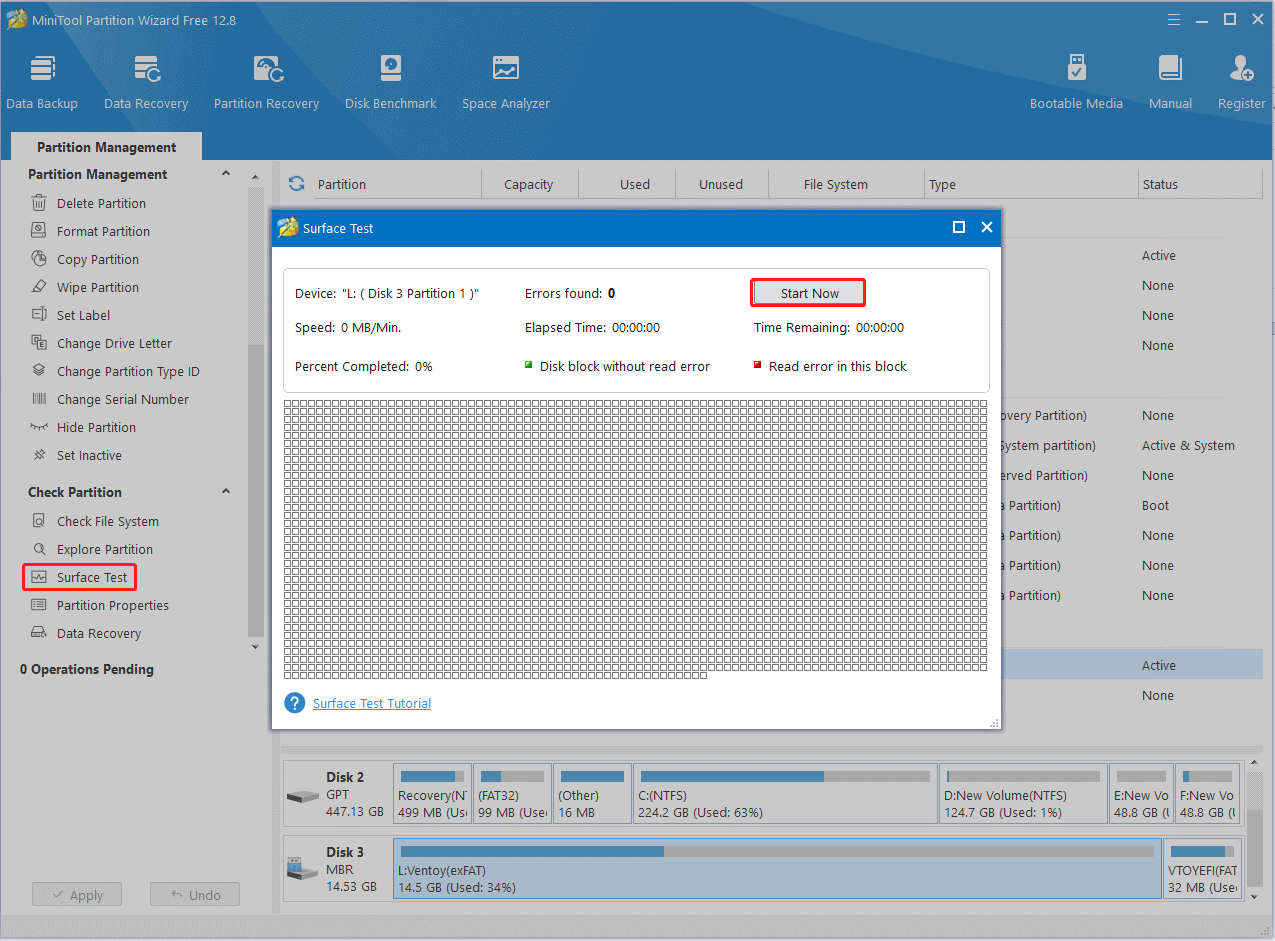
Step 5. To check bad blocks on the USB, select it and click Surface Test from the left panel. Then click on Start Now to start the check.
# 4. Change the BIOS Boot Mode
Some users reported that the BIOS update ID check error can be fixed by changing the BIOS boot mode. Let’s have a try.
Step 1. Enter BIOS as we just explained above and navigate to the Boot or Security tab.
Step 2. Change the BIOS boot mode from legacy to UEFI. Then you can enable the Secure Boot option.
Step 3. Press F10 and then Enter keys to save the change and exit the window.
# 5. Reset CMOS
CMOS is a small amount of memory on a computer motherboard that stores the Basic Input /Output system BIOS settings. If you are still troubled by the BIOS ID check error when updating BIOS, you may consider clearing CMOS. This action can restore the boards and restore the BIOS settings to default. But be careful enough because mistaken operating may give rise to damage to the computer or the BIOS.
# 6. Upgrade Your Motherboard
If all the above BIOS ID check error fixes fail to work, it may indicate that there is something wrong with your motherboard. In this case, you’d better check if the motherboard is faulty. If it is, you can refer to this guide “How to Upgrade Motherboard and CPU without Reinstalling Windows” to replace the bad motherboard.
About The Author

Position: Columnist
Ariel has been working as a highly professional computer-relevant technology editor at MiniTool for many years. She has a strong passion for researching all knowledge related to the computer's disk, partition, and Windows OS. Up till now, she has finished thousands of articles covering a broad range of topics and helped lots of users fix various problems. She focuses on the fields of disk management, OS backup, and PDF editing and provides her readers with insightful and informative content.
User Comments :