If you are searching for a solution to fix the BIOS boot order changes by itself issue, this post is worth reading. Here, Partition Magic provides some effective solutions to troubleshoot the issue.
Some people report that they encounter the boot order changed on its own issue on their computer. This issue bothers them a lot. For example, here is a user report from the HP Community:
I have been using this computer for some time with a dual-boot Linux Mint 20 and W10 OS...Lately, it sometimes changes the boot order in the BIOS/EFI all by itself, and attempts to boot from the backup drive which does not have an operating system...https://h30434.www3.hp.com/t5/Desktop-Boot-and-Lockup/Bios-boot-order-changes-by-itself/td-p/7916894
Have you also come across the same issue on your PC? If so, continue reading to get a full guide.
Preparation
Before attempting the following methods to resolve the issue of the BIOS boot order changing by itself, it is advisable to clone all your important data to a secure location to prevent data loss during or after the troubleshooting process.
To do that, I recommend you use MiniTool Partition Wizard. It is a professional and powerful partition disk manager that offers the Copy Disk feature to help you clone your data with ease.
Besides, this feature-rich tool can also help you to partition hard drive, check disks for errors, format SD card FAT32, rebuild MBR, convert MBR to GPT, do data recovery, and more. Here’s how to use to clone data:
MiniTool Partition Wizard DemoClick to Download100%Clean & Safe
- Download and install MiniTool Partition Wizard.
- Launch this app to enter its main interface.
- Choose the system disk from the drive map.
- Select Copy Disk from the left panel.
- Select the target disk from the pop-up window and click Next.
- Set Copy Options and adjust Target Disk Layout.
- Then, click Next.
- Read the Note and click Finish.
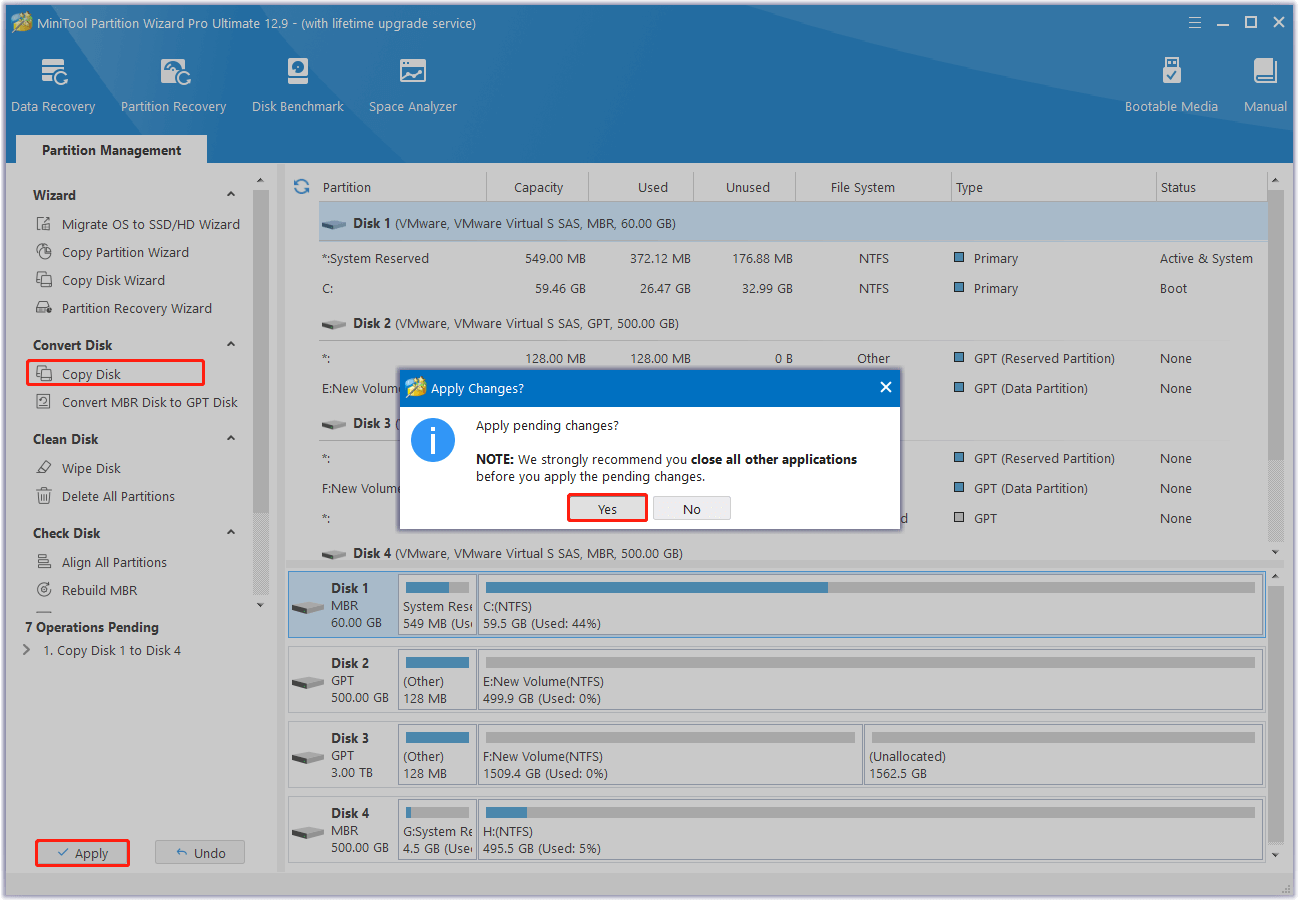
- After that, click Apply and Yes sequentially to execute all the pending operations.

How to Fix BIOS Boot Order Changes by Itself?
How to fix BIOS boot order changes by itself? If you encounter the boot order changes by itself in BIOS issue, you don’t need to worry. Here, I summarize several effective methods to help you get rid of the issue.
Fix 1. Reset the Boot Order
When you run into the boot order changes by itself in BIOS issue on your computer, you can try reset the Boot order to fix the error. Here’s how to do that:
- Restart your computer and press the BIOS key to enter the BIOS menu.
- Look for and select Boot or Boot Options.
- Find Boot Priority or something familiar.
- Select your target drive as the primary boot drive.
- Then, save the changes and exit the BIOS menu.
- Once done, restart your PC and check if the boot order keep changing by itself issue has been resolved.
Fix 2. Update BIOS
If resetting the boot order is unable to help you fix the boot order keep changing by itself issue, you can try updating your BIOS to fix the error. To do that, you just need to do as follows:
- Go to your computer or motherboard manufacturer’s website.
- Check the latest BIOS version here.
- Then, follow the instructions to update it for your PC.
Fix 3. Adjust BIOS Settings
Some people report that they fix the BIOS boot order changes by itself issue successfully by adjusting their BIOS settings. If your priority boot drive is NVMe drive, you can also have a try. Here’s how to do that:
- Reconnect all your drives and cables.
- Then, restart your PC and boot into the BIOS menu.
- Check if all the storage devices show in the BIOS.
- Check if there is an option to enable NVMe support in the BIOS settings.
- Set the right boot mode for your PC, like UEFI or BIOS.
- Update NVMe drive firmware.
- Next, reset the BIOS to its default settings.
- Once done, save the changes and restart your PC. Then, check if the issue has been resolved.
Fix 4. Make Sure Windows Fast Boot Is Disabled
If you have enabled the Windows fast boot feature, you can also run into the BIOS boot order changes by itself issue easily. In this case, you can try disabling the Fast Boot feature to fix the issue. Here’s the guide:
Step 1. Boot into the Windows operating system.
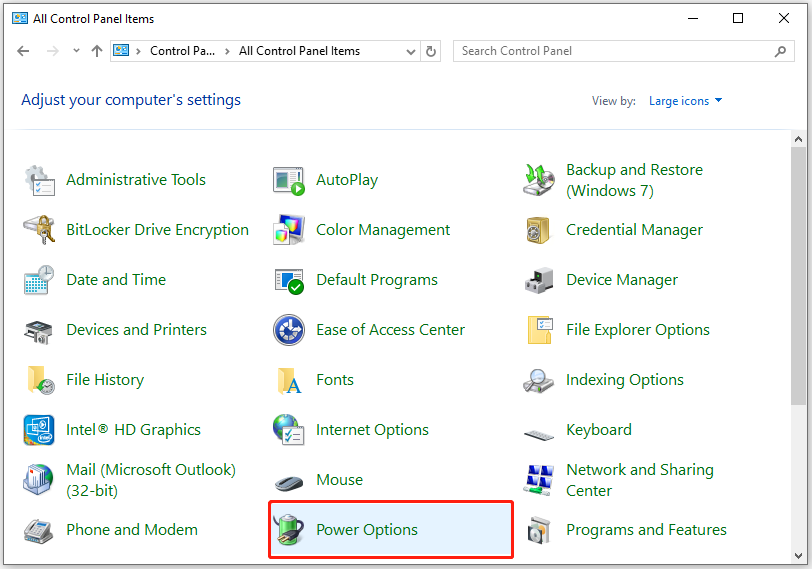
Step 2. Press the Win + S keys simultaneously to open the Search window, type “control panel” and press Enter.
Step 3. Set View by as Large icons, and select Power Options from the feature list.
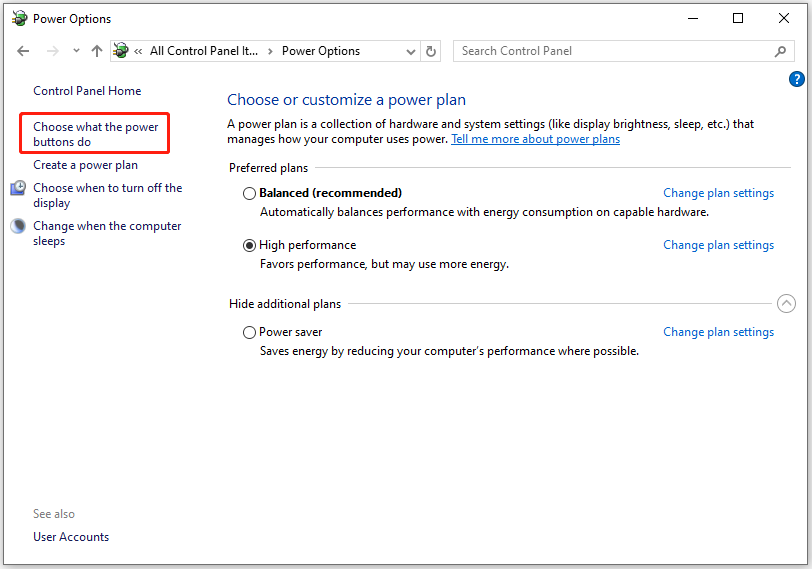
Step 4. On the next page, click the Choose what the power buttons do link from the left panel.
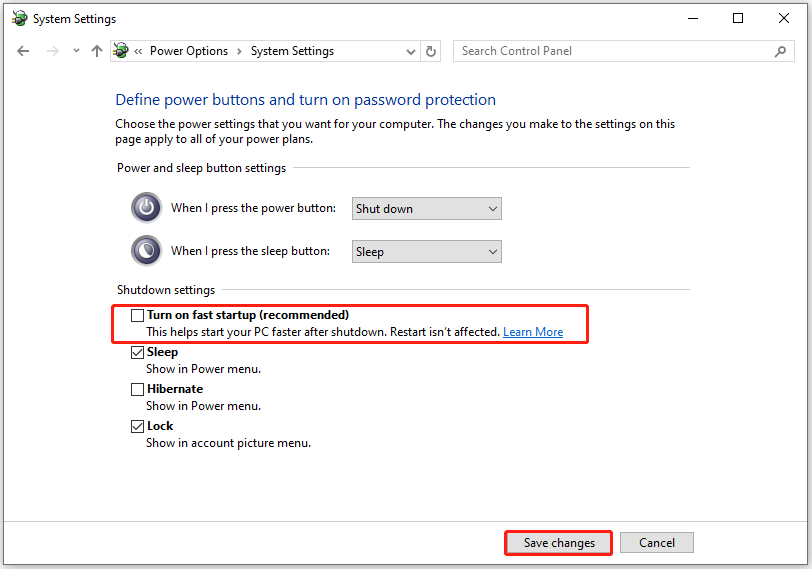
Step 5. Click Change settings that are currently unavailable, uncheck the box of Turn on fast startup (recommended), and then click Save changes.
Step 6. Once done, restart your PC and check if the issue is fixed.
Fix 5. Check the CMOS Battery
Sometimes, CMOS issues may also result in the BIOS boot order changes by itself issue. Therefore, you can try checking the CMOS battery to fix the issue. If there’s something wrong with it, you can replace it.
Fix 6. Replace the Old SATA HDD
Old SATA HDD may need to take a little longer time to come up the speed after setting turned off overnight. Therefore, the BIOS/UEFI will skip it to the next boot drive and then cause the boot order changed on its own issue.
In this situation, the best way for you to fix the boot order changed on its own issue is replacing the old SATA HDD.
Bottom Line
BIOS boot order changes by itself can be very upsetting. Luckily, this post offers a comprehensive guide to solving the error. If you encounter the same error on your PC, you can try these solutions one by one until you resolve the error successfully.
About The Author

Position: Columnist
Charlotte is a columnist who loves to help others solve errors in computer use. She is good at data recovery and disk & partition management, which includes copying partitions, formatting partitions, etc. Her articles are simple and easy to understand, so even people who know little about computers can understand. In her spare time, she likes reading books, listening to music, playing badminton, etc.
User Comments :