About Ahcix64s.sys BSOD Error
The Ahcix64s.sys driver is a critical driver that manages RAID setups. If this driver becomes corrupted, it can lead to an Ahcix64s.sys BSOD error.
After researching this error on the Internet, I discovered that it is primarily caused by a corrupted RAID controller driver related to AHCI, such as the AMD RAID controller driver and Intel. Additionally, incorrect BIOS settings may also lead to this error.
If you also experience the Ahcix64s.sys blue screen error and want to know how to fix the Ahcix64s.sys BSOD error, you can continue reading to get some practical ways to fix the error below.
Way 1. Reinstall the Driver
As we analyzed above, the Ahcix64s.sys BSOD error can easily be caused by a corrupted RAID controller driver related to AHCI. So, you can try reinstalling the Ahcix64s.sys driver to fix the error. Here’s how to do it:
Step 1. Press the Win + X keys simultaneously to open the Quick Link menu.
Step 2. Select the Device Manager option from the menu.
Step 3. In the Device Manager window, expand the Storage controllers category.
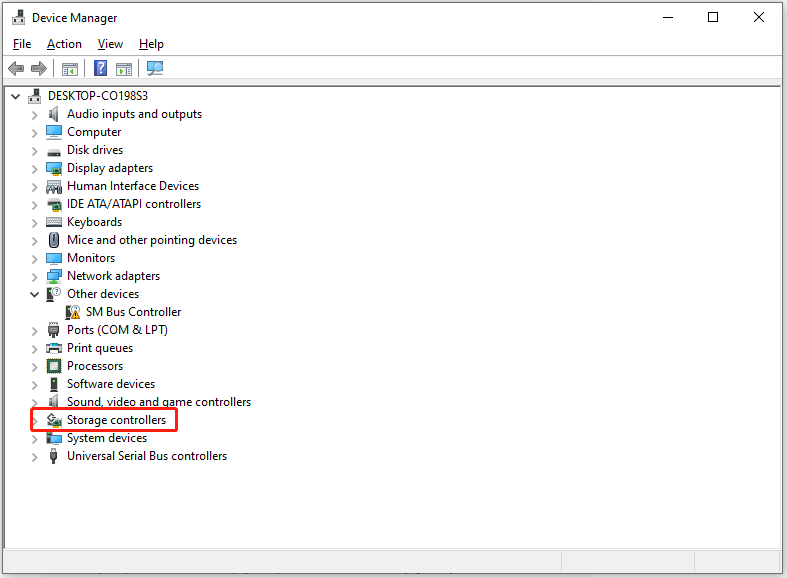
Step 4. Right-click the RAID Controller driver (whether it is AMD or Intel) and select Uninstall device from the menu. Then, click Uninstall in the Uninstall Device window to confirm.
Step 5. After that, go to the motherboard manufacturer’s website and download the chipset drivers.
Step 6. Install the downloaded driver, restart your computer and then check if the error is fixed.
Way 2. Perform System Restore
System restore can revert your computer to the state when the error hasn’t occurred. Therefore, you can try performing a system restore to fix the Ahcix64s.sys blue screen error. Here’s the guide:
- Reboot your PC to enter Safe Mode.
- Press the Windows and R keys simultaneously to open the Run window.
- Type “rstrui.exe” in the box and press Enter.
- Click Next, and you can find all the restore points you have created on your Windows computer to date.
- Select one restore point, and then click Next.
- Follow the on-screen instructions to complete the restore process.
- Once done, check if the error has been fixed.
Way 3. Reset BIOS Settings
Misconfigured BIOS settings might also cause the Ahcix64s.sys BSOD error. So, you can also try resetting the motherboard settings to fix the error. Here’s the way:
- Completely turn off the computer.
- Then, press the power button to turn on it.
- As soon as you see the manufacturer’s logo, start pressing the BIOS key to enter the BIOS settings.
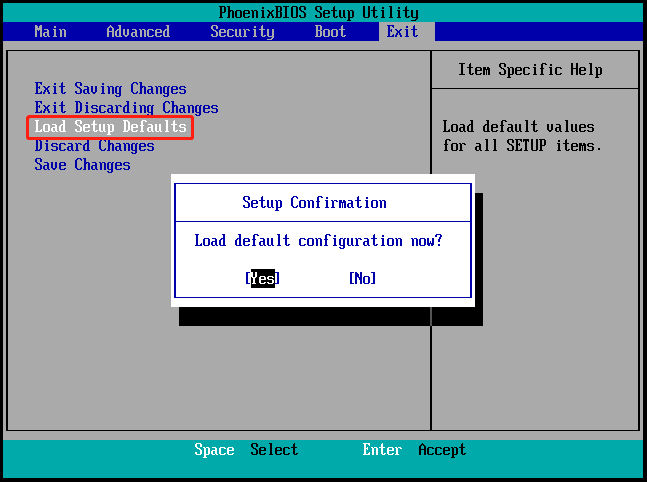
- Once you have accessed the BIOS settings screen, simply find and press the key that resets the BIOS settings or click the Reset icon.
Bonus Tip: How to Recover Lost Files After Fixing the Ahcix64s.sys BSOD Error?
What can you do if your important files are lost after fixing the Ahcix64s.sys BSOD error? Don’t worry. MiniTool Partition Wizard can help you. It is a professional and reliable data recovery tool that can help you easily recover lost files.
In addition, you can use this multifunctional partition software to help you check for disk errors, partition hard drives, move/resize partitions, convert MBR to GPT, change cluster size, rebuild MBR, do data recovery, and so on.
MiniTool Partition Wizard DemoClick to Download100%Clean & Safe
After downloading and installing MiniTool Partition Wizard on your computer, you can follow the steps below to use MiniTool Partition Wizard to help you recover lost files:
- Launch MiniTool Partition Wizard into its main interface.
- Select the Data Recovery feature from the top toolbar.
- In the next screen, choose the system partition and click Scan.
- Wait for the process to complete.
- Check the files that you want to recover.
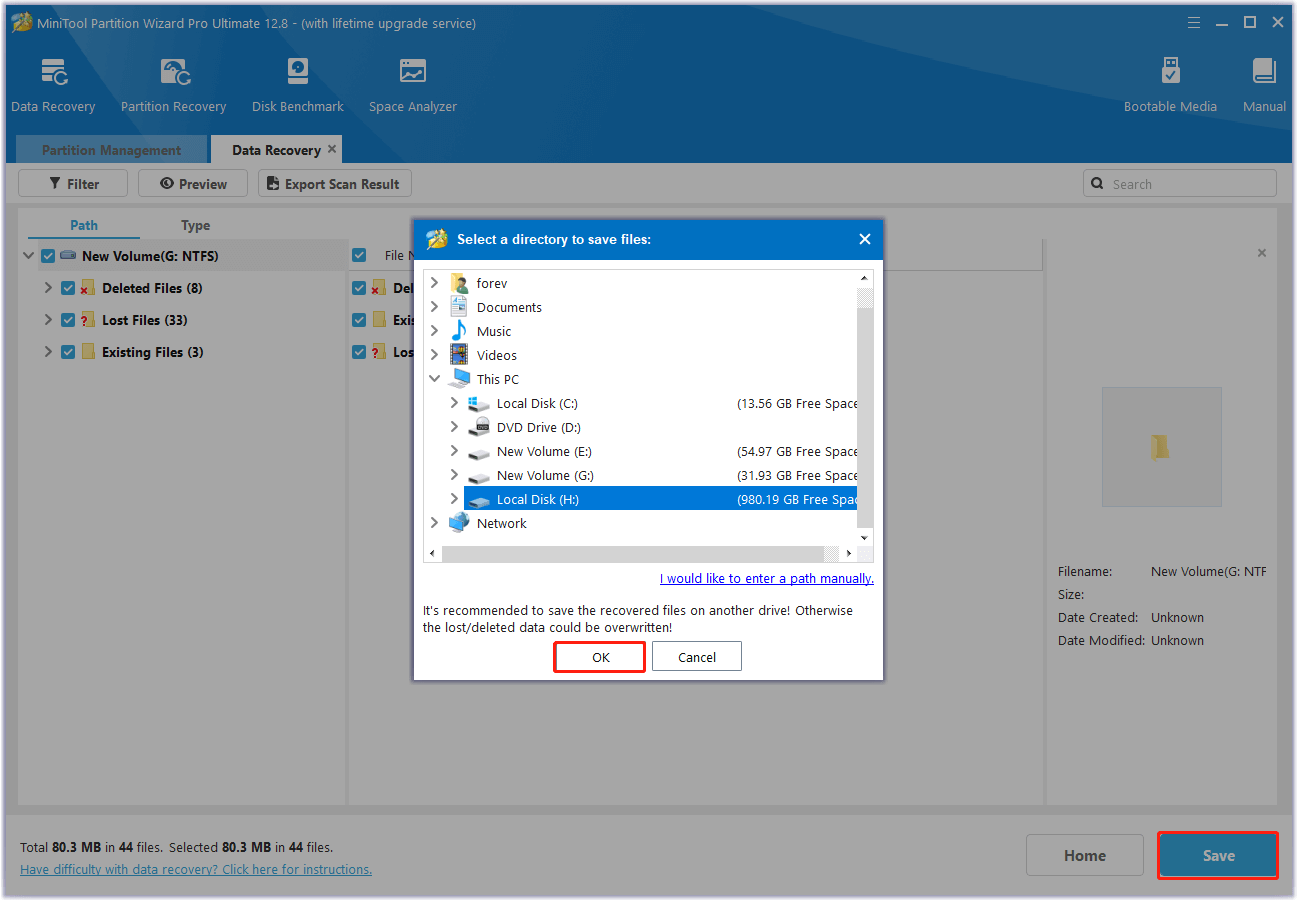
- Click Save.
- Choose a safe location for the recovered files.
- Click OK to confirm.
In Conclusion
How to fix the Ahcix64s.sys BSOD error? After reading this post, you may get the answers. This post provides 3 ways to help you get rid of the Ahcix64s.sys BSOD error.
About The Author

Position: Columnist
Charlotte is a columnist who loves to help others solve errors in computer use. She is good at data recovery and disk & partition management, which includes copying partitions, formatting partitions, etc. Her articles are simple and easy to understand, so even people who know little about computers can understand. In her spare time, she likes reading books, listening to music, playing badminton, etc.
User Comments :