What to do if you encounter an A2 code on motherboard? Don’t worry. This post from Partition Magic will provide some useful methods to A2 motherboard code. You can have a try.
Did you receive the A2 code on motherboard after you replaced the motherboard battery? A2 error code means that your system cannot find a boot device (such as HDD, SSD, or USB) because replacing the CMOS battery caused the BIOS settings to revert to defaults.
Here is a true example from the Tomhardware forum:
Getting an A2 error code after changing the CMOS battery and now PC won't boot? This weekend, I changed my motherboard's CMOS battery. Since changing the battery the computer won't start at all (not even to BIOS) and the code in the motherboard settles on A2, and that's it.https://forums.tomshardware.com/threads/getting-a2-code-after-changing-the-cmos-battery-and-now-pc-wont-boot.3799864/
Are you looking for any way to troubleshoot this problem? Fortunately, we can easily fix the A2 boot problem like any other system failure. Here are the troubleshooting methods that should be applied in this case.
Recover Data from Your PC
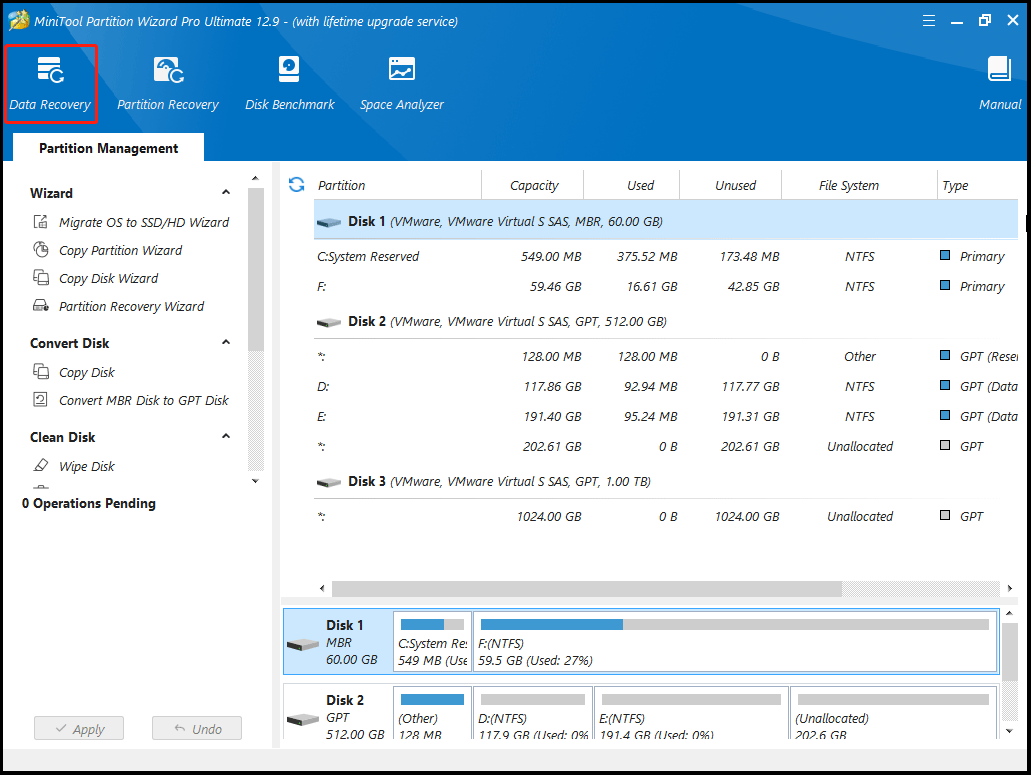
The motherboard code A2 may cause file or data loss. How to recover data if you lost data after this issue? You can recover data from your PC. To do this work, a professional data recovery tool for Windows 11/10/8/7 is highly recommended. MiniTool Partition Wizard is a great choice.
First, you need to create a USB bootable media using its Bootable Media feature, and then use the USB bootable media to boot your unbootable computer. After that, you can use the Data Recovery feature to recover lost data.
MiniTool Partition Wizard DemoClick to Download100%Clean & Safe
Fix 1. Configure Boot Order
As mentioned above, the A2 motherboard code that prevents your computer from booting properly usually occurs because the system cannot recognize a bootable device.
Well, the easiest way to fix this problem is to install only the drive that has the operating system installed or install the drive you want to install the operating system on first. Then restart and install the remaining drives.
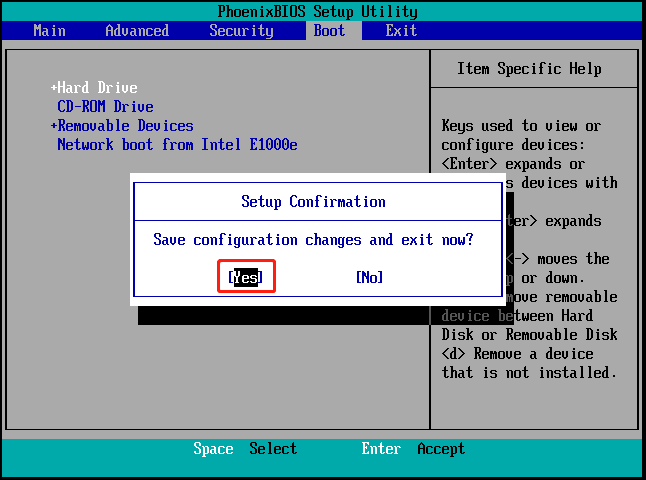
At this point, your motherboard should have automatically determined the boot order, but if it hasn’t, you can change it manually in the BIOS. Here is the guide:
- Restart your computer and press the BIOS key (F1, F2, F8, F10, F12, Del) to enter the BIOS menu.
- In the main menu, navigate to the Boot tab and set the hard drive containing OS as the first bot option.
- Press the F10 and Enter keys to save the change you’ve made.
- Then check if your computer boots properly.
Fix 2. Reset or Update the BIOS
Another way to fix the A2 motherboard code issue is to reset or update the BIOS. Here are the detailed steps to reset the BIOS:
- Boot your PC and enter the BIOS menu.
- Once you’re in the BIOS settings screen, find the menu named Setup Defaults (or Reset to Default, Setup Default, or Factory Default).
- Next, use the Load Setup Defaults option to back to the default values of your BIOS settings.
- Save the changes and wait for the next startup to complete.
- Check if the A2 code on motherboard has been solved.
If resetting doesn’t work, you may need to update the BIOS. Check if there is an update feature from the main menu and select it. If there is no such option, you must visit the computer manufacturer’s website and download and install it manually.
Fix 3. Update Drivers
If the A2 code on motherboard rarely occurs, you should also check the drivers installed on your Windows PC. For example, the USB 3.0 driver may cause boot issues.
Step 1: Boot into WinRE.
Step 2: Boot into Safe Mode.
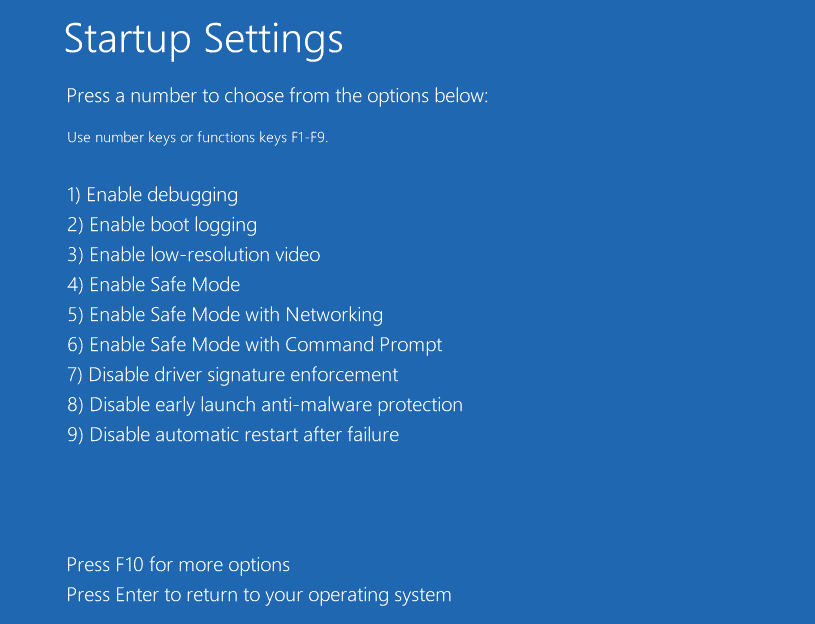
- Navigate to Troubleshoot > Advanced options after you enter WinRE.
- Click Startup Settings and wait for a while.
- Press the F5 key to choose Enable Safe Mode with Networking option, thus booting into safe mode.
After the computer boot into Windows or safe mode, you can update your driver.
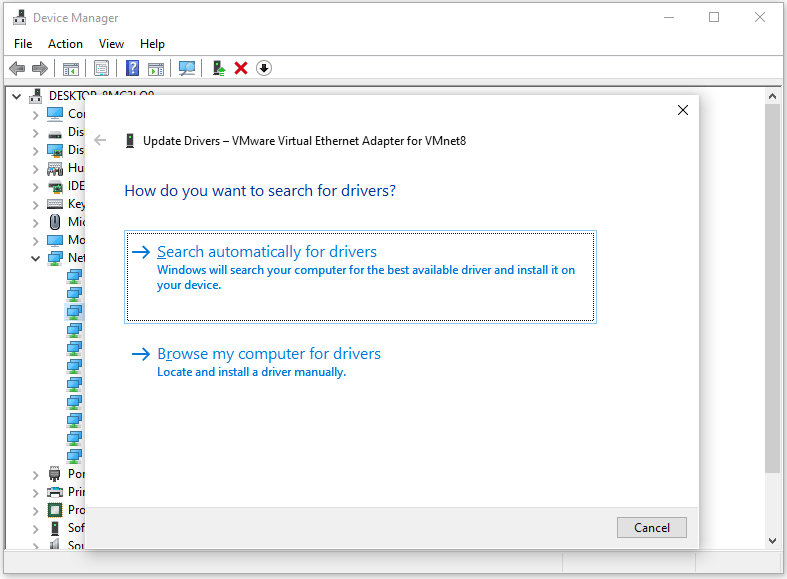
- Right-click on the Start menu and select Device Manager.
- In the Device Manager window, expand each category and see if any of them has a yellow exclamation mark next to it. Then right-click the device and select Update driver from the drop-down menu.
- In the new window, click on Search automatically for drivers. Then follow the on-screen instructions, and the drive should be updated to the latest version.
Bottom Line
This post offers you 3 useful methods to solve the A2 code on motherboard. You can have a try if you have this need.
About The Author

Position: Columnist
Vega joined MiniTool as an editor after graduation. She enjoys helping people with computer problems, including disk management, data recovery, and more. She is constantly expanding her knowledge in related fields. And she will continue to bring more easy-to-understand professional articles to help people solve various problems on the PC. In her daily life, Vega enjoys hanging out with friends, shopping online and listening to music. She is someone who knows how to enjoy life.
User Comments :