If you have encountered the Windows installation error 0xC1900101 - 0x20017 on your PC when you try updating your Windows to a higher version, like Windows 10/11, you come to the right place. This post from MiniTool Partition Wizard provides several effective solutions to fix the error.
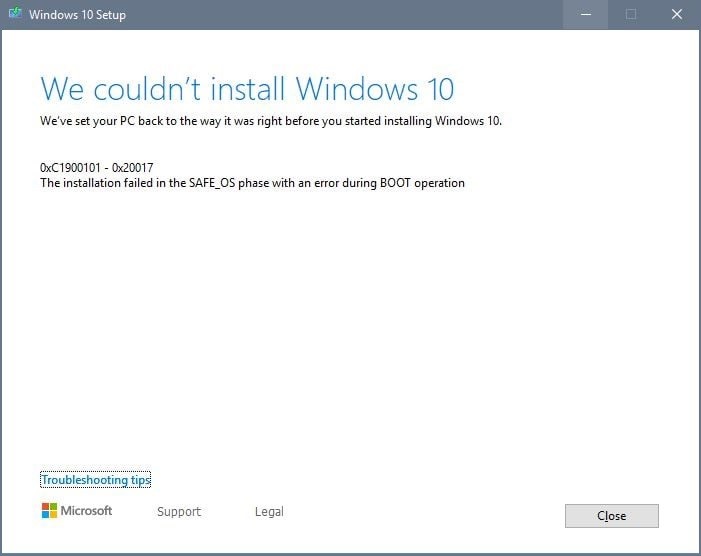
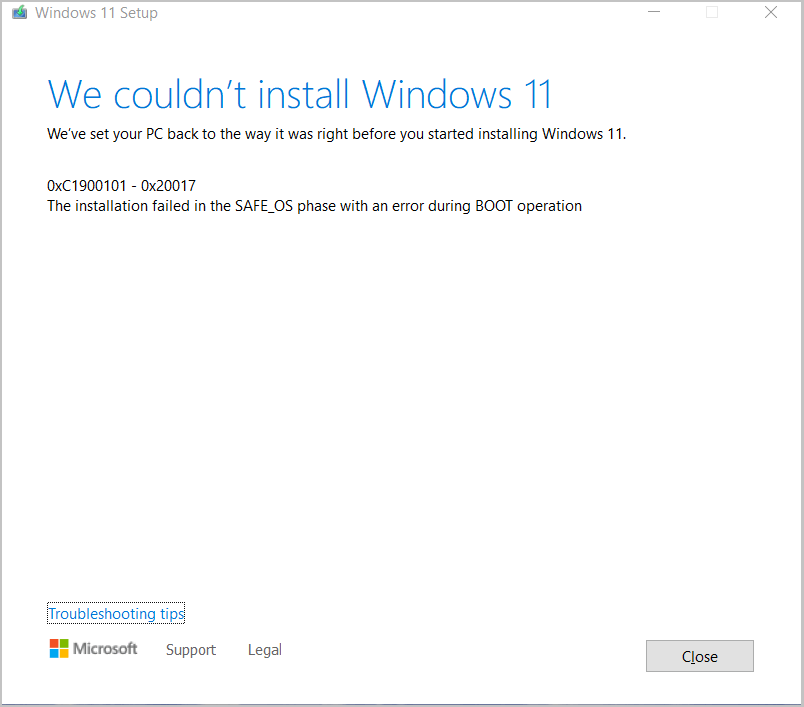
Some people encounter the error 0xC1900101 – 0x20017 on their computers when they try upgrading Windows to a higher version. When this error occurs, they can receive an error message like this.
“0xC1900101 – 0x20017
The installation failed in the SAFE_OS phase with an error during BOOT operation.”


Are you also encountering the same error? If you also encounter the same error and want to know how to fix the error 0xC1900101 – 0x20017, this post is worth reading.
Create a Restore Point
Before you try the following solutions to fix the Windows installation error 0xC1900101 – 0x20017, you need to create a restore point to in case something goes wrong. To create a system restore point, you can refer to this post: What Is System Restore Point and How to Create It? Look Here!
# 1. Try Some Basic Tricks
First, you can try some basic tricks to fix the Windows installation error 0xC1900101 – 0x20017. Some people fix the error with these basic tricks. You can also have a try.
- Update outdated drivers.
- Uninstall the problematic drivers.
- Make sure the Date & Time settings are correct.
- Make sure you have enough storage space.
- Uninstall the third-party antivirus apps.
- Disable the hard drive encryption (If enabled).
- Disconnect any external devices that aren’t needed during the installation.
- Update in Clean Boot state.
- Reset Windows Update components.
If you don’t have enough storage space, you can use a third-party app to help you get more available storage space. To do that, MiniTool Partition Wizard is a good choice. It is a professional and functional partition software that can help you resize partitions, delete unnecessary files, partition hard drive, convert MBR to GPT, do data recovery, and so on.
MiniTool Partition Wizard DemoClick to Download100%Clean & Safe
# 2. Disable the Wireless and the Bluetooth from the BIOS
Some people report that disabling the wireless and the Bluetooth from BIOS helps them fix the Windows upgrading error 0xC1900101 – 0x20017. You can also have a try.
To do that, you just need to restart and boot into the BIOS menu, go to the Advanced tab, proceed to the Wireless area, and then disable your wireless from here. After that, save the changes and restart your PC to check if the error has been resolved.
# 3. Disable the Secure Boot
Disabling the Secure Boot helps some people fix the error 0xC1900101 – 0x20017 successfully. If you also want to have a try, you can do as follows:
- Restart and boot into the BIOS menu.
- In the Security or Boot Options settings, find the Secure Boot option and Disable it.
- Save the changes and restart your PC to check if you have gotten rid of the error message “the installation failed in the SAFE_OS phase with an error during BOOT operation”.
# 4. Run CHKDSK
Disk errors can also cause the error 0xC1900101 – 0x20017. In this situation, you can try running CHKDSK to scan and fix errors. Here are the detailed steps:
- Run Command Prompt as administrator.
- Type “chkdsk C: /f /r” and press Enter.
- Type “y” to confirm to run the check disk utility on the next start.
- Restart your PC to perform the error checking.
# 5. Run the Windows Update Troubleshooter
Windows update troubleshooter is a built-in tool on Windows that can fix many update-related errors. So, you can try running the Windows update troubleshooter to fix the Windows upgrading error 0xC1900101 – 0x20017. Here’s the way:
- Press the Windows and I keys simultaneously to open the Settings window.
- Navigate to Update & Security > Troubleshoot.
- Click the Additional troubleshooters link.
- Choose Windows Update and click Run the troubleshooter.
- Follow the on-screen instructions to complete the process.
# 6. Delete the SoftwareDistribution Folder
Windows update files are always stored in this location: “C:WindowsSoftwareDistribution”. However, this folder is easy to corrupt. If you suspect the error 0xC1900101 – 0x20017 is caused by the corrupted folder, you need to rebuild it to fix the error.
If you don’t know how to delete the folder and rebuild the data, you can follow the guide in this post: How to Rename or Delete Software Distribution Folder on Windows.
# 7. Disable the Intel Virtualization Technology
In some cases, the enabled Intel Virtualization Technology can cause the error 0xC1900101 – 0x20017. So, you can try disabling the Intel Virtualization Technology to fix the error. Here’s how to do it:
- Enter BIOS settings.
- Disable the Intel VT-d features in Advanced settings > Chipset.
- Save and exit from BIOS settings.
- Try to install the update.
# 8. Changing Your Registry
If none of the above methods can fix the Windows upgrading error 0xC1900101 – 0x20017, you can try modifying certain key values under the registry to fix the error. To do that, please follow the guide:
Step 1. Press the Windows and R keys simultaneously to open the Run window.
Step 2. Type “regedit” and press Enter.
Step 3. Click Yes in the UAC window.
Step 4. Before making any changes to the registry, you need to export your registry. To do that, you need to do as follows:
- In the Registry window, go to File and then select Export.
- Select All and then enter the file name.
- Choose a location and click on Save.
- Once done, you can back up your Registry successfully.
Step 5. Navigate to this path “HKEY_LOCAL_MACHINE\SOFTWARE\Microsoft\WindowsSelfHost\Applicability”.
Step 6. Then change the following key values to:
- Ring = WIF
- RingBackup = WIS or Enabled
- EnablePreviewBuilds = 2
- BranchName = TH1
- UserPreferredBranchName = TH1
Step 7. After that, restart your PC to apply all the changes.
Wrapping Things up
How to fix the error 0xC1900101 – 0x20017? This post provides several feasible solutions to help you fix the error with ease.

![[A Full Guide] Windows Update Error 8007042B - 0x4001E](https://images.minitool.com/partitionwizard.com/images/uploads/2023/09/8007042b-0x4001e-thumbnail.png)
![[8 Fixes] Media Creation Tool Error 0x80070005 - 0x90002](https://images.minitool.com/partitionwizard.com/images/uploads/2023/09/0x80070005-0x90002-thumbnail.png)


User Comments :