Are you looking for effective ways for this error 0xc1900101 - 0x20004 the installation failed in the SAFE_OS phase? If yes, you are at the right place. This post from MiniTool Partition Wizard provides several feasible ways for this error.
When upgrading your Windows operating system or installing an update, you may encounter the error 0xc1900101 – 0x20004 the installation failed in the SAFE_OS phase. Its full error message is:
0xc1900101 – 0x20004. The installation failed in the SAFE_OS phase with an error during INSTALL_RECOVERY_ENVIRONMENT operation
Most of the time the installation will get stuck at 25%. This issue is related to BIOS and SATA settings. Whatever the cause of this error, you can try the following solutions to fix error 0xC1900101 – 0x20004.
Solution 1. Unwind All SATA Cables
Since the installation is done online and the information is stored on the system, unplug the SATA cable. If possible, unplug any attached external devices such as printers, external USB drives, or USB hubs. Once done, reinstall. If it still doesn’t work, continue to method 2 below.
If you are new to computer hardware, you should seek professional help to untangle the SATA cable from the hard drive. If SATA cables are connected to other peripherals, disconnect them as well.
Solution 2. Check the Hard Disk for Errors
Hard disk errors may cause many issues like error code 0xC1900101 – 0x20004. So, you’d better check your hard disk for errors. The steps are as follows:
Step 1: Press the Win + E key to open the File Explorer, and then right-click on the hard drive and select Properties.
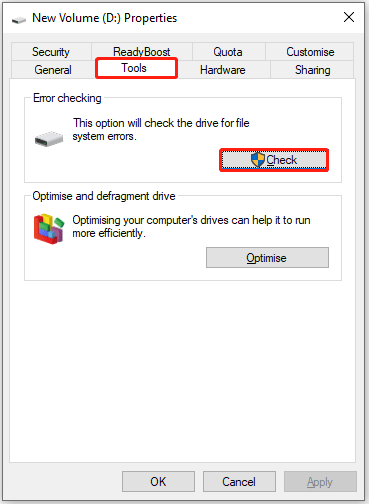
Step 2: In the pop-up window, switch to the Tools tab, and then click on the Check button under the Error checking section.
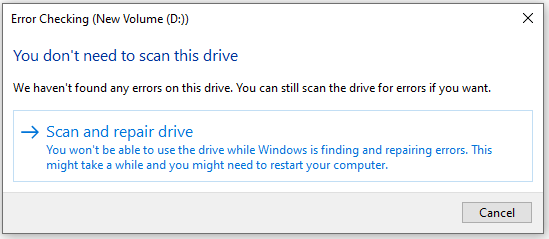
Step 3: Click on Scan and Repair drive and wait for the process to complete.
Besides, you can also use a powerful disk manager – MiniTool Partition Wizard. It not only can help you repair file system errors but also check bad sectors easily and quickly.
MiniTool Partition Wizard FreeClick to Download100%Clean & Safe
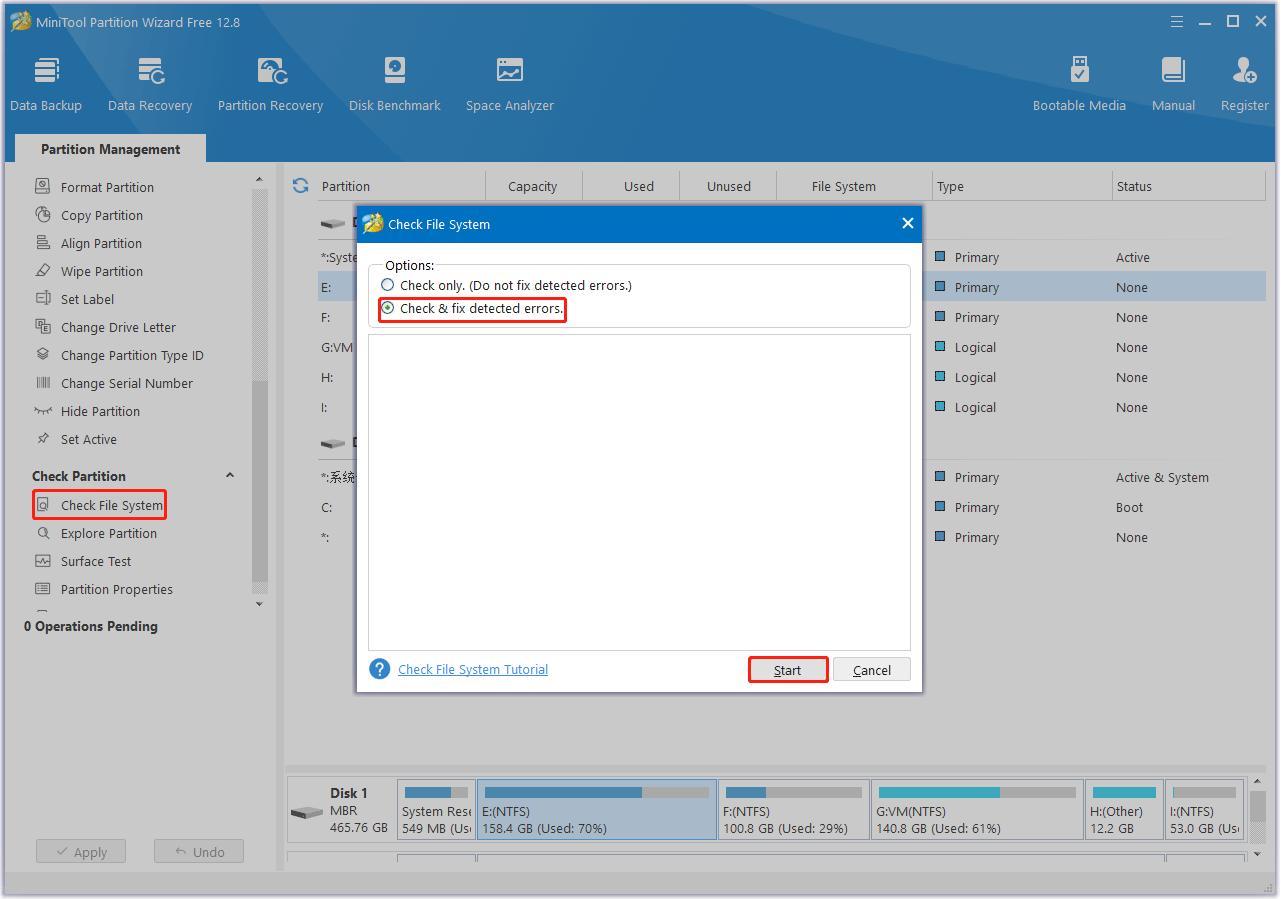
Step 1: Download and install MiniTool Partition Wizard on your computer. Then launch it to get its main interface, and then select the target drive, and click on Check File System from the left action panel.
Step 2: Select Check & fix detected errors and click on the Start button. This tool will check and repair file system errors immediately.
Step 3:In the main interface, select the drive again and click on Surface Test from the left pane.
Step 4:Click on the Start Now button in the pop-up window. After that, this tool will scan the whole drive immediately and show you the test result.
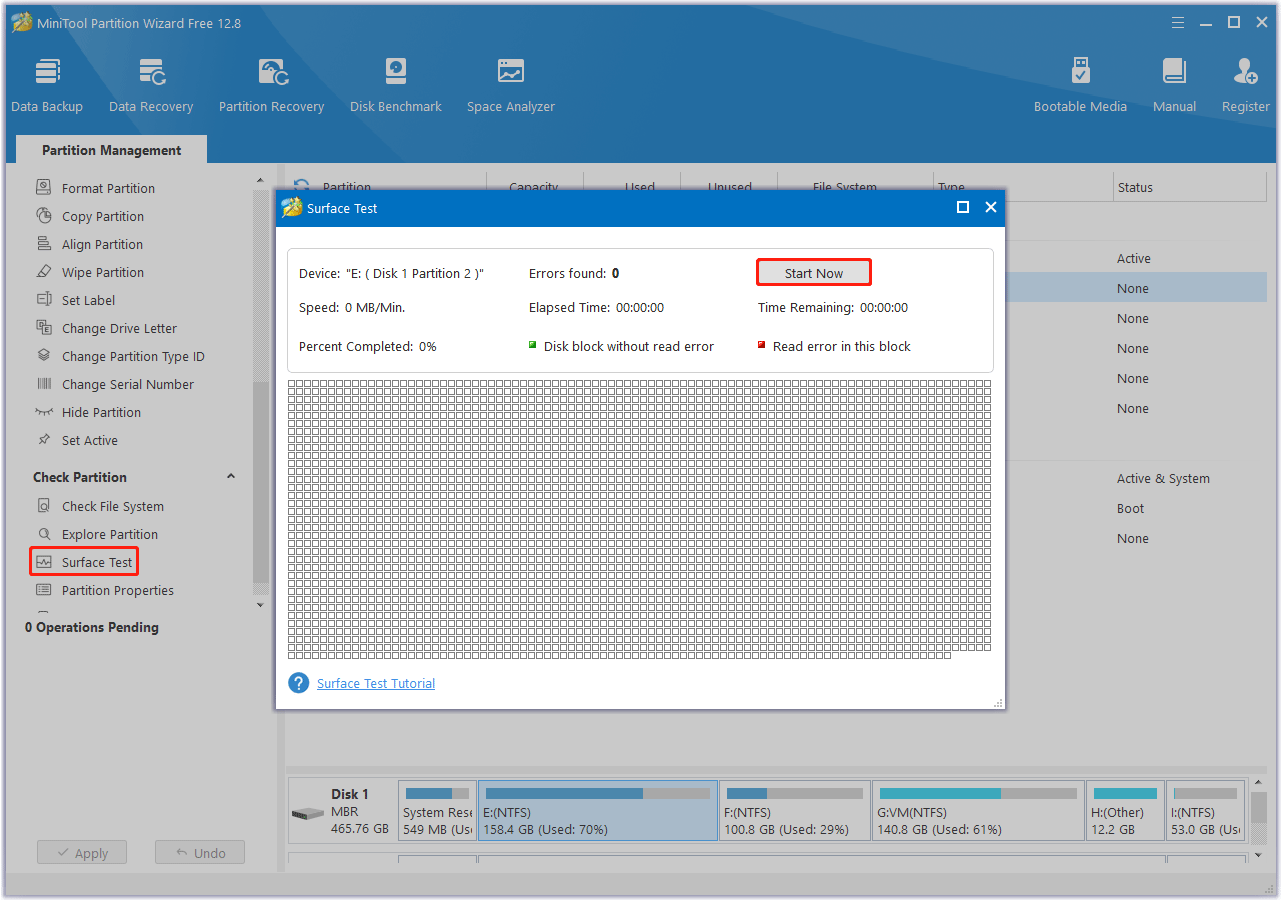
Step 5: When the hard drive error test process is completed, the bad sectors on the hard drive will be marked with red color. In this case, you can either use this bad sector repair guide or consider replacing it with a new one.
Solution 3. Reset BIOS
If the problem persists, resetting the BIOS settings to default can help. For detailed information, you can refer to this article: How to Reset BIOS/CMOS in Windows 10 – 3 Steps
Bottom Line
What to do if you encounter the error code 0xc1900101 – 0x20004? Three solutions are provided in this post that may help you solve this problem.

![How to Fix Windows Update Error 0xc1900202? [5 Ways]](https://images.minitool.com/partitionwizard.com/images/uploads/2023/08/0xc1900202-thumbnail.png)
User Comments :