With my PC, I have already successfully created a 'Media Creation Tool' USB stick several times, including the most recent: 21H2. Since yesterday, however, the operation has no longer been successful. Every time, about halfway through, it gives me the error: 0x80042401 - 0xA001B…https://answers.microsoft.com/en-us/windows/forum/all/media-creation-tool-error-0x80042401-0xa001b/34764cec-89a8-43f2-bd16-015aa996fc20
If you want to clean install Windows, you may want to create a Windows installation USB drive using the Windows Media Creation Tool. However, some of you may encounter the Windows Media Creation Tool 0x80042401 – 0xA001B error. Then, the following solutions may help you get rid of the issue.
Way 1. Make Sure the USB Drive Is Big Enough
To make a Windows installation USB drive, the USB drive should be more than 16GB. If the USB drive is not big enough, the Windows Media Creation Tool 0x80042401 – 0xA001B error may occur.
Way 2. Reformat the USB Drive
You can reformat the USB drive to FAT32 or NTFS and then try creating the Windows installation USB drive again to see if the 0x80042401 – 0xA001B error disappears.
To reformat the USB drive, you can open the Windows File Explorer, right-click the USB drive on the left navigation bar, and then choose Format. Then, on the pop-up window, select FAT32 or NTFS file system and click Start.

Way 3. Make Sure the USB Drive Is MBR Style
It seems that if the USB drive is GPT style, the Windows Media Creation Tool may not work properly. Therefore, make sure your USB drive is MBR. Here is the way:
Step 1: Press the Windows logo key + R to call out the Run dialog. In the text bar, type “diskpart” and press Enter to open it.
Step 2: In the diskpart.exe window, execute the command: List disk. This command will list all disks connected to your computer. Check if there is an asterisk under the Gpt column behind the USB drive. If so, execute the following commands one by one. If not, exit the DiskPart tool.
- Select disk # (# is the number of the USB drive. You can identify it according to the size)
- Clean (This will clean the USB drive)
- Convert MBR (This will convert the USB drive to MBR)
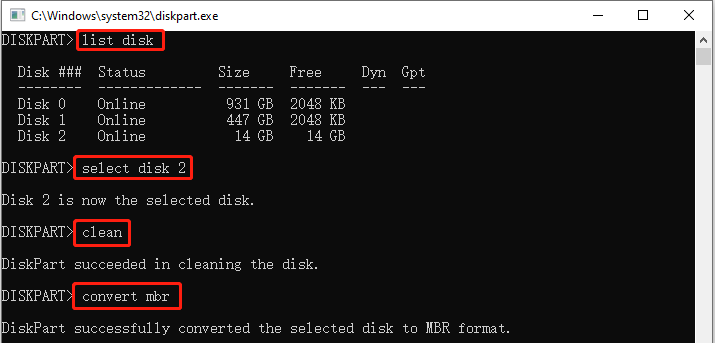
Step 3: Create a new partition on the USB drive and then create the Windows installation USB drive again.
Way 4. Create the Installation Media Manually
If the Windows Media Creation Tool fails to create the Windows installation USB drive, you can create it manually using the ISO file. Here is the guide:
Step 1: Download the Windows ISO file from Microsoft. Then, connect the USB drive to your PC and make sure it is MBR style.
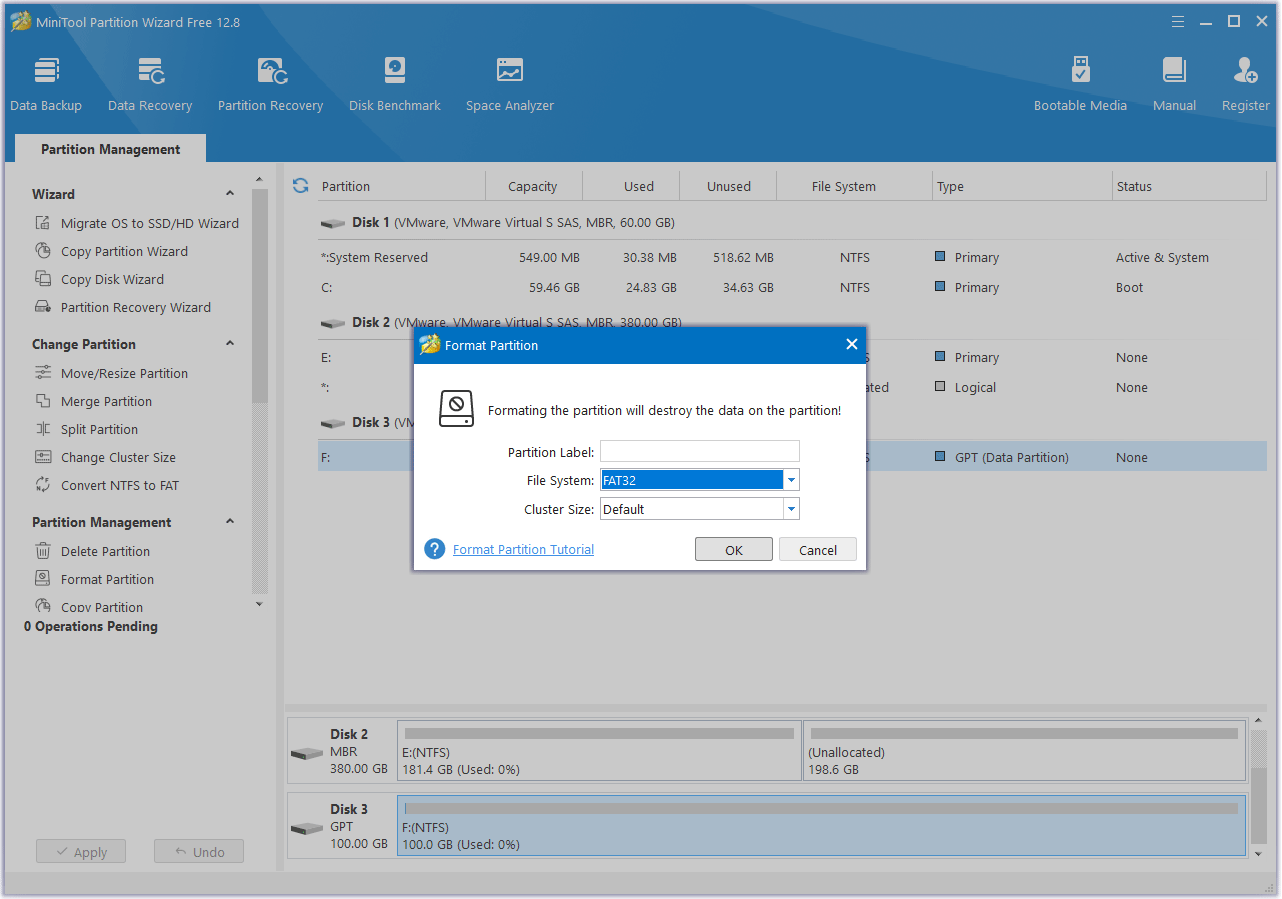
Step 2: Format the USB to FAT32 so that it can boot either BIOS-based or UEFI-based PCs. If the USB drive is larger than 32GB, you can use MiniTool Partition Wizard to format the drive to FAT32.
MiniTool Partition Wizard FreeClick to Download100%Clean & Safe
Step 3: Right-click on the ISO file and select Open with > Windows Explorer. Copy all files under this folder to the USB drive.
Step 4: Open Disk Management, right-click the USB drive partition, and click Mark Partition as Active. Then, you can use the USB drive to install Windows.
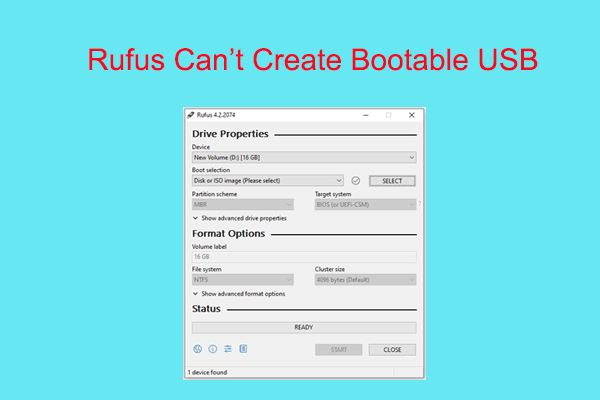
Way 5. Use Rufus to Create the Installation Media
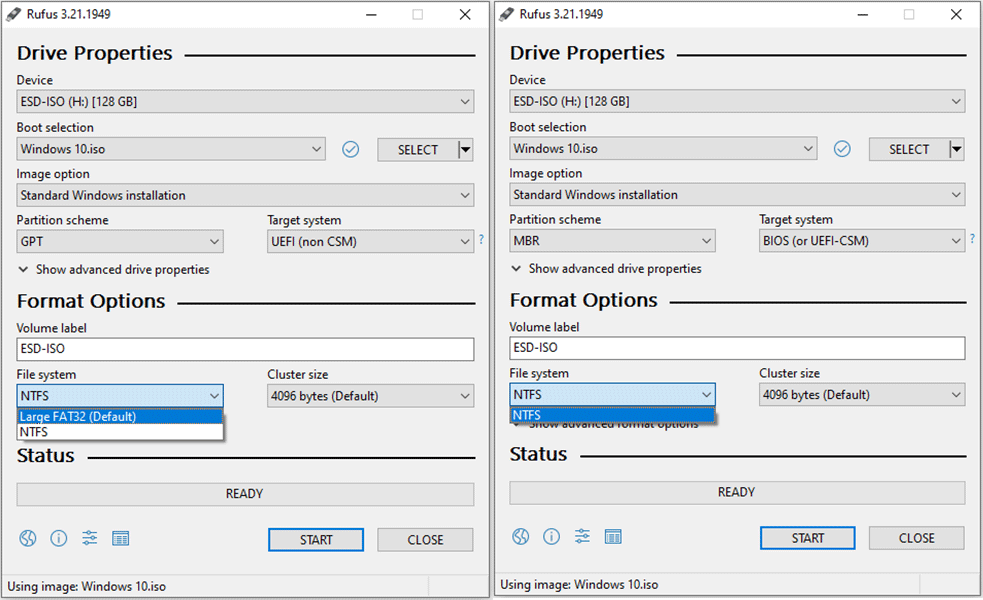
Rufus is a free and open-source burning program. It can also create a Windows installation USB drive using the ISO file. Here is the guide:
- Download the Windows ISO file from Microsoft.
- Download the latest Rufus version and then double-click the Rufus.exe file to launch it.
- Make sure the USB drive is connected to your PC. Then, under Boot selection, click Select and choose the Windows ISO file.
- You can change the Partition scheme. If you select the MBR style for the USB drive, the USB drive can be used to boot BIOS-based PCs only. If you select the GPT style, the USB drive can only be used to boot UEFI-based PCs.
- Then, click Start.
Bottom Line
This post offers you 5 ways to solve the Windows Media Creation Tool 0x80042401 – 0xA001B error. You can try them one by one.
About The Author

Position: Columnist
Linda has been working as an editor at MiniTool for 5 years. She is always curious about computer knowledge and learns it crazily. Her articles are simple and easy to understand. Even people who do not understand computer can gain something. By the way, her special focuses are disk management, data recovery and PDF editing.
User Comments :