When trying to install the Windows 2018 Security and Quality Rollup update, lots of users are trouble by the Windows Update error 0x80092004. Now, you come to the right place. MiniTool explores several effective troubleshooting methods for you.
The causes behind the Windows Update error 0x80092004 could be varied. These update errors often occur when Windows Updates cannot work the way they should. Sometimes, the updates you have downloaded get corrupted or faulty, which can also lead to error 0x80092004.
Now, let’s see how to fix Windows Update error 0x80092004. We will walk you through the top 5 troubleshooting methods.
Solution 1. Run Windows Update Troubleshooter
The first and simplest method is to run Windows Update troubleshooter. This utility is often used to troubleshoot many common Windows Update issues such as Windows Update stuck at 0%, error 0x80070422, etc. Here’s how to do that:
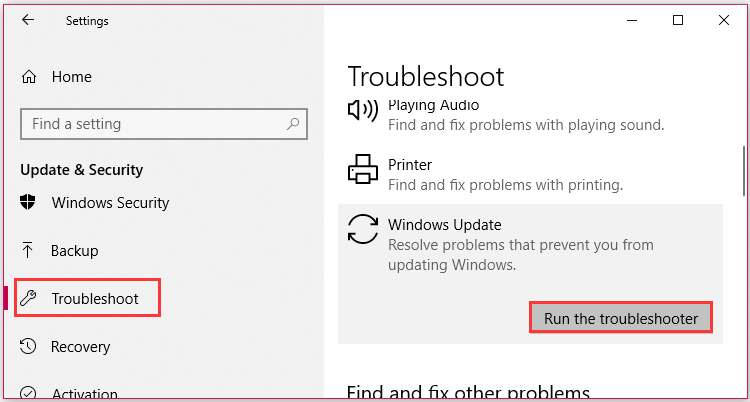
Step 1. Press Win + I keys to open the Setting window, and then click on Update & Security section to go on.
Step 2. Navigate to the Troubleshooter section on the left side, and then scroll down the right sidebar to find the Windows Update. Double click to open it and click on Run the troubleshooter button.

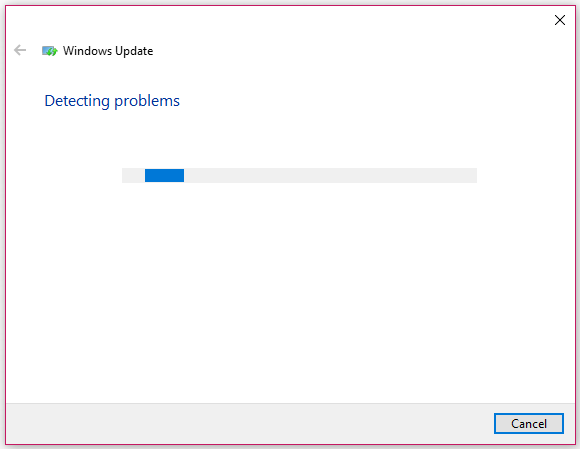
Step 3. Then this tool will start detecting the problems at once. Wait for this process to complete and check if you can install the Windows update without 0x80092004 error code.

Solution 2. Use DISM Tool to Remove the Recent Updates
Usually, you need to roll back and clean up all update files when an update fails. Here you can manually clean the package. Open the Update History to check how much KB updates were installed. Then follow the steps below to manually remove them.
Step 1. Press Win + R keys to open the Run dialog box, and then type cmd in it and press Ctrl + Shift + Enter keys to open the elevated command prompt.
Step 2. Type the Dism /online /Get-Packages command and hit Enter to open the list of packages you have installed currently.

Step 3. Then type the following commands and hit Enter to remove the installed packages.
dism.exe /online /remove-package /packagename:Package_for_RollupFix_Wrapper~31bf3856ad364e35~amd64~~16299.248.1.17 /packagename:Package_for_RollupFix~31bf3856ad364e35~amd64~~16299.125.1.6 /packagename:Package_for_RollupFix_Wrapper~31bf3856ad364e35~amd64~~16299.192.1.9 /packagename:Package_for_RollupFix~31bf3856ad364e35~amd64~~16299.192.1.9 /norestart
Step 4. Restart your computer and come back to the elevated command prompt. Then run the following command.
Dism.exe /online /Cleanup-Image /StartComponentCleanup
Now, you can try installing this update and check if the Windows Update error 0x80092004 disappears.
Solution 3. Perform a System Restore
In addition to the above method, you can perform a system restore to roll back your system to an earlier date. This operation will clean up the corrupted updates. After restoring your system, you can try installing the Windows updates again and check if the error 0x80092004 is fixed.
Click here to know more detailed steps.
Solution 4. Delete the Faulty Updates from Software Distribution Folder
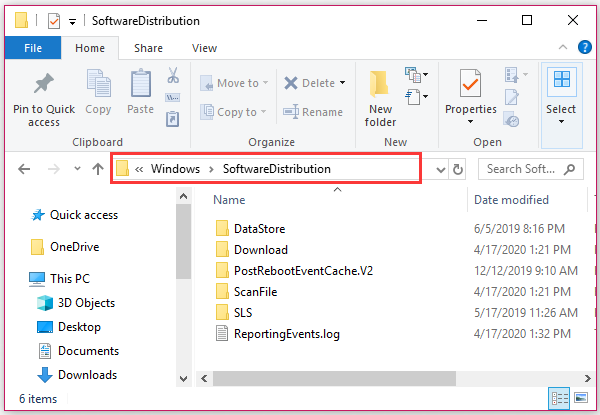
To clean up the faulty update files, you can delete the Software Distribution folder in File Explorer. As you might know, the downloaded windows update files are saved in a dedicated folder called SoftwareDistribution. Here you can follow the steps below to delete it manually.
Step 1. Press Win + E keys to open the File Explorer window.
Step 2. Click on This PC on the left side, and then navigate to the C:WindowsSoftwareDistribution path. Then select the folder and click on the delete key.

Solution 5. Manually Install the Windows Updates
The last way to get rid of the 0x80092004 error code is to install the Windows update manually. You can check your pending Windows updates and try installing it from here. Click here to visit the Microsoft Update Catalog to download the KB update.
Step 1. Search for the updated version in the search box and download the update on your computer.

Step 2. Then double click to execute this update and check if the error still persists.

User Comments :