What to do if Windows 11 won’t boot? This post from MiniTool Partition Wizard offers you 10 ways to solve the Windows 11 not booting/loading/starting/turning on issue. You can have a try.
Why Is Windows 11 Not Booting/Starting/Loading/Turning on?
Nowadays, many people may have upgraded their PCs to Windows 11. However, some people report that they have encountered the Windows 11 not loading/booting/starting/turning on issue.
The specific situation may be as follows:
- No sign of power. This issue is usually related to the power supply unit, the power cable, etc.
- Windows 11 starts to boot but shuts down at once. This issue may be caused by power failure, computer overheating, loose contact between memory and motherboard slot, etc.
- The power light is on but no display. The cause may be the faulty monitor or damaged motherboard.
- Windows 11 is stuck on the logo screen, boot screen, or loading screen. This issue may be caused by incompatible external devices, motherboard firmware failure, failed POST process, etc.
- Windows 11 black screen. The causes include hardware issues, failed POST process, incorrect BIOS settings, hard drive failure, missing or corrupt system files, etc.
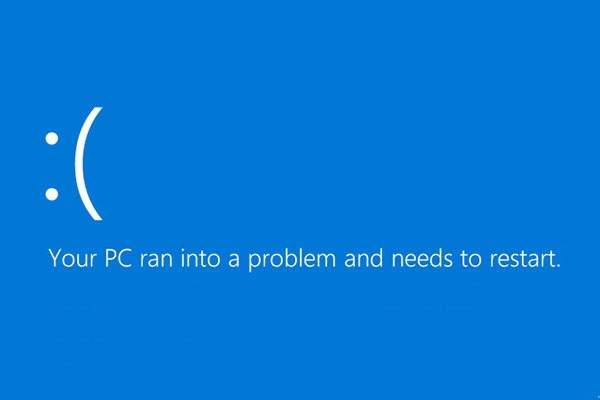
- Windows 11 blue screen. The causes include incompatible drivers, incompatible or corrupt memory bars, hard drive failure, computer overheating, viruses, missing or corrupt system files, etc.
How to Fix the Windows 11 Not Booting / Starting / Loading / Turning on Issue
If Windows 11 won’t boot, you can try the following ways to solve this issue.
Way 1. Cool Down Your Computer
Before you perform any methods, you need to make sure that the computer is cool enough. Then, power on your computer and see if it can enter Windows 11. If not, it means that the issue is not caused by overheating.
If the Windows 11 not booting issue is caused by overheating, you can try the following methods to get rid of this issue permanently.
- Make sure you don’t do any CPU or GPU overclocking.
- Remove dust from the fan.
- Replace the thermal paste.
Way 2. Remove All the External Devices
Sometimes, incompatible external devices may also cause the “Windows 11 stuck on boot screen” issue. Therefore, you can remove all the peripheral equipment and then power on the PC again to see if the issue is solved.
Way 3. Check the Power Supply Unit and the Power Cable
When you power on your PC, if the power light is not on or it is just on and then immediately off, you should check the PSU and the power cable.
- Remove the power cable and the battery.
- Plug in the power cable and then try powering on the computer.
- If the PC is on, it means that the battery is corrupt and you need to replace it.
- If Windows 11 won’t start still, try another power cable. If the issue persists, it’s possible that the motherboard gets damaged.
Way 4. Check the Monitor
My laptop won’t turn on but the power light is on Windows 11. Some people report this issue. In this case, you need to check if the monitor works normally. You can connect an external display to your computer and then power on the PC to see if Windows 11 is loading normally.
If the Windows 11 not loading issue persists, you need to consider that the issue is caused by a damaged motherboard. Then, replacing the motherboard may solve the issue.
Way 5. Flash the BIOS
Is your Windows 11 stuck on boot screen? If so, you can try entering the BIOS. If you cannot enter the BIOS, you should consider that the BIOS is corrupt. Then, you can flash the BIOS in the following 2 ways.
- Use BIOS FlashBack.
- Download the BIOS file into a USB drive and connect it to your computer. The PC may detect the file in the USB drive and then flash the BIOS automatically.
Way 6. Adjust the BIOS Settings
If Windows 11 freezes on startup, you should enter the BIOS to check if all settings are OK. For example, you should make sure the boot mode is right, the boot device is right, and so on. If necessary, you can reset the BIOS.
Way 7. Use Repair Tools in WinRE
If Windows 11 won’t start and you are facing a blue screen, please try powering on and off your computer repeatedly to enter the WinRE. WinRE offers many tools to help you solve the Windows 11 freezing on startup issue.
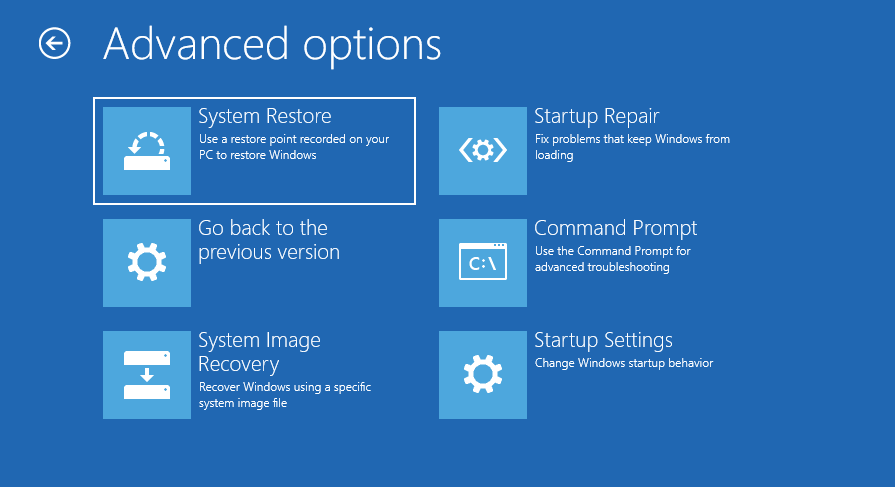
#1. Run Startup Repair
Go to Troubleshoot > Advanced options and click Startup Repair. This option will fix the most common issues that prevent your computer from loading correctly.
#2. Use Command Prompt to Repair System Files
Click Command Propmt and execute the command “sfc /scannow”. If the Windows 11 freezing on startup issue is caused by corrupt system files, this method may work.
#3. Uninstall Windows Updates
Some people report that Windows 11 won’t boot after update. It’s very likely that the update caused the issue. Then, you can uninstall it. To do that, you can click Go back to the previous version. Sometimes, this option is named Uninstall Updates.
# 4. Use System Restore
This option can revert your computer’s state to a previous point in time. Therefore, if Windows 11 won’t boot after update, this option may also work. You just need to click this option and then follow the on-screen instructions.
#5. Reset Your PC
This option can restore your computer to the factory settings. In addition, this option offers you the choice to keep your personal files. You just need to click Troubleshooter > Reset this PC and then follow the on-screen instructions.
Way 8. Rebuild MBR
The first sector of the disk is called Master Boot Record (MBR). It stores boot codes and partition table. If it is corrupt, Windows 11 won’t load because the PC can’t find a bootable device. Then, you can refer to the following guide to repair it.
Step 1: On a well-running computer, create a Windows installation USB drive using the Windows Media Creation Tool.
Step 2: Insert the USB drive into the computer, on which Windows 11 won’t load. Start the computer. Once the PC logo appears, press the BIOS key (Del, Esc, F2, etc.) to enter the firmware. In the firmware, change the boot drive to the USB drive. Save and exit the firmware.
Step 3: The PC will boot from the USB drive and you will see the Windows Setup window. On the Install Now window, click Repair my computer. Go to Troubleshoot > Advanced options > Command Prompt.
Step 4: Execute the following commands one by one.
- bootrec /fixmbr
- bootrec /fixboot
- bootrec /rebuildbcd
Way 9. Reinstall Windows 11
If Windows 11 won’t boot due to software issues, reinstalling Windows 11 can solve the issue in most cases. You need to create a Windows installation USB drive on a well-running PC and then use this USB drive to reinstall Windows 11.
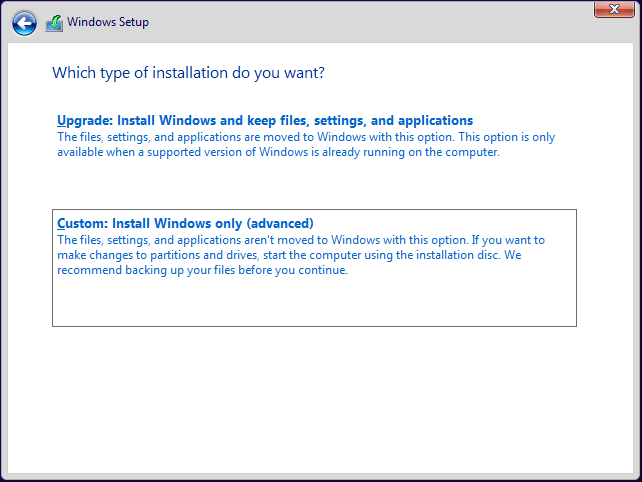
Note that it offers two types of installation. When it asks you which type of installation you want, choose Upgrade first. This option will allow you to keep your personal files. If this method fails or there is no important file, you can choose Custom. This option will format the C drive and then reinstall Windows.
Way 10. Check If the Hard Drive Failing
If you have tried all of the above ways but none of them work, you should check if the system hard drive is damaged. If the system hard drive is damaged, you will likely see S.M.A.R.T errors or the BIOS cannot detect the hard drive.
Of course, you can also use software like MiniTool Partition Wizard to check if the hard drive is healthy. MiniTool Partition Wizard is a multifunctional program that can partition hard drive, clone hard drive, recover hard drive data, etc. Here is how to use this software to check if the system hard drive is damaged.
MiniTool Partition Wizard DemoClick to Download100%Clean & Safe
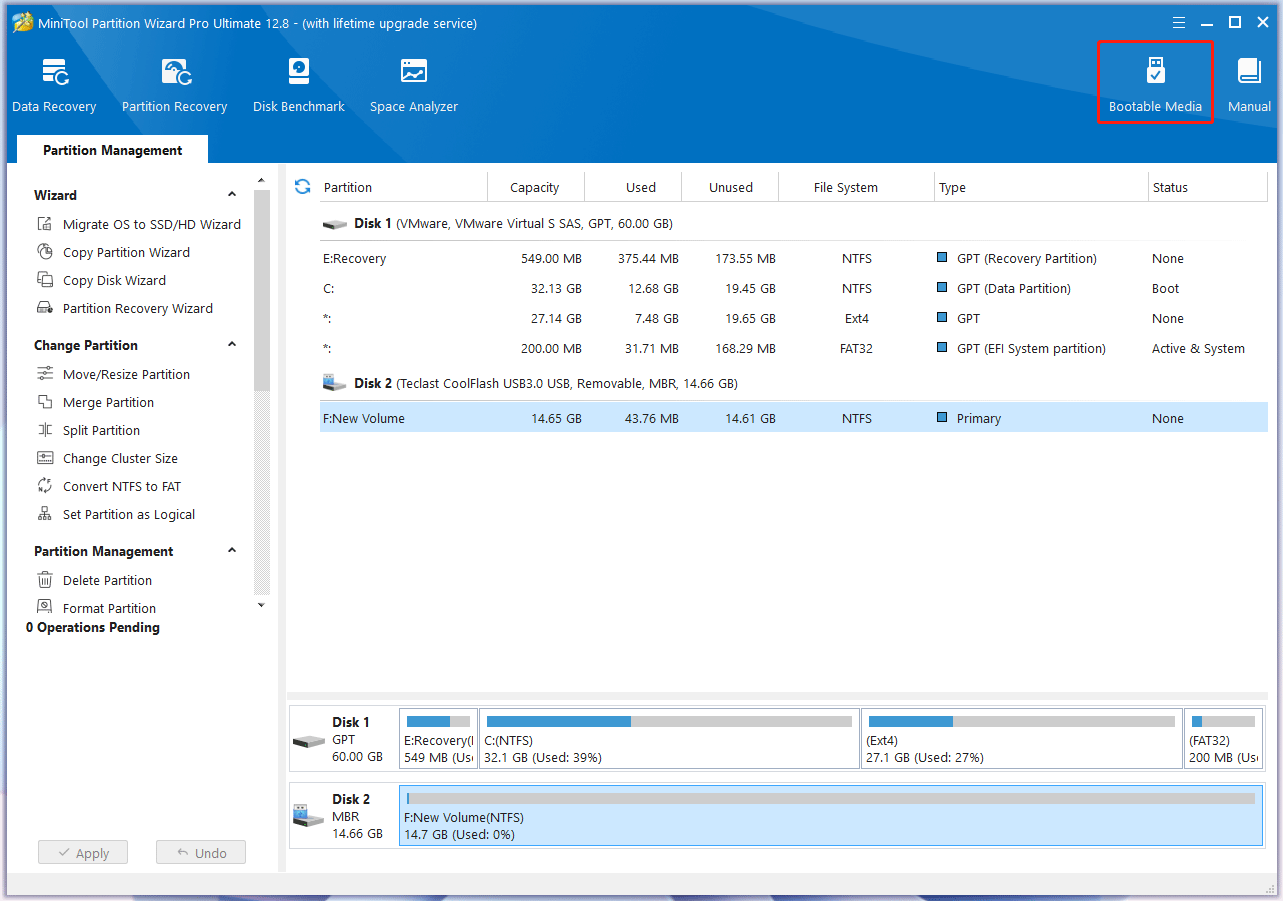
Step 1: Insert a USB drive into a normal PC. Launch MiniTool Partition Wizard and click Bootable Media.
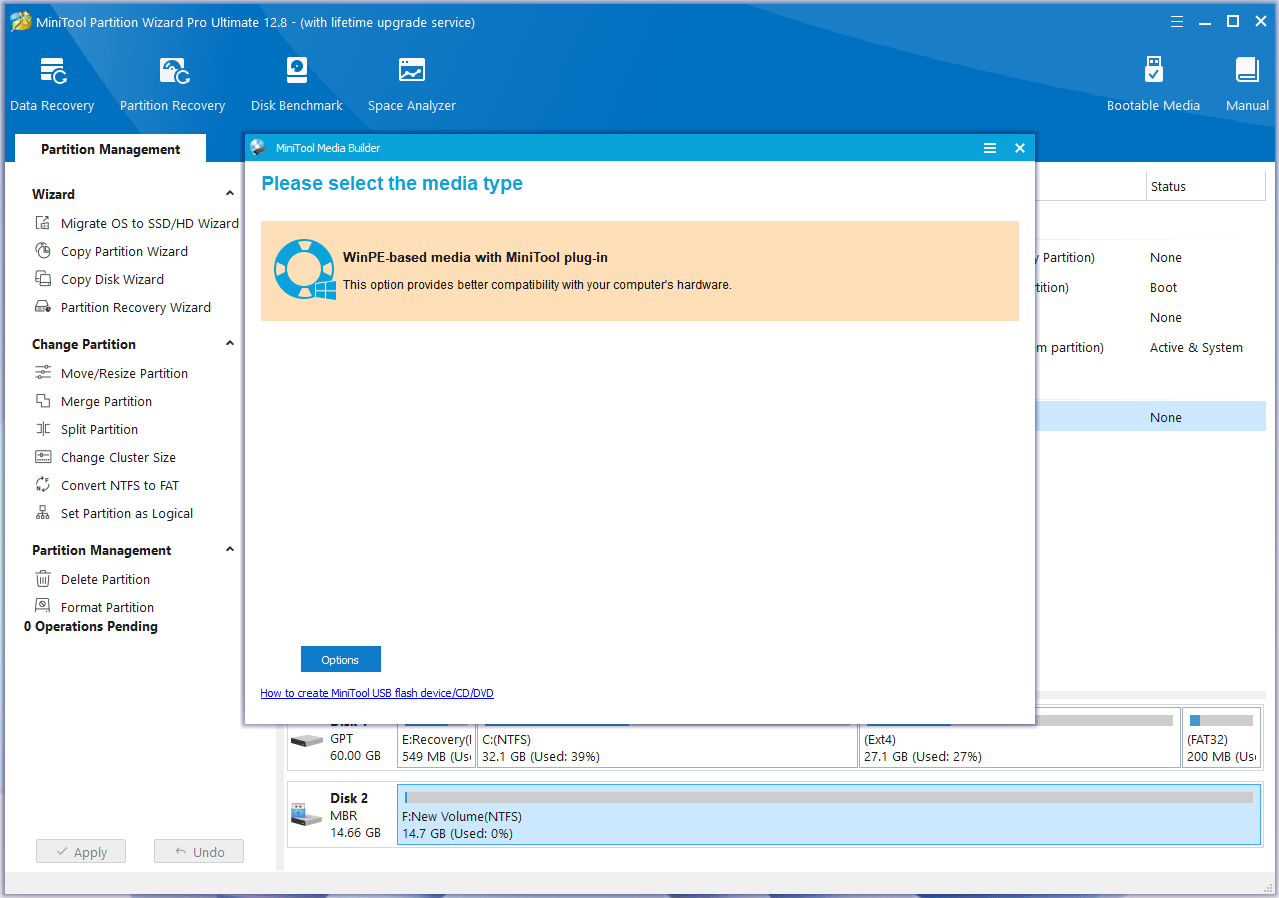
Step 2: Click WinPE-based media with MiniTool plug-in.
Step 3: Click the USB Flash Disk. You will be warned that the data on the USB disk will be destroyed. Click Yes and then MiniTool Partition Wizard will start to create a bootable drive.
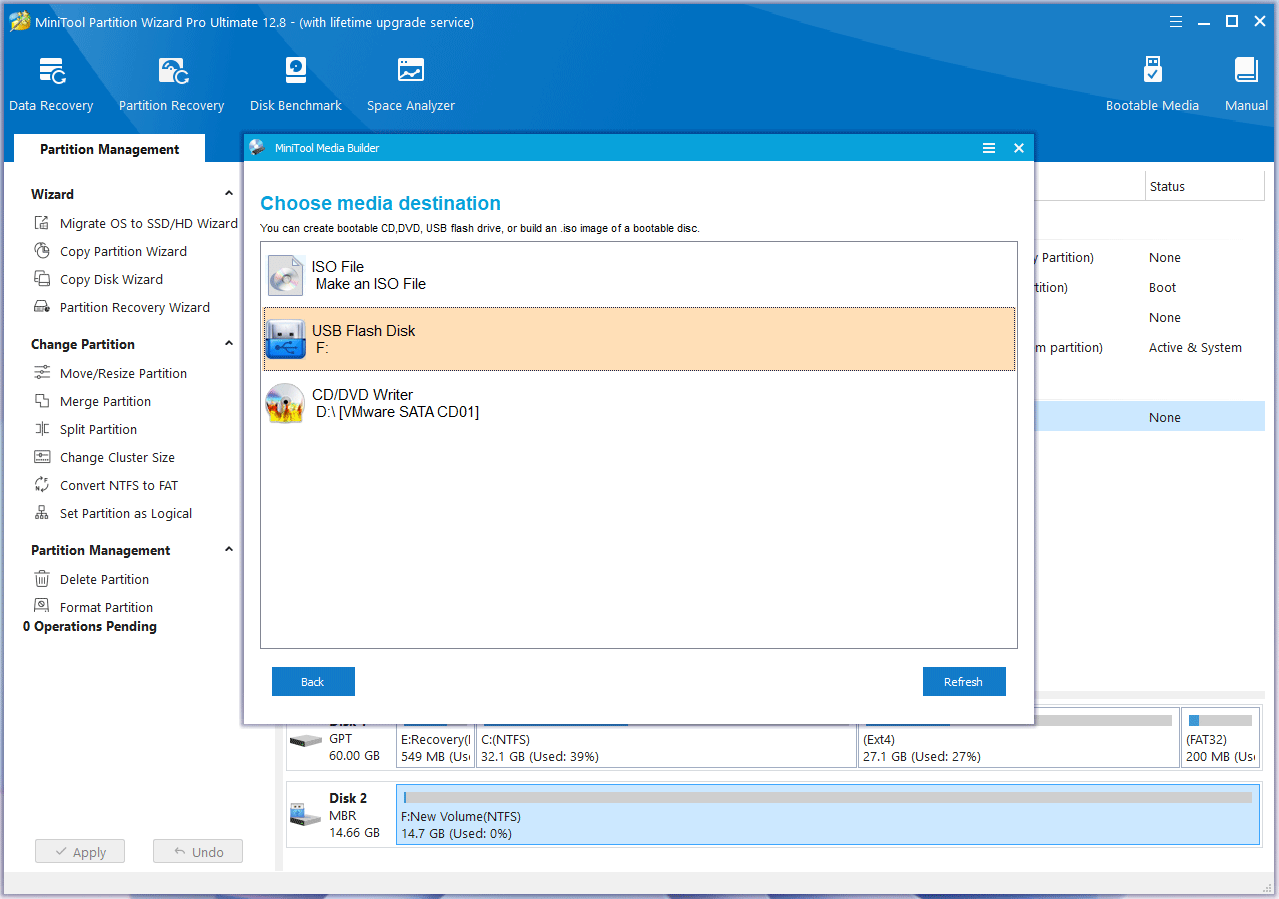
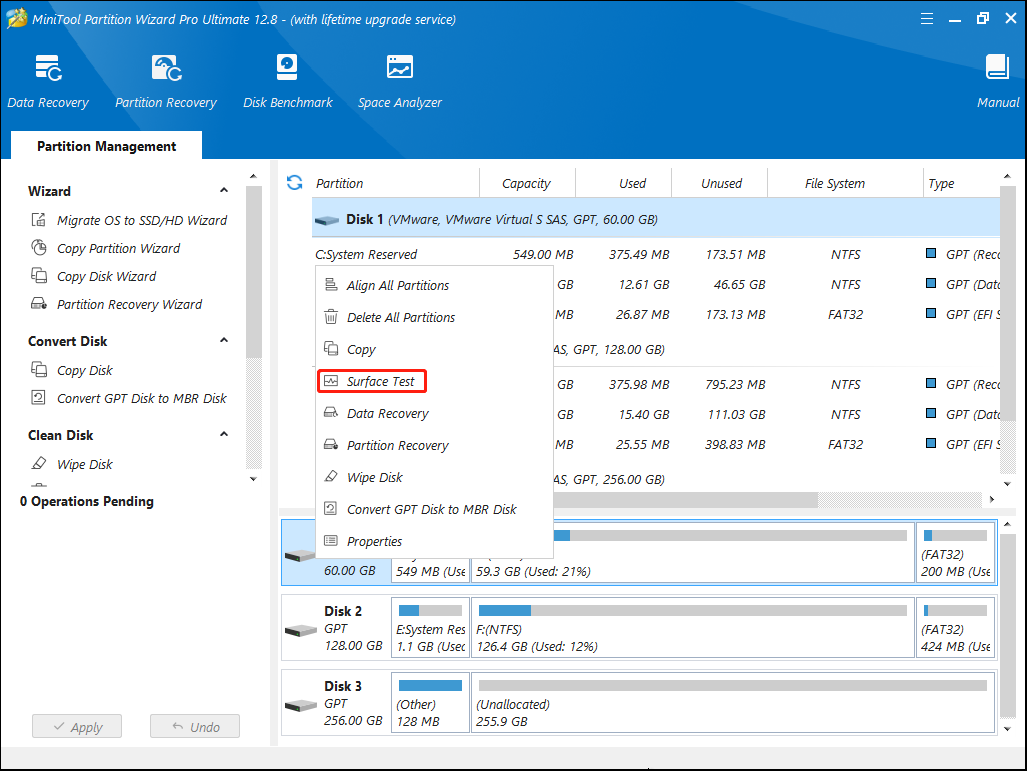
Step 4: Insert the bootable US drive into the unbootable Windows 11 PC and make the PC boot from the USB drive. Click OK twice and then you will see MiniTool Partition Wizard’s main interface. Right-click the system hard drive and choose Surface Test.
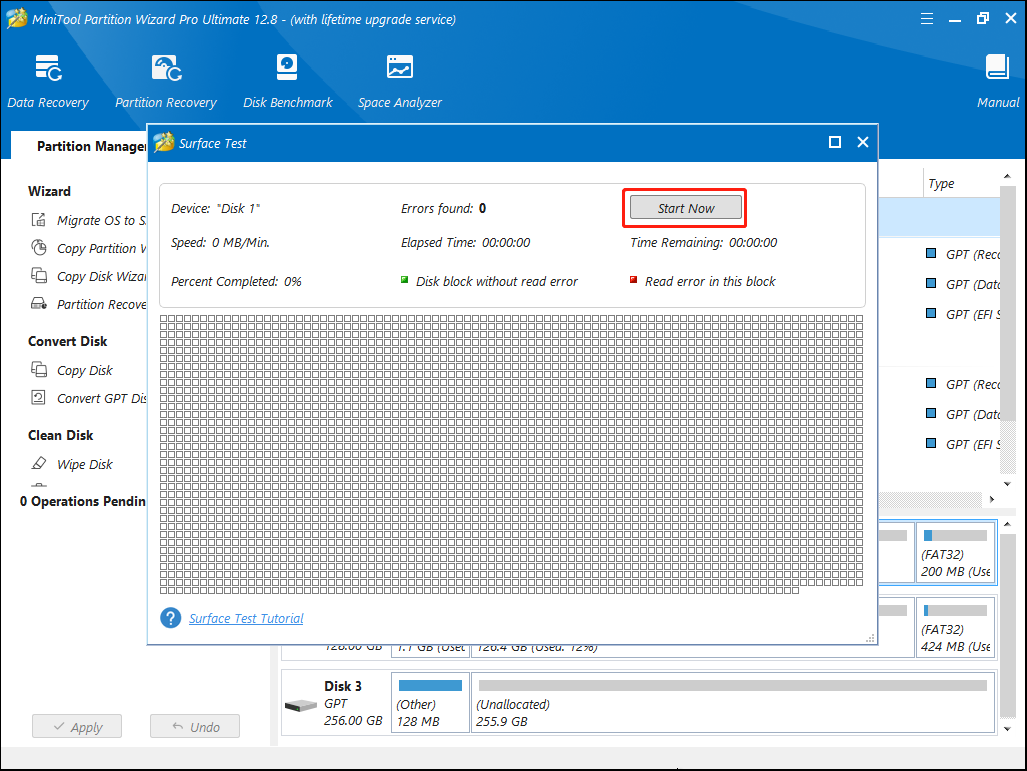
Step 5: On the pop-up window, click Start Now. Damaged sectors/blocks will be marked as red. If there are too many red sectors/blocks, you may need to replace the hard drive.
Recover Data from the Unbootable Windows 11 PC
If all the above solutions don’t work and there are important files on your PC, you can recover files from the unbootable Windows 11 PC with the steps below.
MiniTool Partition Wizard DemoClick to Download100%Clean & Safe
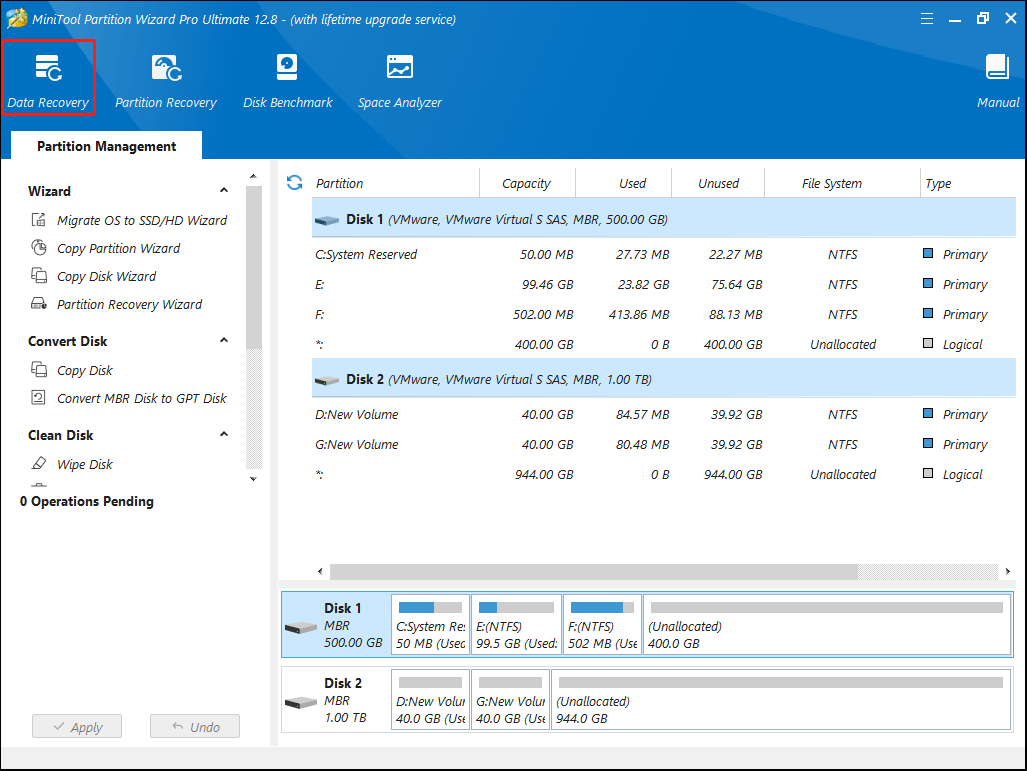
Step 1: Make a bootable USB drive using MiniTool Partition Wizard and boot the problematic computer from the USB drive. On the MiniTool Partition Wizard’s main interface, click Data Recovery on the toolbar.
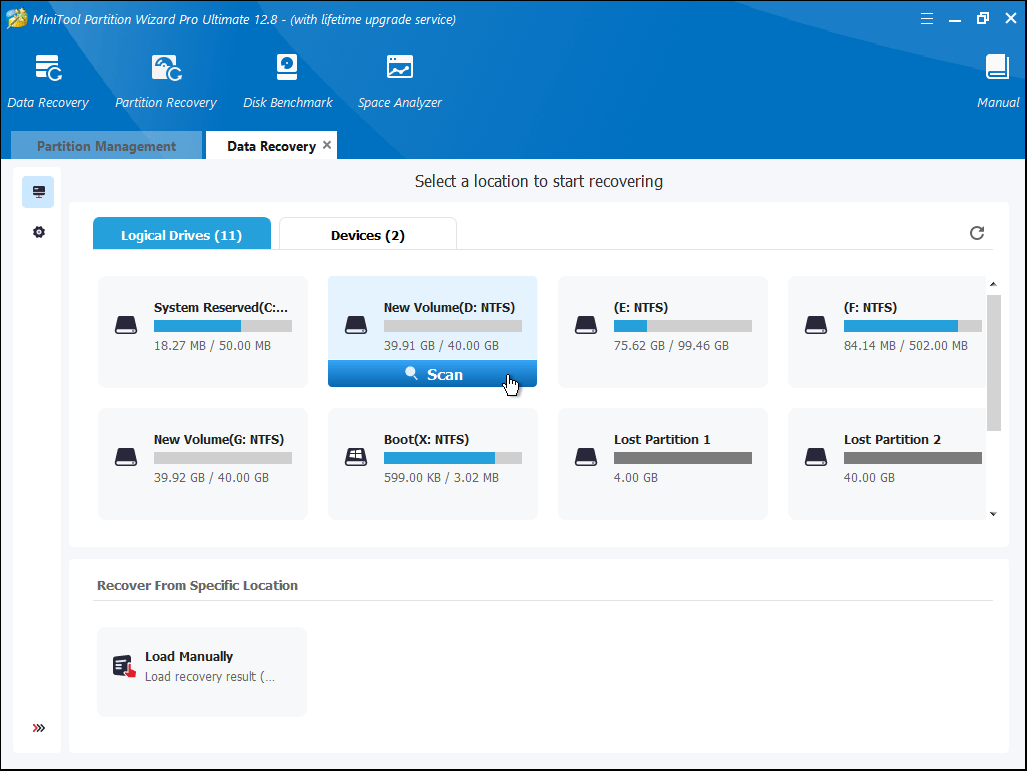
Step 2: Hover the cursor over a partition and click Scan.
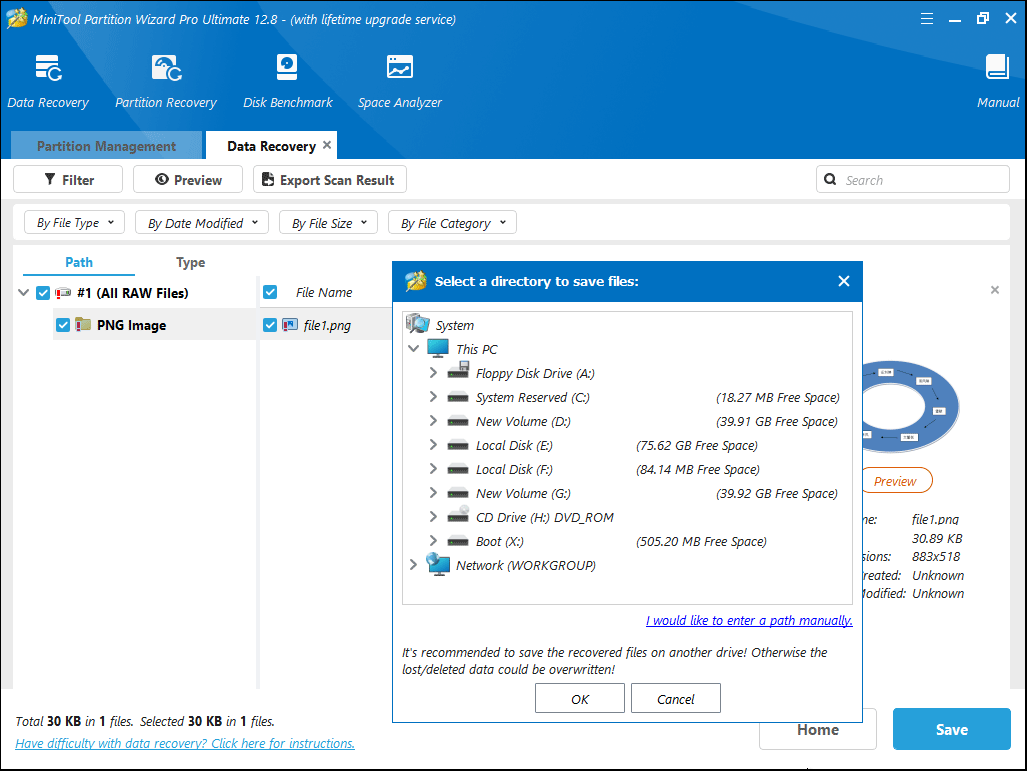
Step 3: After the scanning process is completed, find the files you want to recover using Path, Type, Filter, or Search tools. Check the box before the files you want to recover and then click Save. Select a safe place to save these files and click OK.
Bottom Line
What to do if Windows 11 won’t boot? Do you know other solutions to this issue? Leave your comments in the following zone. In addition, if you encounter problems when using MiniTool Partition Wizard, please feel free to contact us via [email protected]. We will get back to you as soon as possible.

User Comments :