Can you recover deleted data from Synology NAS hard drive? How to perform Synology data recovery? If you wonder about those, you can focus on this post from MiniTool Partition Wizard. Here, this partition software introduces how to do Synology NAS data recovery in detail.
About Synology NAS
Synology NAS, also called Synology Network Attached Storage, is a type of storage device that was created by Synology Inc. With this multifunctional tool, you are capable of building a private cloud for smart data management. You can do plenty of tasks with Synology NAS and the most common ones are listed as follows:
- Store terabytes of data freely and securely
- Access your files anytime and anywhere with a home or office network
- Share and sync files across different systems like Windows, macOS, and Linux
- Host websites and email addresses
- Protect data from ransomware attacks
- Increase team productivity with collaboration tools
Although Synology NAS is a pretty secure storage device, random issues still happen on this device and some of them may even lead to data loss. If you are a victim of Synology NAS data loss, simply keep reading to obtain details on how to recover data from Synology NAS.
What Causes the Synology NAS Data Loss
Many users complain about data loss while using Synology NAS. What’s the reason for this frustrating issue? To help you further know about it, this post summarizes some possible causes of Synology NAS data loss below.
- Accidental file deletion
- Sudden power outage or improper system shutdown
- Virus or malware infection
- Initialized or formatted Synology NAS drive
- Hard drive failure
- NAS file system corruption
- Certain hardware failures
- …
If you lose important files due to the above reasons, you need to perform Synology data recovery with a Synology file recovery tool. If you have no clue how to do this, you can refer to the following content. There are a couple of workable NAS file recovery methods available.
Way 1: Recover Deleted Data from Synology NAS via Recycle Bin
When you create a shared folder, the Recycle Bin option is enabled by default. With this feature enabled, a subfolder will be created to store deleted files. So, you can try to recover files from the Recycle Bin after deleting them by mistake. How does Synology recover deleted files from Recycle Bin? Here’s a complete guide.
Step 1: Make sure the Recycle Bin is enabled.
- Open DiskStation Manager and then go to Control Panel > Shared Folder.
- Select the shared folder you want to recover files from and click Edit.
- Under the General tab, tick the checkbox next to the Enable Recycle Bin option. If you want to make Recycle Bin only accessible for administrators, check Restrict access to administrators only.
- Click OK to save the changes.
Step 2: Now you can launch File Station to find and open the target shared folder.
Step 3: Open the #recycle subfolder and then right-click the files or folders you want to recover.
Step 4: Select Copy to/Move to from the expanded menu and then select Move to.
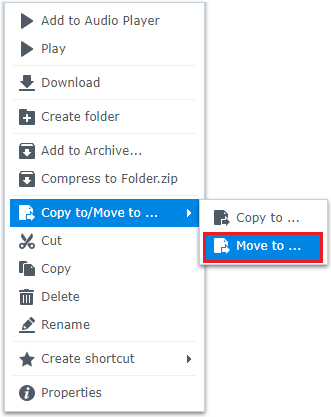
Step 5: After that, you can choose a desired location to retrieve the deleted data.
Way 2: Recover Deleted Data from Synology NAS via Synology Backup Solutions
Synology provides several tools like Synology Drive Admin Console, Shared Folder Sync, or Hyper Backup, to help you set up backup solutions. If you adopt any Synology backup solutions before the data loss happens, you can use them to recover deleted files or folders. To do Synology data recovery in this way, follow the given instructions.
Synology Drive Admin Console
Synology Drive Admin Console is a package automatically installed when you download Synology Drive Server. It’s designed only for administrators, helping manage sync settings and better monitor business properties and resources on Synology Drive.
With its Version Explorer feature, you, as an administrator, can view and revert to previous versions of modified or deleted files in synced folders. The following are details for this kind of Synology NAS data recovery.
Step 1: Open Drive Admin Console. Then go to Overview and click Version Explorer.
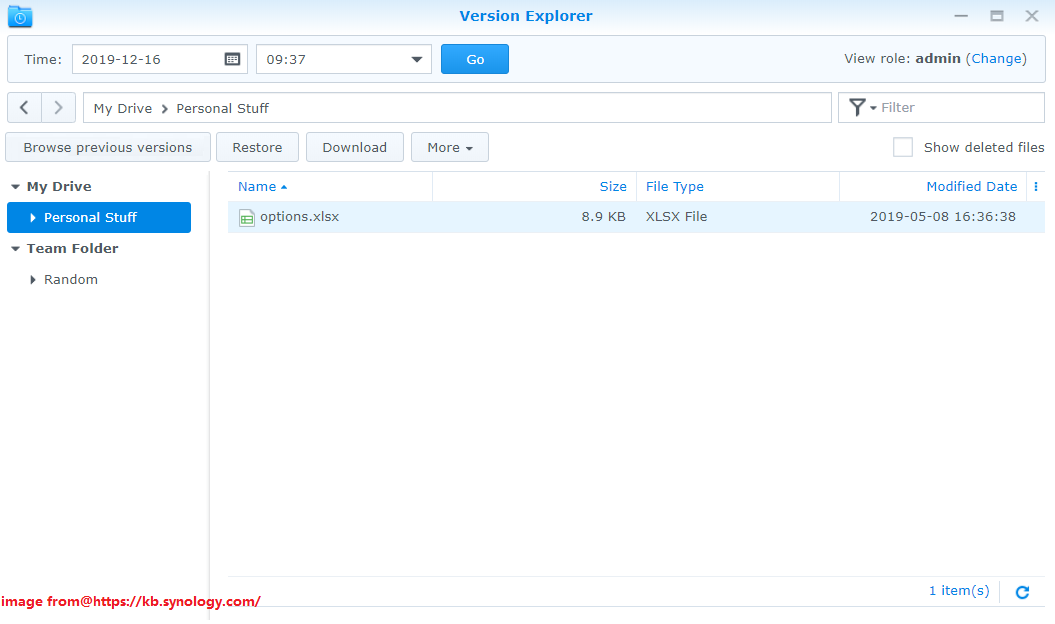
Step 2: Select a date and time so that you can browse files at the specific historical point from the My Drive folders or Team Folder of different users.
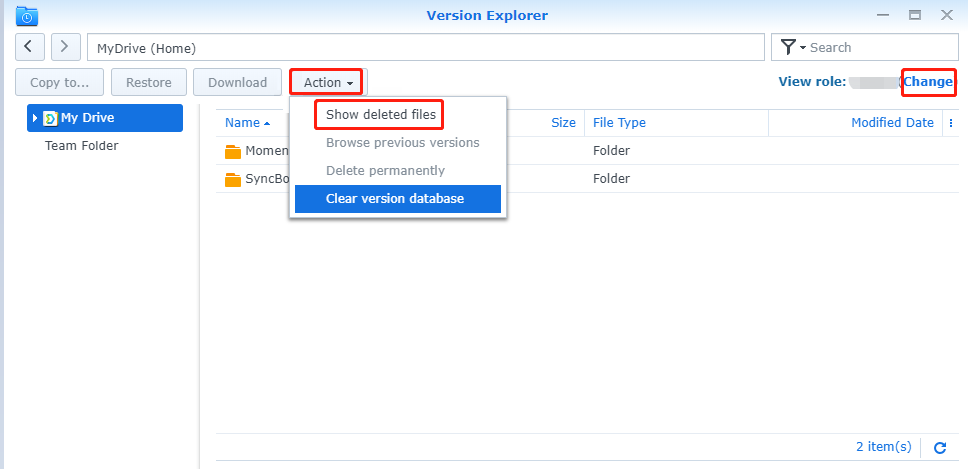
Step 3: Click Change at the top-right corner to switch to the target view role.
Step 4: After that, click the Action button and select Show deleted files. Then you can see deleted files in Version Explorer.
Step 5: Find and highlight the file or folder you want to recover. Then choose a suitable option according to your preference.
- Browse previous versions: It allows you to view, download, or restore previous versions of the target file or folder.
- Restore: It helps recover the target file or folder to a specified time.
- Download: You can directly download the target file or folder.
- More: You can select Copy to from its drop-down menu to recover the target file or folder to a specified time and choose a desired folder to save the result.
Hyper Backup
Hyper Backup is one of the main backup solutions for Synology NAS devices. It enables you to back up system configurations, packages, and user data, to Synology NAS devices, such as local shared folders, external hard drives, network drives, public cloud, and so on.
The backup data of multi-version Hyper Backup tasks will be stored in a Hyper Backup backup (.hbk) file. With this file, you can easily restore them by using Hyper Backup, Hyper Backup Explorer, or Hyper Backup Vault. Here, we mainly discuss how Synology recovers deleted files from an existing Hyper Backup task.
Step 1: Launch the Hyper Backup package.
Step 2: Click the Restore icon from the left panel. Then select Data.
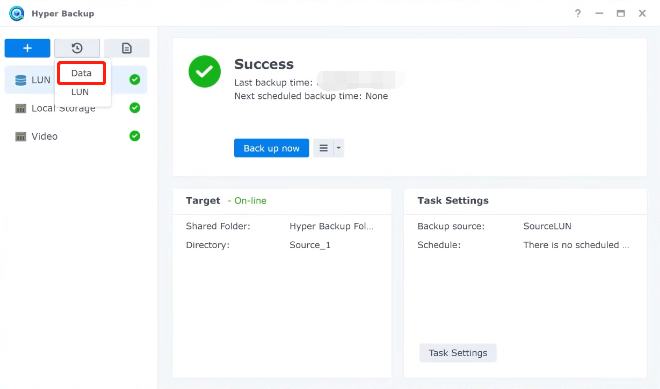
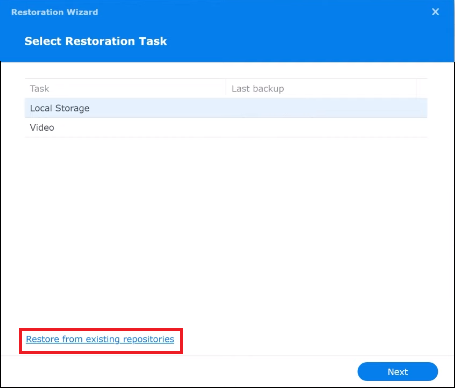
Step 3: In the prompted window, select the backup task that contains the deleted files and click Next.
Step 4: Select Do not restore system configuration and click Next.
Step 5: Use the timeline at the bottom of the next window to find the desired version. Then check the folders containing the files you want to restore and click Next.
Step 6: Check the applications to restore and click Next. If prompted, click Yes to go on.
Step 7: In the Data Restoration Summary window, click Done to execute the Synology data recovery.
Way 3: Recover Deleted Data from Synology NAS via Windows Backup and Restore
Backup and Restore Windows 7 is a Windows built-in backup software that can help you back up and restore data. If you set up a backup for Synology NAS drive with this tool, you are likely to use it to finish Synology data recovery. How can Synology recover deleted files via Backup and Restore Windows 7? You can learn the details from below.
Step 1: Connect the Synology NAS drive to your computer. Then press Windows + I to open Windows Settings and select Update & Security.
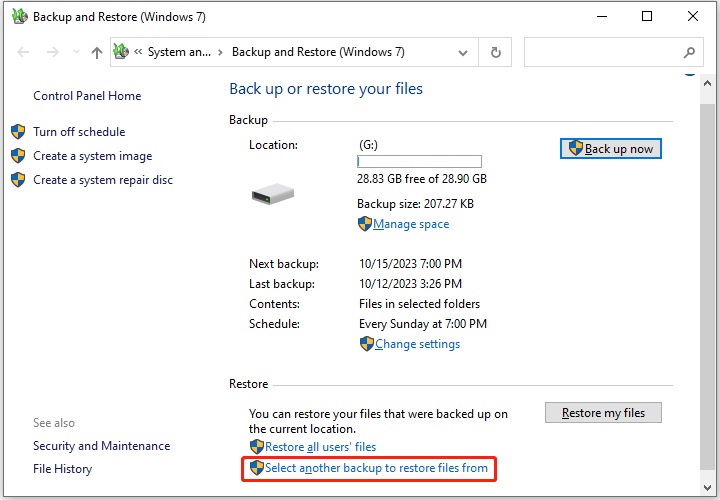
Step 2: Go to Backup. Then click Go to Backup and Restore (Windows 7) from the right side.
Step 3: Click Select another backup to restore files from.
Step 4: Select the connected Synology NAS drive and click Next.
Step 5: After that, click Search, Browse for files, or Browse for folders to find and select files or folders you want to recover.
Step 6: Once done, click Next. Select In the original location and click Restore to recover the needed files or folders. Alternatively, you can switch to In the following location and then click Browse to choose another location for data recovery.
Way 4: Recover Deleted Data from Synology NAS via MiniTool Partition Wizard
MiniTool Partition Wizard is a powerful and reliable data recovery tool. With this tool, you can recover deleted or lost data from multiple storage devices like internal/external hard drives, USB flash drives, SD cards, etc. Also, it allows you to recover deleted or lost partitions with a few clicks.
In addition to data/hard drive recovery, MiniTool Partition Wizard offers a wide range of features related to partition/disk management. For instance, you are able to use it to partition hard drive, clone hard drive, check hard drive health, execute MBR2GPT conversion, and more.
To successfully complete Synology NAS data recovery by using MiniTool Partition Wizard, you can follow the detailed steps below.
Step 1: Connect your Synology NAS drive to your computer. Then download and install MiniTool Partition Wizard on the same computer.
MiniTool Partition Wizard DemoClick to Download100%Clean & Safe
Step 2: Launch this Synology file recovery tool to get into its main interface. Then click Data Recovery at the top toolbar.

Step 3: Move your cursor to the target hard drive and then click Scan. It may take a long time to finish the scanning process. Just wait patiently.

Step 4: After the scan completes, select all the needed files from the full scan result. Then click the Save button.
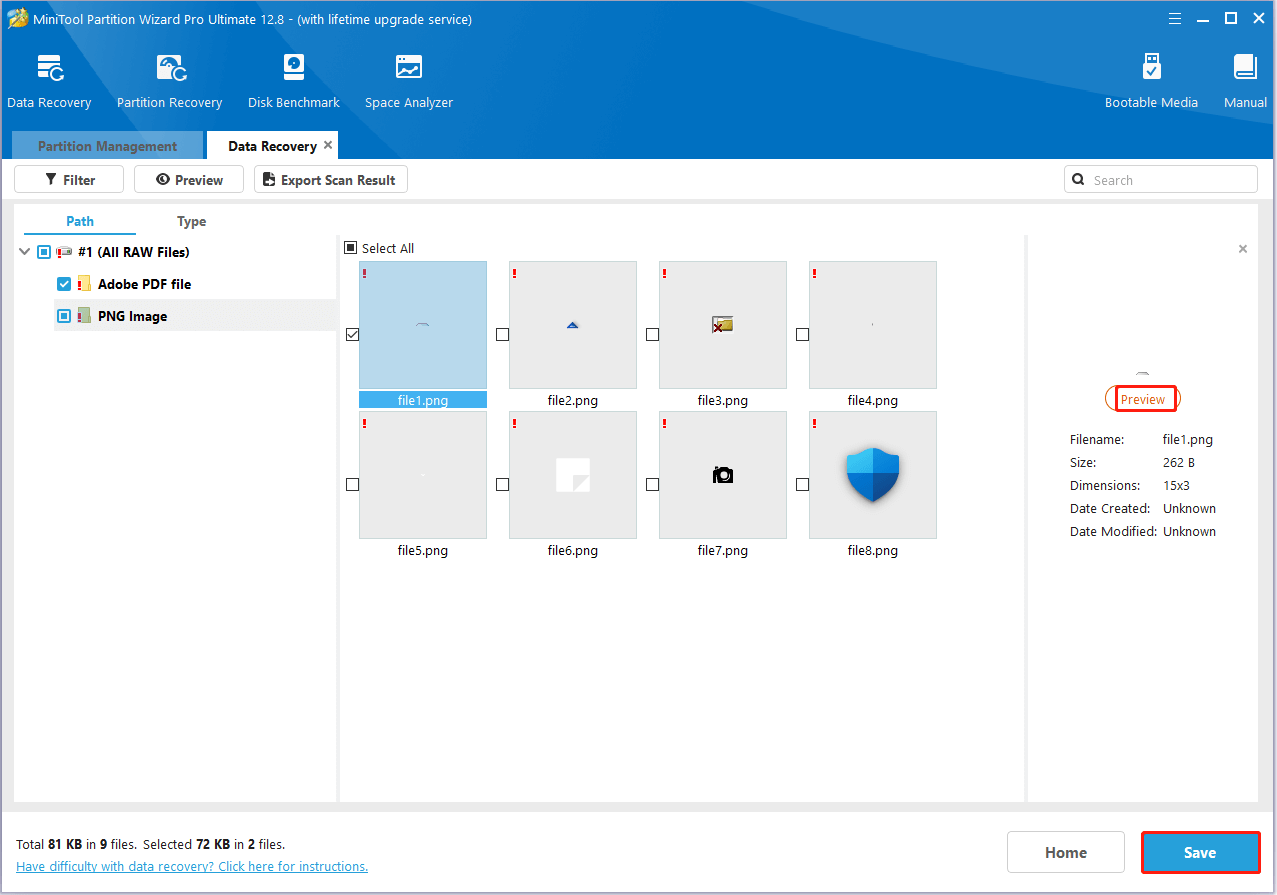
Step 5: In the pop-up window, select a directory and click OK to store the recovered files. You’d better choose to save these files on another drive. Otherwise, the deleted/lost data will be overwritten.
Bottom Line
In this post, MiniTool Partition Wizard collects possible reasons for Synology data loss and feasible Synology data recovery approaches. If you want to recover deleted data from Synology Nas drives, you can read this post. If you have any problems with Synology data recovery, you can leave a message in our comment part below.
For any issues occurring when you use MiniTool Partition Wizard, you can contact us via [email protected]. We’ll reply to you as soon as possible.
User Comments :