A great many users don’t know how to suspend BitLocker encryption on Windows 10/11. This post of MiniTool will provide 3 ways for suspending BitLocker and introduce extra useful information.
BitLocker is a full-volume encryption feature that is designed by Microsoft to help Windows users protect their data. It is only available on Pro, Ultimate, Enterprise, and Education Windows operating systems as well as Windows Server 2008 and later.
BitLocker is a very useful feature when it comes to protecting your data from being stolen or lost, but sometimes it might get you into trouble too. For example, if you enable BitLocker with TPM on a system drive, some operations such as UEFI or BIOS update, hardware changing, or Windows 10 upgrading will be recognized as boot attacks and require you to enter the BitLocker recovery key.
If you forgot the BitLocker recovery key or password accidentally, Windows won’t boot normally. To avoid this situation, you can use encryption by suspending BitLocker on the system drive before you perform firmware, hardware, or system updates. How to suspend BitLocker and resume it on Windows 10/11? Let’s keep reading.
How to Suspend BitLocker or Resume It on Windows 10/11
Here are 3 simple ways for suspending BitLocker and you can choose one according to your preferences.
Way 1. Suspend BitLocker via Control Panel
The first and most common way is to use Control Panel for suspending BitLocker Windows 10/11.
Step 1. Press the Win + R key to open the Run box, and then type control in it and hit Enter to open Control Panel.
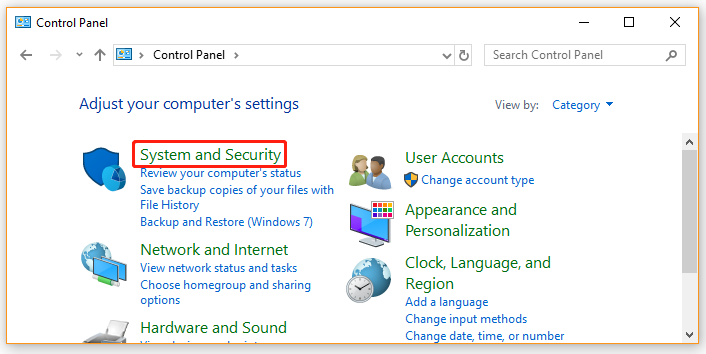
Step 2. Change the View by type to Category and select System and Security > BitLocker Drive Encryption.

Step 3. Locate the drive you have encrypted and click on Suspend protection. Then click on Yes to confirm it.

Step 4. If you want to resume the encryption, you can follow Steps 1 to 3 to locate the drive and click on Resume protection > Yes.

Way 2. Suspend BitLocker via PowerShell
In addition, you can use the suspend BitLocker command line. Here’s how to perform the BitLocker PowerShell commands to suspend the protection.
Step 1. Right-click the Start menu and select Windows PowerShell (Admin) and click on Yes to run the program.
Step 2. In the elevated PowerShell window, type the following command and hit Enter to suspend BitLocker for the C drive.
The -RebootCount command allows you to determine how many times your computer can restart before the BitLocker is automatically re-enabled. Here you can set the values from 0 to 15. The “0” represents that the BitLocker protection will be suspended until you resume it manually.
Suspend-BitLocker -MountPoint “C:” -RebootCount 0
Step 3. If you want to resume the protection for the C drive, you can run the following command.

Resume-BitLocker -MountPoint “C:”
Way 3. Suspend BitLocker via Command Prompt
Similarly, you can run the suspend BitLocker command line in Command Prompt. Here’s how to suspend BitLocker with manage-bde commands.
Step 1. Type cmd in the Search box, and then right-click the Command Prompt window and select Run as administrator. Then click on Yes in the UAC window.
Step 2. In the elevated Command Prompt window, type the following command and hit Enter to suspend BitLocker.
Manage-bde –Protectors –Disable C: -RebootCount 0

Step 3. To resume the BitLocker protection, you can run the following command.
Manage-bde –Protectors -Enable C:
Bonus Tip: How to Recover Data from BitLocker Encrypted Drive
As discussed above, if you haven’t the BitLocker protection suspended, your system will require the BitLocker recovery key the next time restart. Not having the recovery key will lead to data loss or unnecessary OS reinstallation.
How to recover a BitLocker encrypted drive without the recovery key? MiniTool Partition Wizard can make it! It is a professional data recovery and partition management tool that even can recover data from an unbootable computer. Here you can refer to this guide to know more details.
MiniTool Partition Wizard DemoClick to Download100%Clean & Safe


User Comments :