What can you do when the Windows 10 scan drive for errors notification shows up? If you have no idea, you can focus on this post. Here, this post from MiniTool Partition Wizard introduces detailed information about the troublesome notification including its solutions.
About Windows 10 Scan Drive for Errors Notification
The scan drive for errors notification in Windows 10 is a common notification that is prompted by the Windows Security and Maintenance component. It often appears when you are using the computer, installing a program, or after a restart.
Once this notification pops up, it may indicate that you are suffering hard drive failure. If you follow the notification’s instructions to scan your drive for errors, you may finally receive another error message that says: Restart to repair drive errors.
Since the Windows scan drive for errors notification doesn’t specify which drive gets corrupted or what results in this issue, it may be hard to find the proper solution to this issue.
Here, this post summarizes several possible reasons and troubleshooting fixes for the scan drive for errors notification. If you receive the same notification, you should pay attention to the following content and find a suitable way to sort your problem out.
What Causes Windows 10 Scan Drive for Errors Notification
The Windows 10 scan drive for errors notification may occur due to various reasons. Below we collect multiple factors that probably cause this issue.
- There certainly are file system problems or bad sectors on your hard drive.
- You shut down your computer improperly.
- Your system is attacked by viruses or malware.
- …
How to Fix Windows 10 Scan Drive for Errors Notification
To assist you to solve the Windows scan drive for errors notification, there are several effective methods available. Simply follow them to fix this maddening issue.
Method 1: Run CHKDSK
If the scan drive for errors Windows 10 notification keeps showing up, you should first do as the notification tells you – scan your hard drive. It’s the simplest and quickest way that may help fix this issue. To do this, you can run the CHKDSK utility. The following are detailed steps.
Step 1: Press Windows + R to open the Run dialog.
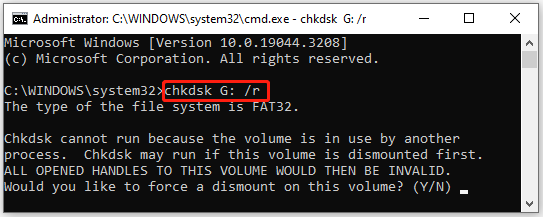
Step 2: Type cmd in the text box and then press Ctrl + Shift + Enter. By doing so, you can open Command Prompt as an administrator.
Step 3: In the elevated Command Prompt, type chkdsk *: /r and press Enter to execute this command. You should replace * with the drive letter of your hard drive. Make sure you scan each hard drive if you have more than one drive on your PC.
Step 4: After the process ends, restart your PC to see if the notification disappears.
Method 2: Scan Your System for Viruses or Malware
As you can know from above, virus infection is another possible reason for the scan drive for errors notification. To figure out if it’s the culprit, you’d better scan your system for viruses or malware. Here’s a step-by-step guide on how to perform a virus scan.
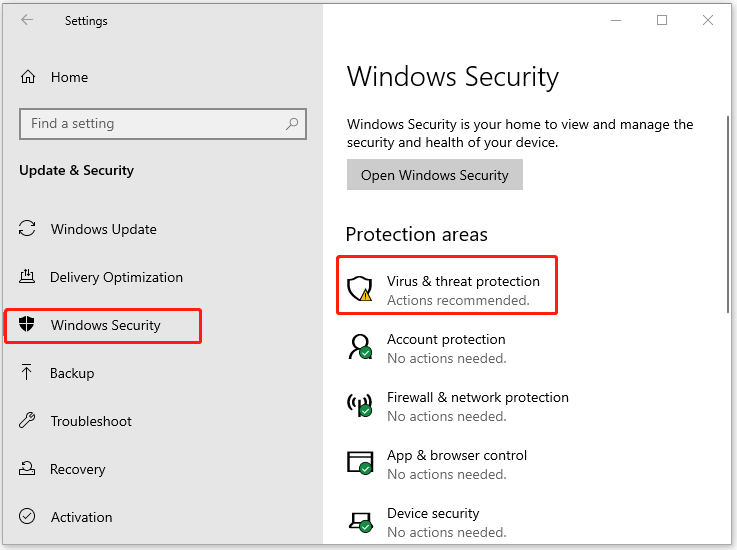
Step 1: Open Windows Settings by pressing Windows and I keys simultaneously.
Step 2: Select Update & Security in the main menu.
Step 3: Go to the Windows Security tab. Then click Virus & threat protection on the right side.
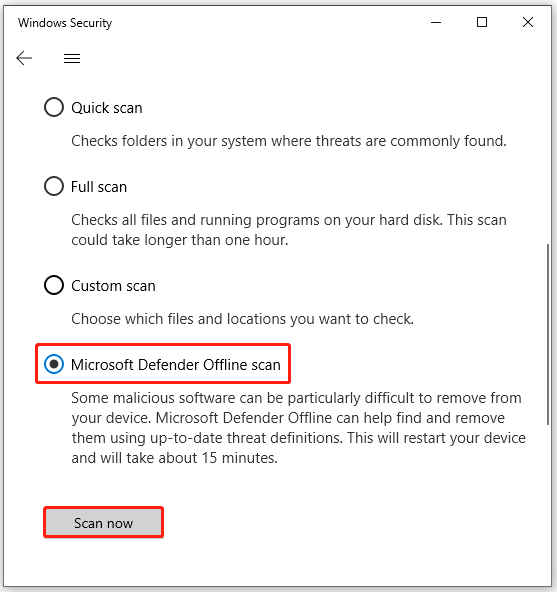
Step 4: In the prompted window, click Scan options. Then select Microsoft Defender Offline scan.
Step 5: After that, click the Scan now button to start the scan.
Step 6: Once the scanning completes, restart your computer to see if the issue is solved.
Method 3: Use Third-party Disk Error Checking Software
Sometimes, your system may wrongly think your disk gets corrupted, showing the Windows 10 scan drive for errors notification. To rule out this possibility, it’s better for you to re-check your hard drive with a third-party disk checker. Here, we highly recommend MiniTool Partition Wizard to you.
It’s a piece of professional and secure disk-checking software. With this tool, you are able to check file system corruption, scan for bad sectors, analyze disk space usage, etc. To check your hard drive for errors with MiniTool Partition Wizard, you should download & install this program on your PC and then follow the guide below.
MiniTool Partition Wizard FreeClick to Download100%Clean & Safe
Check File System
Step 1: Launch MiniTool Partition Wizard to enter its main interface.
Step 2: Right-click the partition to check and then select Check File System. Alternatively, you can highlight the target partition and select Check File System from the left action panel.
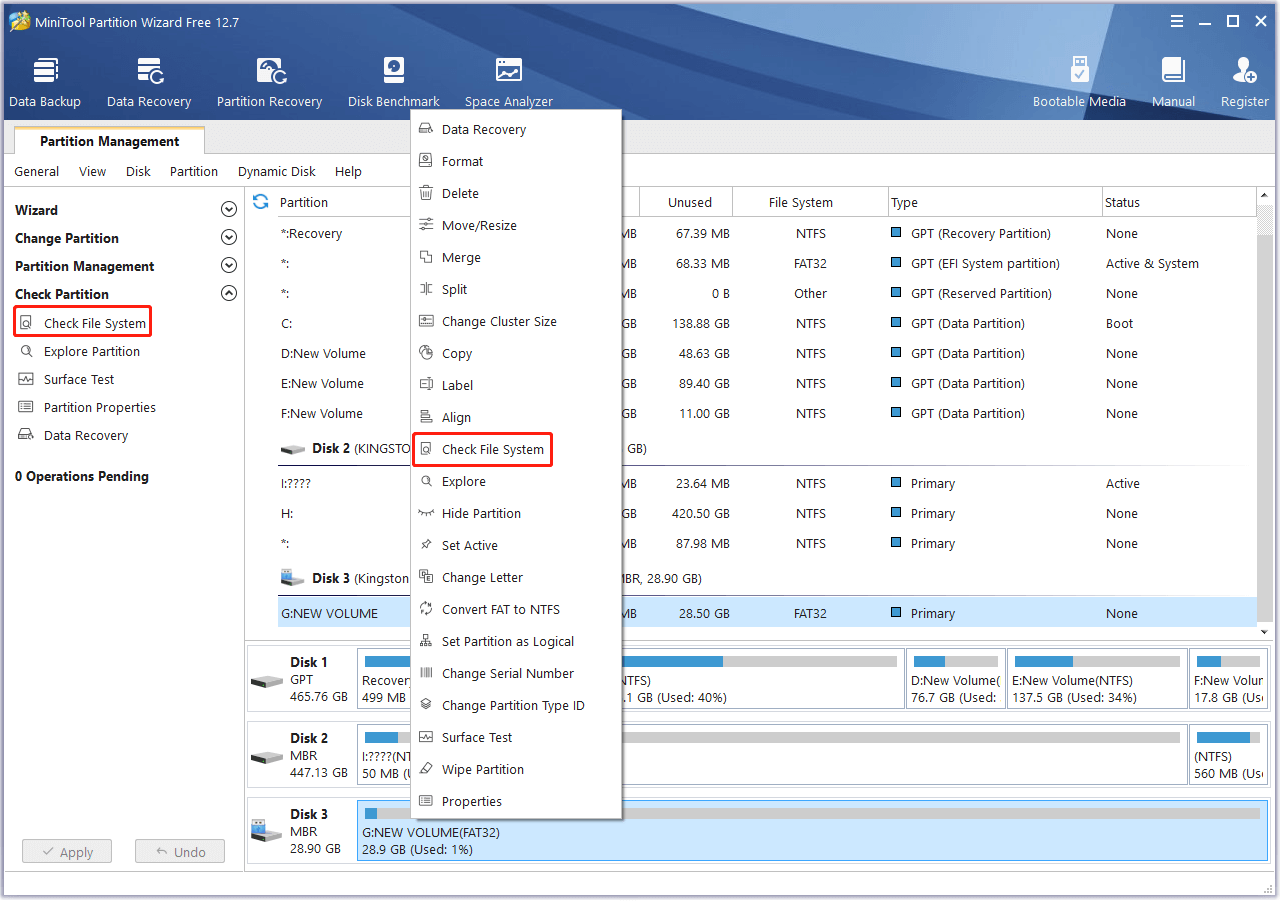
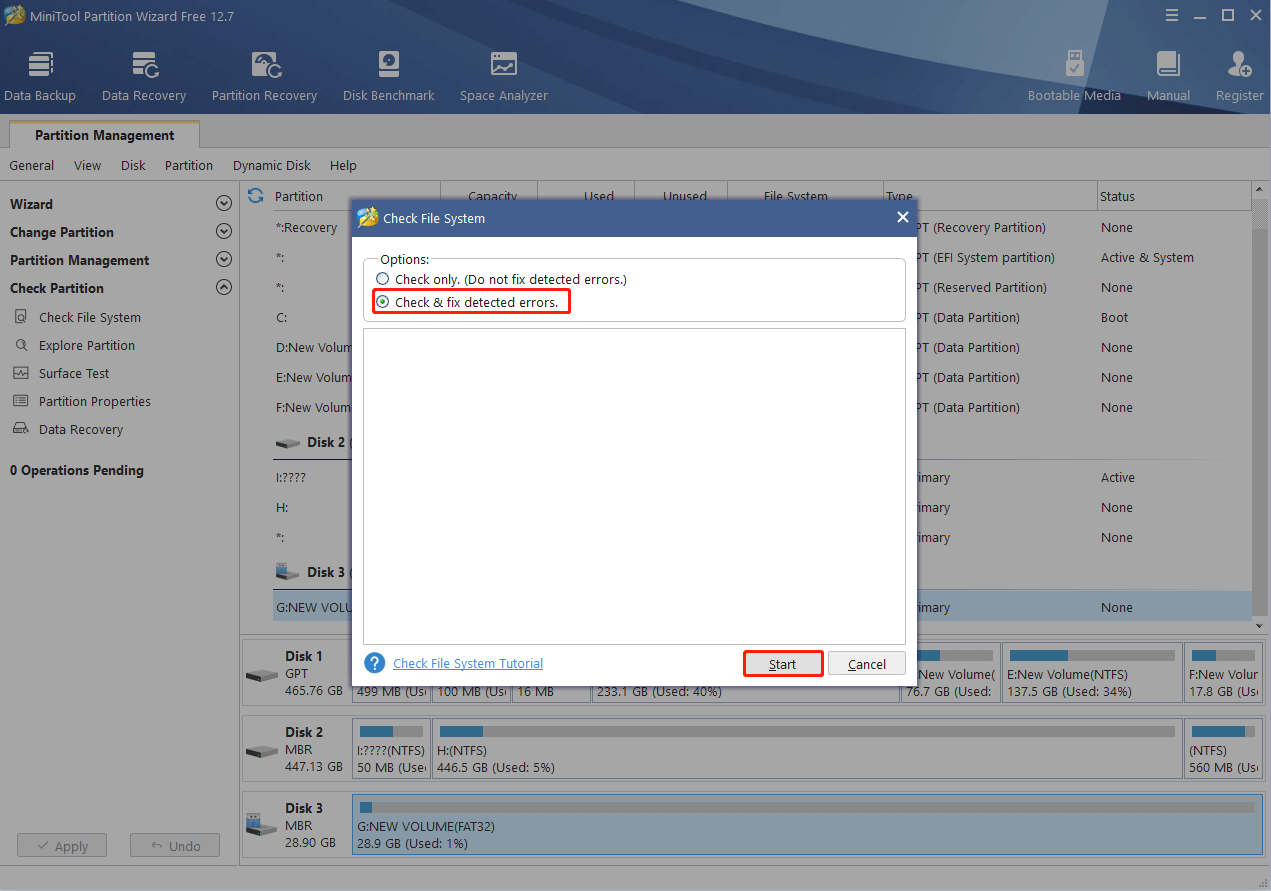
Step 3: In the pop-up window, select Check & fix detected errors. Then click Start to begin the process.
Surface Test
Step 1: Get into the main interface of MiniTool Partition Wizard.
Step 2: Right-click the target partition and select Surface Test.
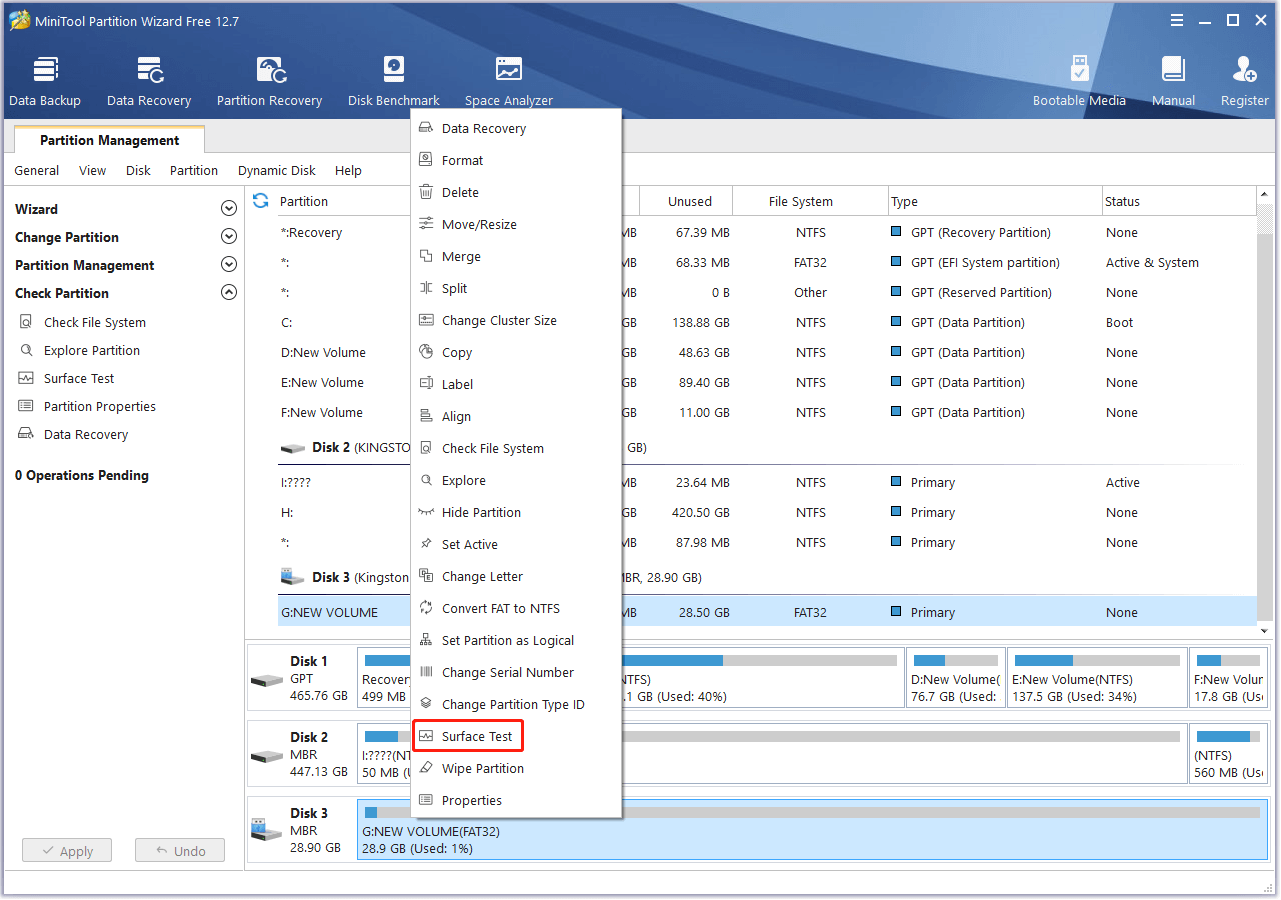
Step 3: After that, click Start Now to begin scanning the bad sectors on the selected partition.
Step 4: If any bad sectors are detected, they will be marked with red. You can click here to see how to deal with bad sectors.
![[Full Guide] Bad Sectors Were Encountered During the Format?](https://images.minitool.com/partitionwizard.com/images/uploads/2023/07/bad-sectors-were-encountered-during-the-format-thumbnail.png)
Method 4: Run a SMART Test
SMART (Self-monitoring, Analysis, Reporting, and Technology) is a monitoring system utility included on your computer that can check your hard drive’s reliability. Therefore, when the scan drive for errors Windows 10 notification keeps showing up, you can try running a SMART test to see if the issue happens due to a problematic drive.
Step 1: Run Command Prompt with administrative rights.
Step 2: Type wmic diskdrive get status and press Enter to execute this command. Then the status of your drive will be displayed.
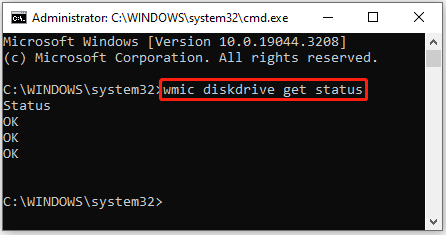
Step 3: If the SMART status is BAD or Unknown, it means there is something wrong with your drive. If the status is OK, it indicates your drive works well. Then you should continue with the following methods to solve the notification.
Method 5: Cancel CHKDSK Using Command Prompt
In some cases, canceling CHKDSK is likely to avoid the scan drive for errors notification. You can learn how to cancel CHKDSK using Command Prompt with the following steps.
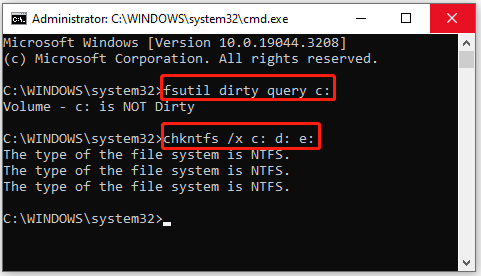
Step 1: Open Command Prompt as an administrator.
Step 2: Type fsutil dirty query *: and then press Enter. Replace * with the drive letter of your hard drive. Then this command will help check if your drive has been marked as Dirty.
Step 3: After that, execute the chkntfs /x *: command to prevent Windows from checking the specific drive on the next startup.
Method 6: Perform a System Restore
If none of the above solutions help remove the scan drive for errors notification, you can try reverting your system to a previous state with the System Restore utility. This method may help you solve this annoying issue as well. Simply complete this operation by following the given steps.
Step 1: Open the Run dialog and type rstrui in the text box.
Step 2: Press Enter to open the System Restore window. Then click Next to continue.
Step 3: In the next window, select a system restore point when your system worked without problems. Then click Next.
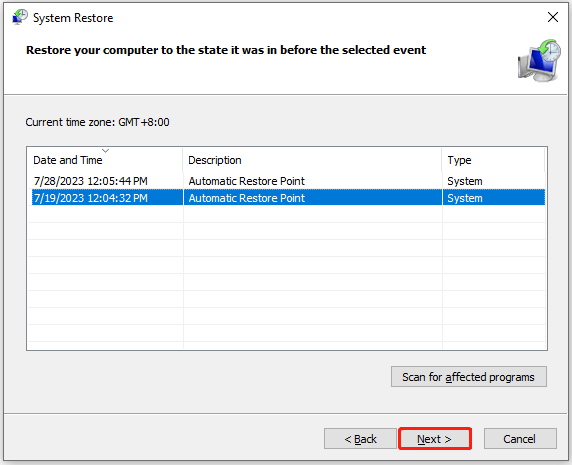
Step 4: Finally, click Finish to confirm the operation.
Bonus Tip: Recover Data After Resolving Your Problem
In addition to the scan drive for errors notification, your problematic hard drive may sometimes cause data loss. To get important files back after you solve the notification, you may need to use a third-party data recovery tool. As for this, we’d like to recommend MiniTool Partition Wizard to you. It’s powerful and safe data recovery software that enables you to restore data with ease.
To recover your data with MiniTool Partition Wizard, follow the steps below.
MiniTool Partition Wizard DemoClick to Download100%Clean & Safe
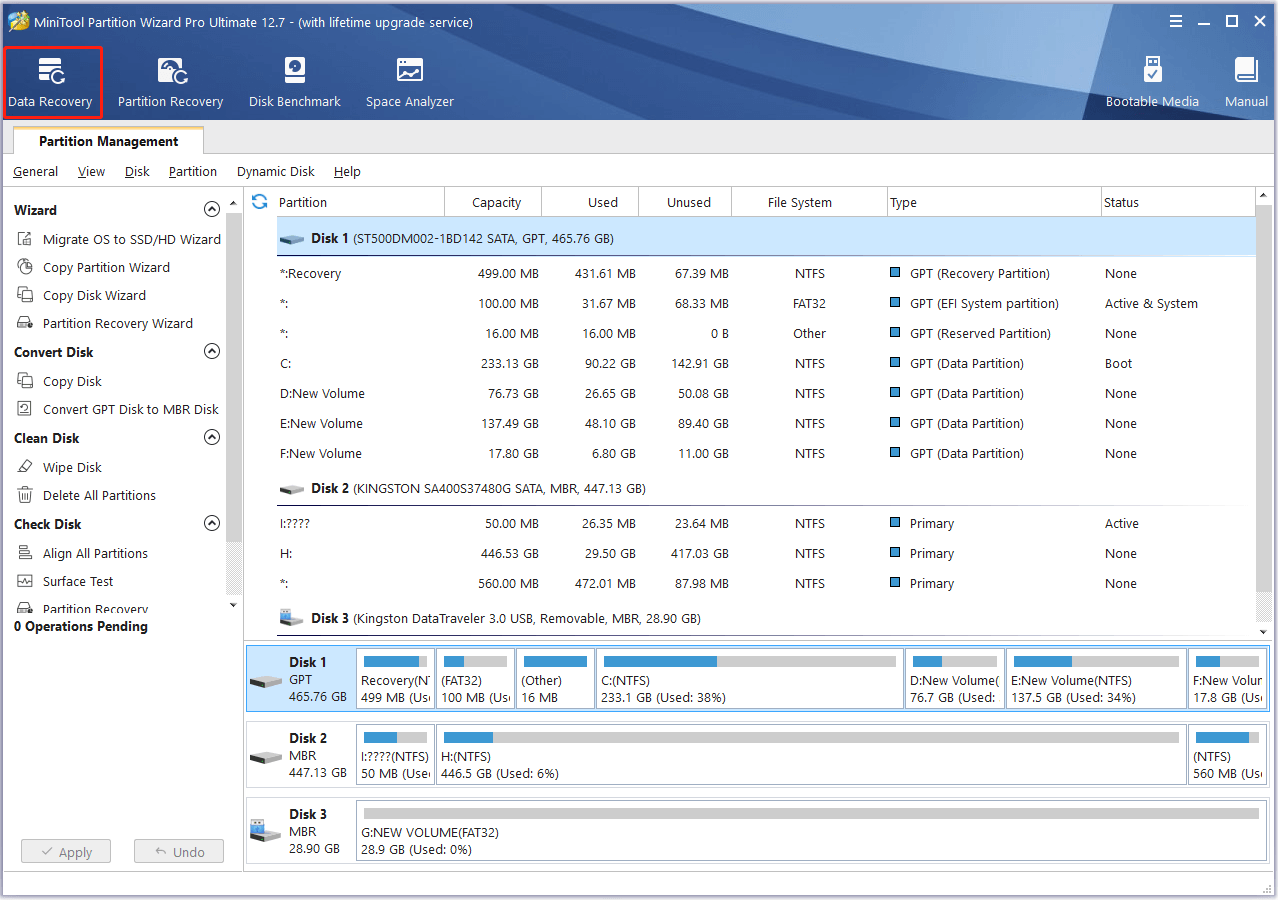
Step 1: Download and install MiniTool Partition Wizard on your PC. Then launch it to get into the main interface.
Step 2: Select Data Recovery from the top toolbar.
Step 3: In the next window, move your cursor to the target drive and then click Scan.
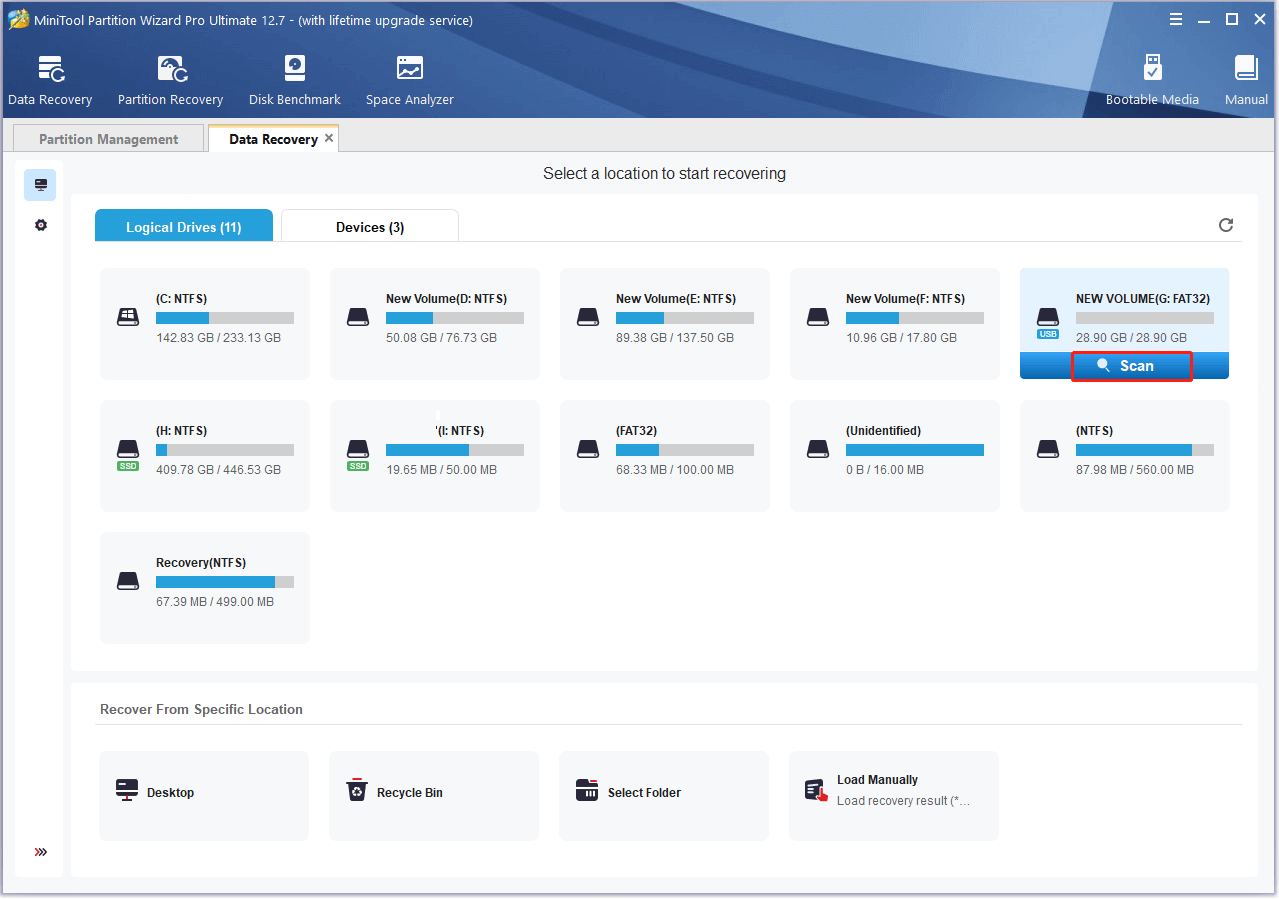
Step 4: After the scan finishes, all the files on the drive will be shown clearly. You should check the wanted files and then click Save.
Step 5: Choose a different drive and click OK to restore the selected files.
Bottom Line
What if the scan drive for errors notification keeps appearing? The above solutions may help you solve this issue. If you have any problems with this issue, you can leave a message in the following comment area.
If you run into any problems while using MiniTool Partition Wizard, you can contact us via [email protected]. We’ll reply to you as soon as possible.
User Comments :