External hard drives are essential for storing and transferring large amounts of data. However, sometimes you may encounter an issue where the drive becomes write-protected, preventing you from adding, deleting, or modifying files. This post from Partition Magic provides several methods to remove write protection from external hard drive.
What causes Write Protection on External Hard Drive?
Write protection is a feature designed to prevent the modification or deletion of data on a storage device. This can be particularly useful for protecting important files from accidental changes or deletions. However, when write protection is enabled inadvertently, it can be a significant hindrance.
To effectively troubleshoot and resolve write protection issues, it is essential to understand the various ways it can be implemented and enforced. Here’s a deeper dive into the primary causes and mechanisms behind write protection:
#1. Physical Write Protection Switch
Many external hard drives feature a physical switch to prevent accidental data overwriting. However, unintentionally activating this switch can inadvertently enable write protection.
#2. Infected by Unknown Viruses or Malware
External hard drives can become write-protected as a result of infections by unknown viruses or malware. These malicious programs can modify system settings, corrupt the file system, or directly alter the drive’s attributes to prevent data from being written or deleted.
#3. File System Errors
File system errors are a common cause of write protection. When the file system on an external hard drive becomes corrupted, the operating system might lock the drive to prevent further damage. This can happen due to improper ejection of the drive, power failures, malware infections, or hardware faults.
#4. Registry Settings
The Windows registry can contain entries that enforce write protection on external storage devices. These settings can be added by users, software, or even malware.
How to Remove Write Protection from External Hard Drive
Once you have a basic understanding of write protection and its potential causes, you can start exploring specific methods to remove it. Here are some fixes.
Method 1: Check for Physical Write Protection Switch
Many external storage devices especially USB drives come equipped with a physical switch that enables or disables write protection. This switch is usually small and located on the side of the device. When toggled to the lock position, the switch can inadvertently enable write protection.
To easily remove write protection from external hard drive, look for the small switch on the side of USB flash drive. And then move the switch to the unlock position.
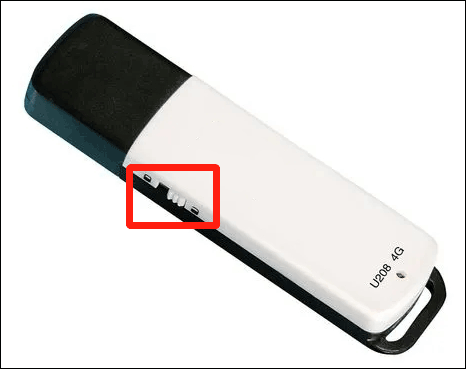
After turning off the physical switch, connect it to your PC to check whether the write protection has been removed.
Method 2. Using Antivirus Software
Occasionally, viruses and malware attack external hard disks and cause write protection. In this case, you can use a reliable antivirus program to scan the external hard disk, clean and remove the write protection virus.
Method 3: Using Diskpart Utility
DiskPart is a command-line utility in Windows that can be used to manage disk partitions. Now you can follow these steps to remove write protection using DiskPart:
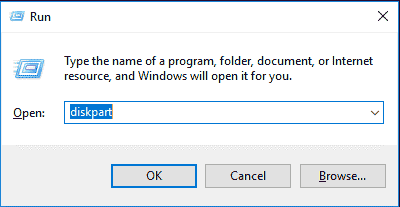
Step 1: Press Windows + R, type diskpart, and press Enter to open the DiskPart tool.
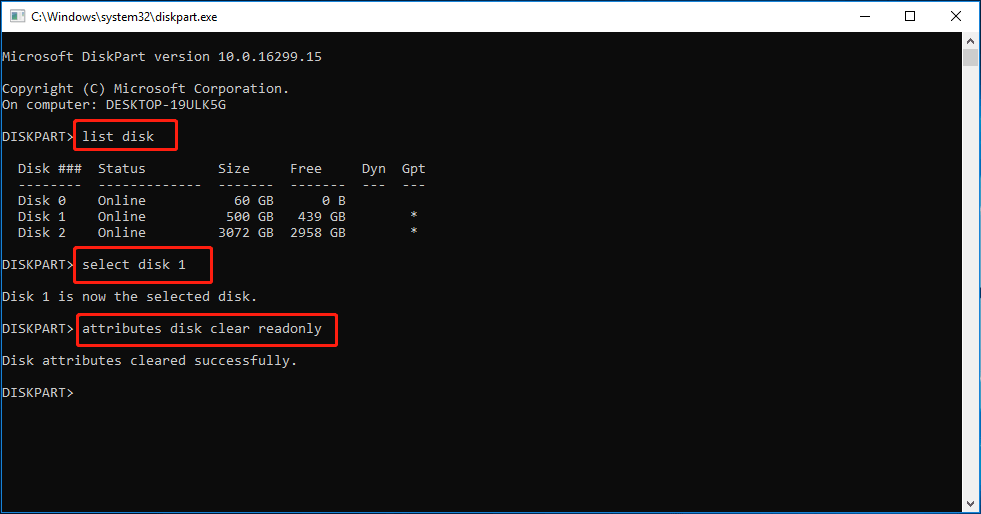
Step 2: Next, you can type the command lines below to remove write protection from external hard drive. Remember to press Enter after typing each command line.
- list disk (this command will list all available drives detected by the computer, identify your external hard drive from the list and note its disk number)
- select disk 1 (replace 1 with the exact disk number)
- attributes disk clear readonly
Step 3: Wait a moment and let it remove the read-only attribute. When DiskPart completes, type Exit and press Enter. You can try copying or deleting files on the external drive to make sure the write protection has been removed.
Method 4: Modifying Registry Settings
The Windows registry can enforce write protection on external drives. Follow these steps to modify the relevant registry entry:
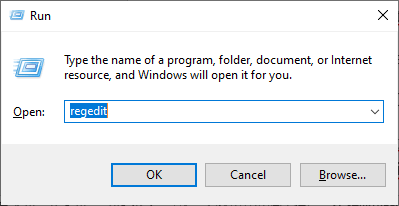
Step 1: Press Win + R, type regedit, and press Enter.
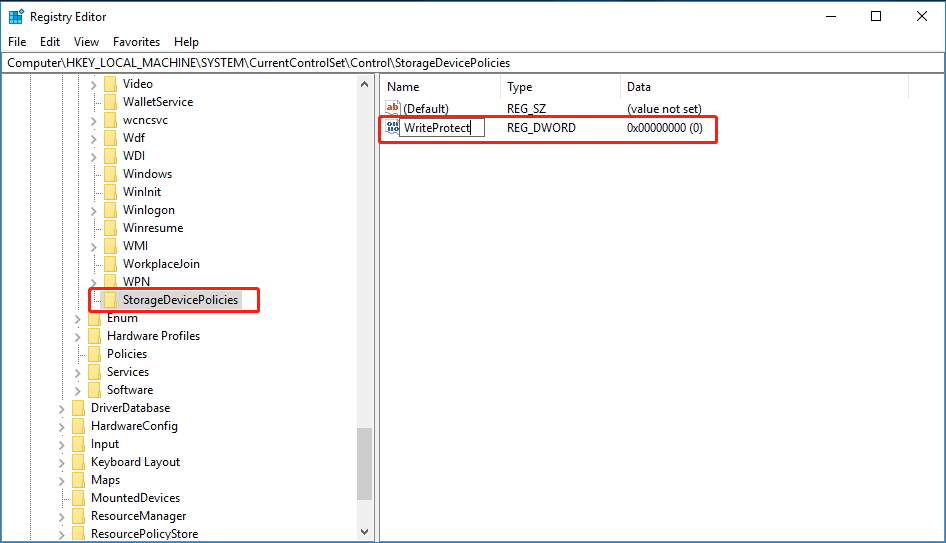
Step 2: Navigate to StorageDevicePolicies. Expand the list of HKEY_LOCAL_MACHINE by clicking > greater than sign. Similarly, expand the System list and then Current Control Set. Click Control and select Storage Drive Policies.
If you don’t see a StorageDevicePolicies key, you may need to create it. Right-click Control, select New > Key, and name it StorageDevicePolicies.
Select StorageDevicePolicies, right-click in the right pane, select New > DWORD (32-bit) Value, and name it WriteProtect.
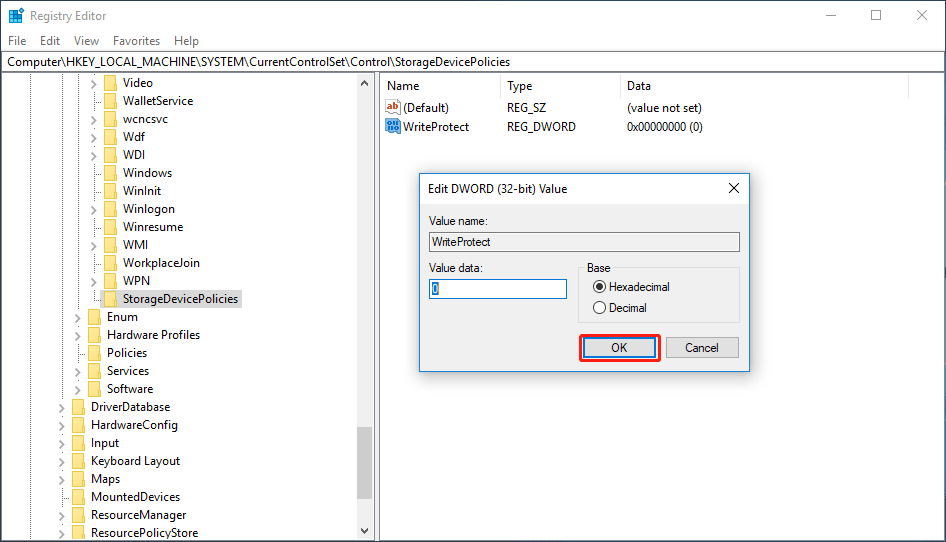
Step 3: Double click WriteProtect file and set the value of WriteProtect to 0, then, click OK.
Step 4: Close the Windows Registry and restart the system to implement the modifications.
Method 5: Using Disk Management
Disk Management is a built-in Windows utility for managing disks and partitions. Use it to remove write protection by following these steps:
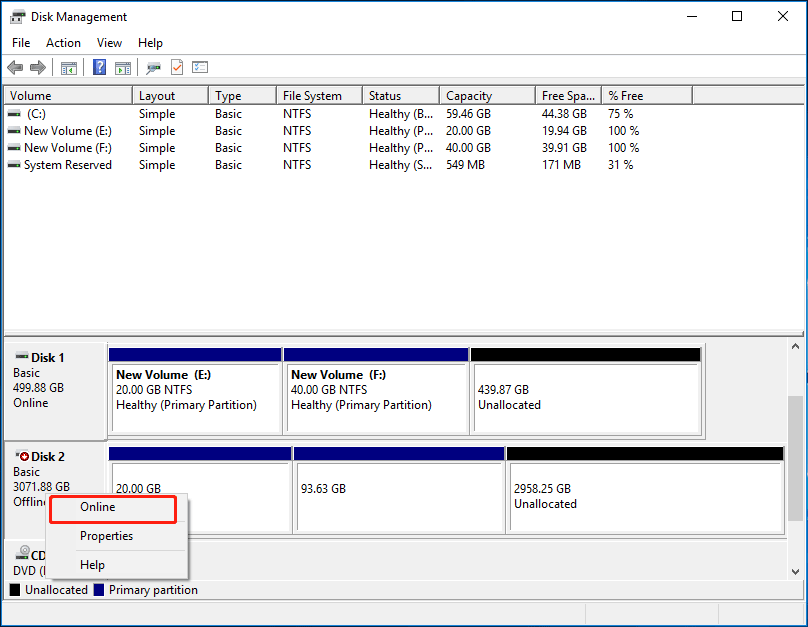
Step 1: Press Win + X and select Disk Management.
Step 2: Find the write protected hard drive in the list of disks. If the drive shows as Read-Only or Offline, right-click the volume and select Online or Reactivate Disk.
Method 6: Formatting the Drive
If other methods fail, formatting the drive can remove write protection. Note that this will erase all data on the drive, so make sure you have backed up important files.
Here, I recommend you to use a third-party tool – MiniTool Partition Wizard. As a professional partition master for Windows computers, it can be used to format USB to FAT32, rebuild MBR, clone hard drive, migrate OS to SSD/HDD, recover hard drive data, etc.
And now, follow the guide below to format your device:
MiniTool Partition Wizard FreeClick to Download100%Clean & Safe
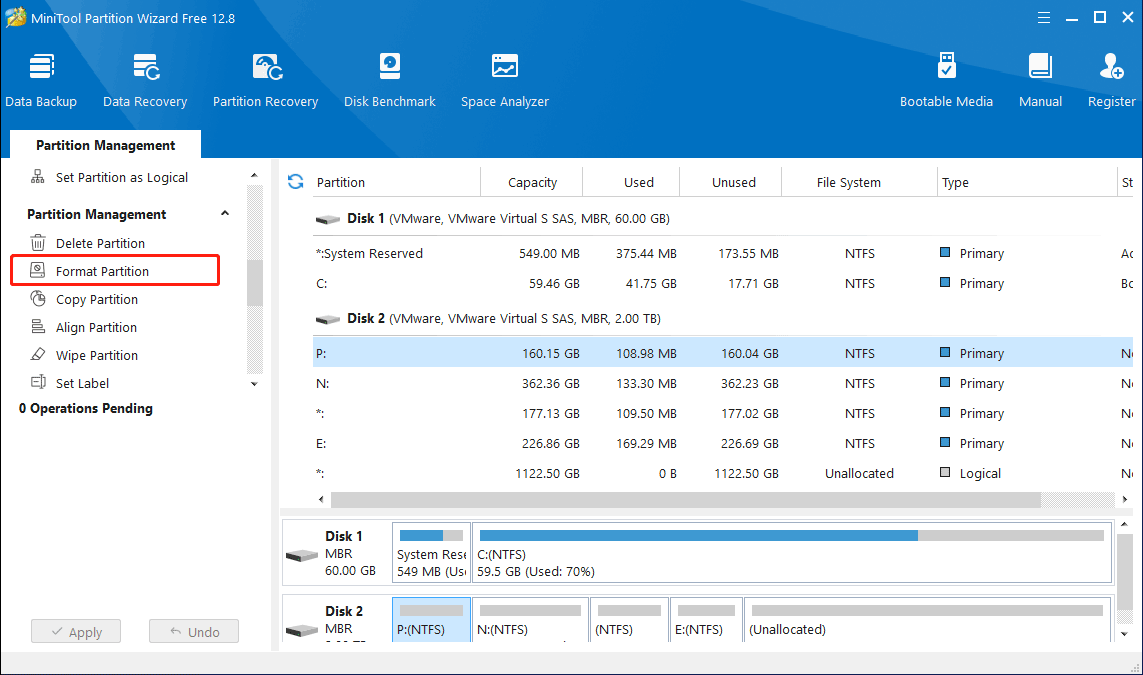
Step 1: Launch MiniTool Partition Wizard to the main interface. After selecting a partition of external hard drive, you will see the many features about partition management. Here, click Format Partition.
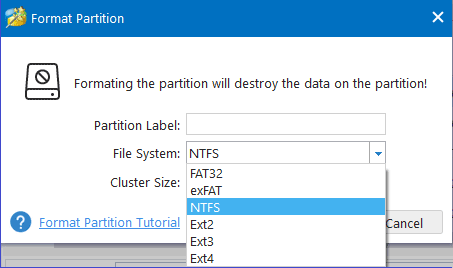
Step 2: Choose a file system as you’d like – FAT32, exFAT, NTFS, Ext2, Ext3, Ext4. For Windows users, it is recommended to choose NTFS. Then, you can click OK to continue.
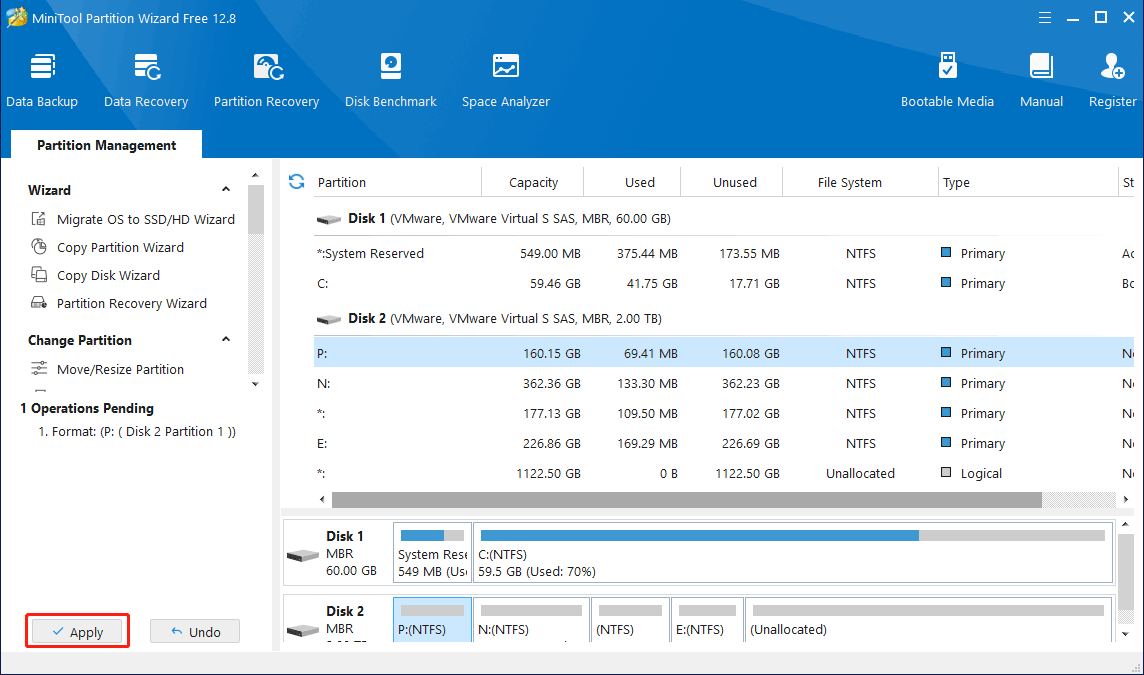
Step 3: Execute this change by clicking the Apply button to remove write protection on the external hard drive.
Step 4: Repeat the above steps to continue formatting more partitions on the external hard drive.
What if data is lost during the process of removing disk write protection? MiniTool Partition Wizard’s Data Recovery function can help you recover lost data. And now, you can follow these instructions carefully to maximize your chances of successful recovery.
MiniTool Partition Wizard DemoClick to Download100%Clean & Safe
Step 1: Launch MiniTool Partition Wizard to get its main interface.
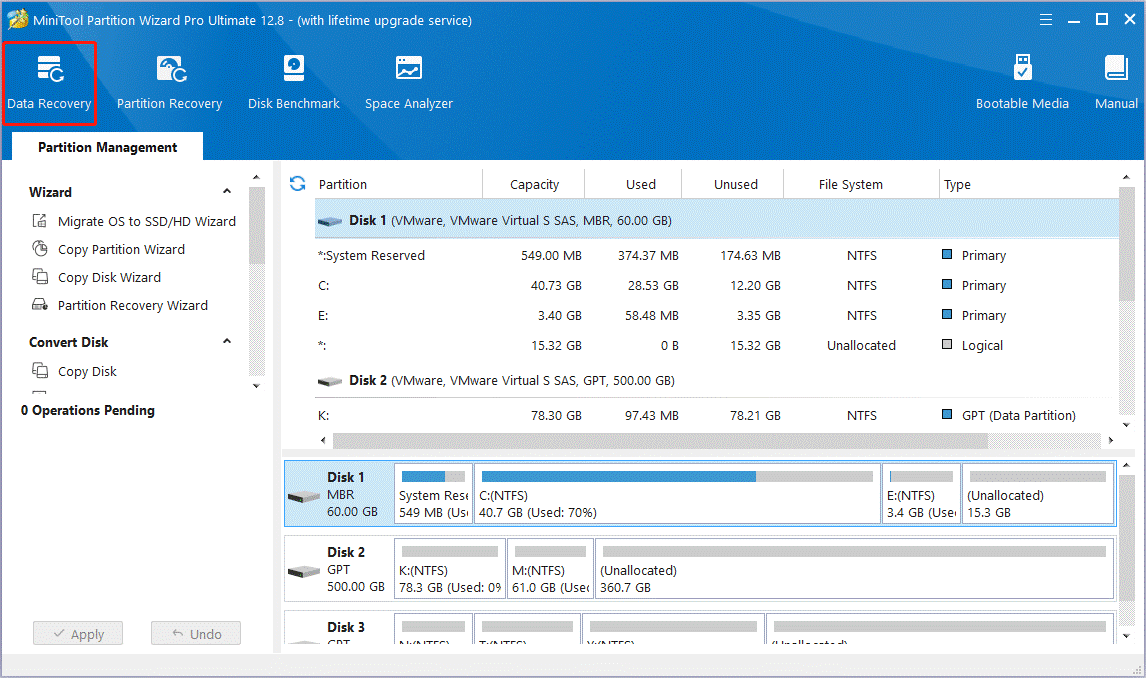
Step 2: To recover files from the hard drive, click Data Recovery on the top Tool Bar.
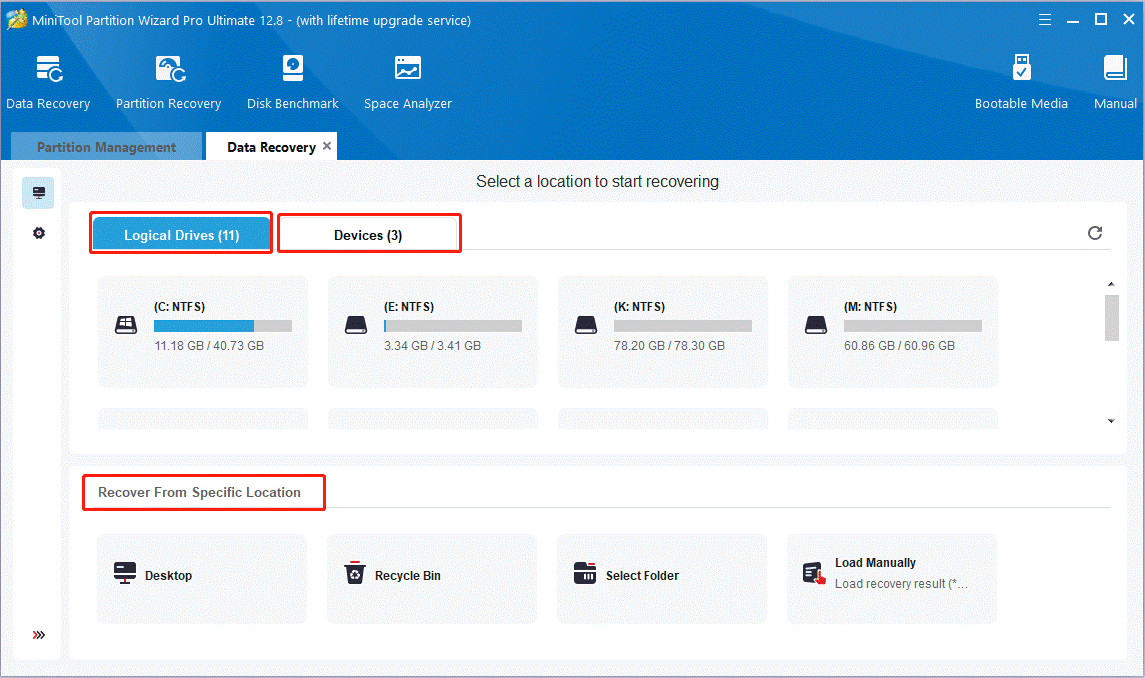
Step 3: After launching the Data Recovery function, you will enter the following interface where all the detected storages devices on the computer and specific locations for data recovery are listed.
- Logical Drives: This section shows lost partitions, unallocated space, and all existing partitions on the PC, including removable devices like USB drives.
- Devices: This section lists all hard disks connected to the computer. You can select a hard disk to scan.
- Recover From Specific Location: This section allows you to scan and recover lost files from three specific locations (Desktop, Recycle Bin, and a specific Folder).
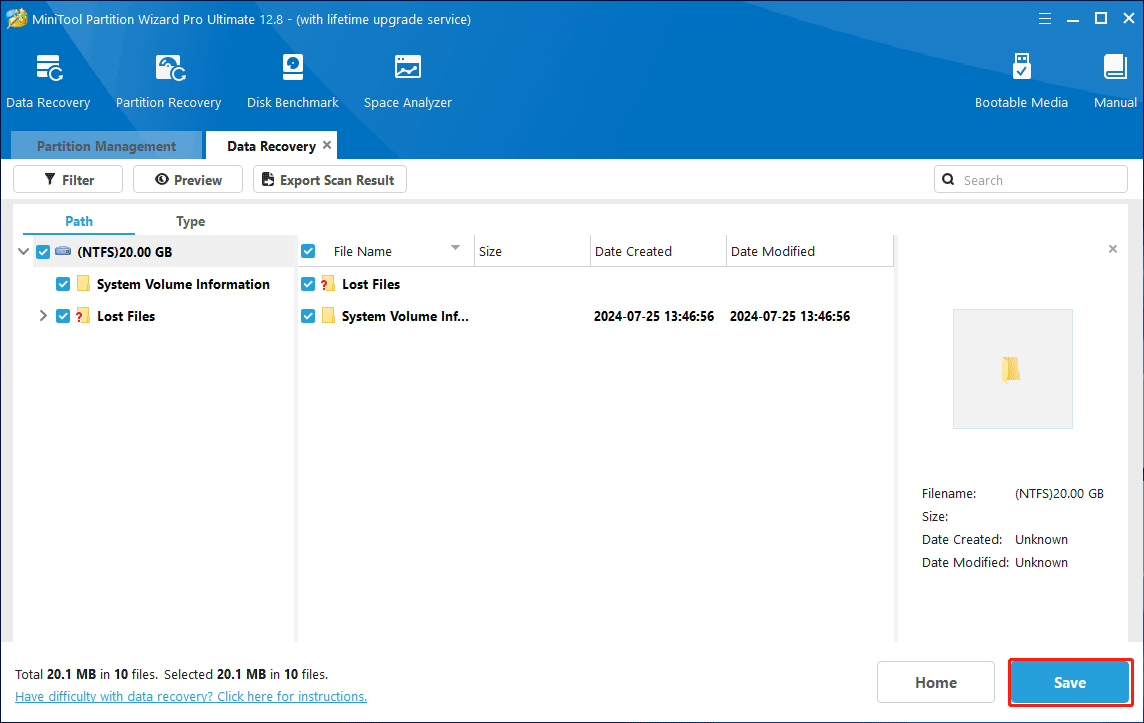
Step 4: Select your external hard drive or one of its partitions to scan. After completing the scan, you need to find the files you need. Then, select the files that need to be recovered and click the Save button.
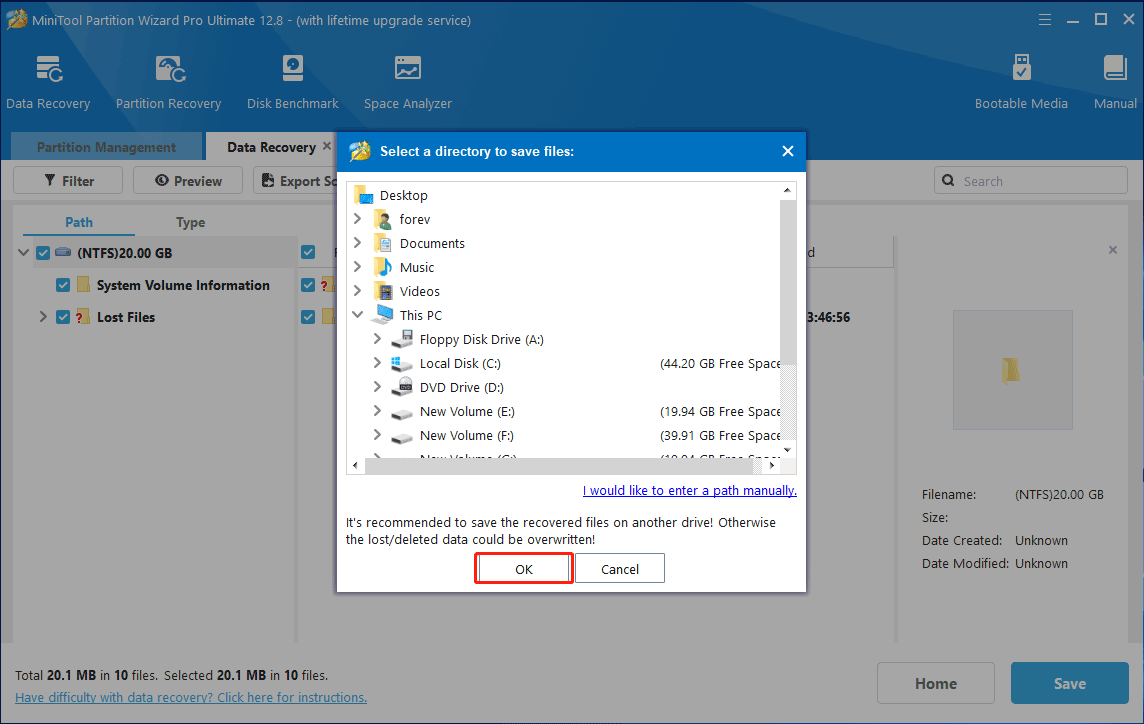
Step 5: Finally, choose a directory to save selected files and click OK. It is recommended to save the recovered files on another drive. Otherwise, the lost/deleted data could be overwritten.

Bottom Line
Removing write protection from an external hard drive involves a series of troubleshooting steps. With the above methods outlined in this post, you can regain full access to your external hard drive and resume normal operation. In addition, if you have any problems when using MiniTool Partition Wizard, you can always contact us via [email protected].
User Comments :