Partition Magic shows the possible causes of the Lenovo F11 not working issue and collects some troubleshooting methods for it in this post. Besides, it provides you with some tips for preventing the Lenovo F11 not working issue.
Lenovo OneKey recovery is a backup and recovery tool preinstalled in Lenovo PCs like IdeaPad 110. It also helps factory reset the system. To start the OneKey recovery function, simply press the F11 key. However, you sometimes may receive the Lenovo F11 not working Windows 10/11 issue.
This issue may occur with one of the following symptoms.
- The operating system Rescue and Recovery (RNR) can’t be accessed by pressing F11 after POST using default BIOS setting.
- Fail symptom: no response after pressing F11, system will enter Windows desktop rather than RNR.
What to do if Lenovo F11 is not working? If you want to troubleshoot the issue successfully, you should find the possible reasons behind it. The following section explains why Lenovo F11 is not working. Please keep reading the post.
Causes of Lenovo F11 Not Working
The Lenovo F11 key works properly when the MBR and BCD files are in good condition. Nevertheless, the installation of a new operating system will overwrite the MBR or corrupt the boot settings saved within the BCD, causing Lenovo F11 not to work.
In addition to that, Lenovo F11 not working Windows 11/10 issue can also be caused by the following reasons.
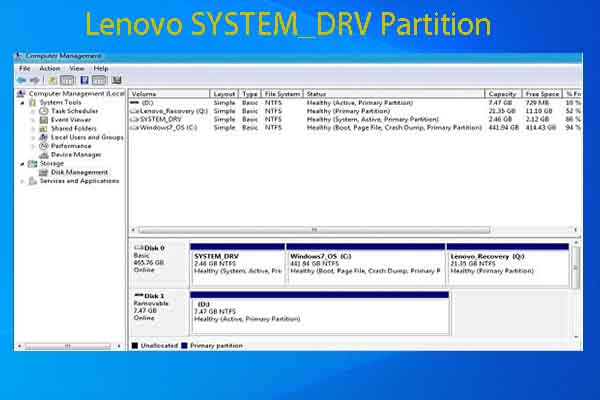
- The recovery partition is deleted or lost: The recovery partition is the core of Lenovo OneKey recovery. So, if it is deleted or lost by mistake, it won’t work no matter how many times you press the F11 key.
- Different models may have different specific keys: Under normal cases, you can press F11 to start the OneKey recovery function in a Lenovo computer. However, the key may vary depending on your PC model.
- Other kinds of OneKey recovery software are installed on Lenovo: This affects Lenovo’s OneKey recovery function.
Further reading:
To eliminate the effect of Lenovo F11 not working issue, you can create a recovery disk or system restore point. Alternatively, you can also make a Windows backup by using MiniTool Partition Wizard or MiniTool ShadowMaker. Once there’s something wrong with the system, you can restore the system to an earlier state or reinstall Windows 11/10.
MiniTool Partition Wizard DemoClick to Download100%Clean & Safe
MiniTool ShadowMaker TrialClick to Download100%Clean & Safe
Preliminary Checks Before Troubleshooting the Issue
It’s necessary to perform some preliminary checks before you perform any other fixes. Here is a list of checks you should conduct when the Lenovo F11 not working Windows 10/11 issue occurs.
- Check If the Function Keys Are Locked: You can check the User Guide to see what keys can be used to lock the function keys.
- Check for Conflicting Keyboard Shortcuts: Ensure that there aren’t any conflicting keyboard shortcuts or extensions affecting the F11 key.
- Check the Software or Application: Check if the software or application you use has a function assigned to the F11 key.
- Check Function Key Setting in the BIOS: Check if the function key settings in the BIOS are properly configured. You should keep the Fn and Ctrl key swap disabled, Fn Sticky Key disabled, and F1-F12 as Primary Function enabled. Additionally, you can also update BIOS to get rid of the issue.
- Check Settings in Lenovo Vantage: If you have installed Lenovo Vantage, check the User-defined Key Settings are configured properly.
After performing the above checks, see if the Lenovo F11 not working Windows 10/11 issue still persists. If so, conduct further operations to troubleshoot the issue.
Methods for Fixing Lenovo F11 Not Working
In this section, several methods for fixing the Lenovo F11 not working Windows 10/11 issue are offered. Try them now to resolve the issue.
#1: Recover the Recovery Partition
As mentioned earlier, the Lenovo F11 not working issue can appear if the recovery partition is deleted/lost. Hence, an available solution to the issue is to recover the recovery partition on your Lenovo computer. To do that, you need to use a piece of professional partition recovery software.
MiniTool Partition Wizard is such a tool. It helps you recover lost partitions due to virus attacks, mistaken deletion, wrong ghost, incorrect partitioning, sudden power outages, etc. It can undelete NTFS partitions, recover FAT32 partitions, recover unformatted partitions, etc.
In addition to partition recovery, MiniTool Partition Wizard also boasts the Data Recovery feature. By using this feature, you can perform external hard drive data recovery, SSD data recovery, D drive data recovery, USB data recovery, and other data recovery tasks.
In this scenario, we show you how to recover the recovery partition on the Lenovo computer.
Step 1: Download MiniTool Partition Wizard and install it on your computer.
MiniTool Partition Wizard DemoClick to Download100%Clean & Safe
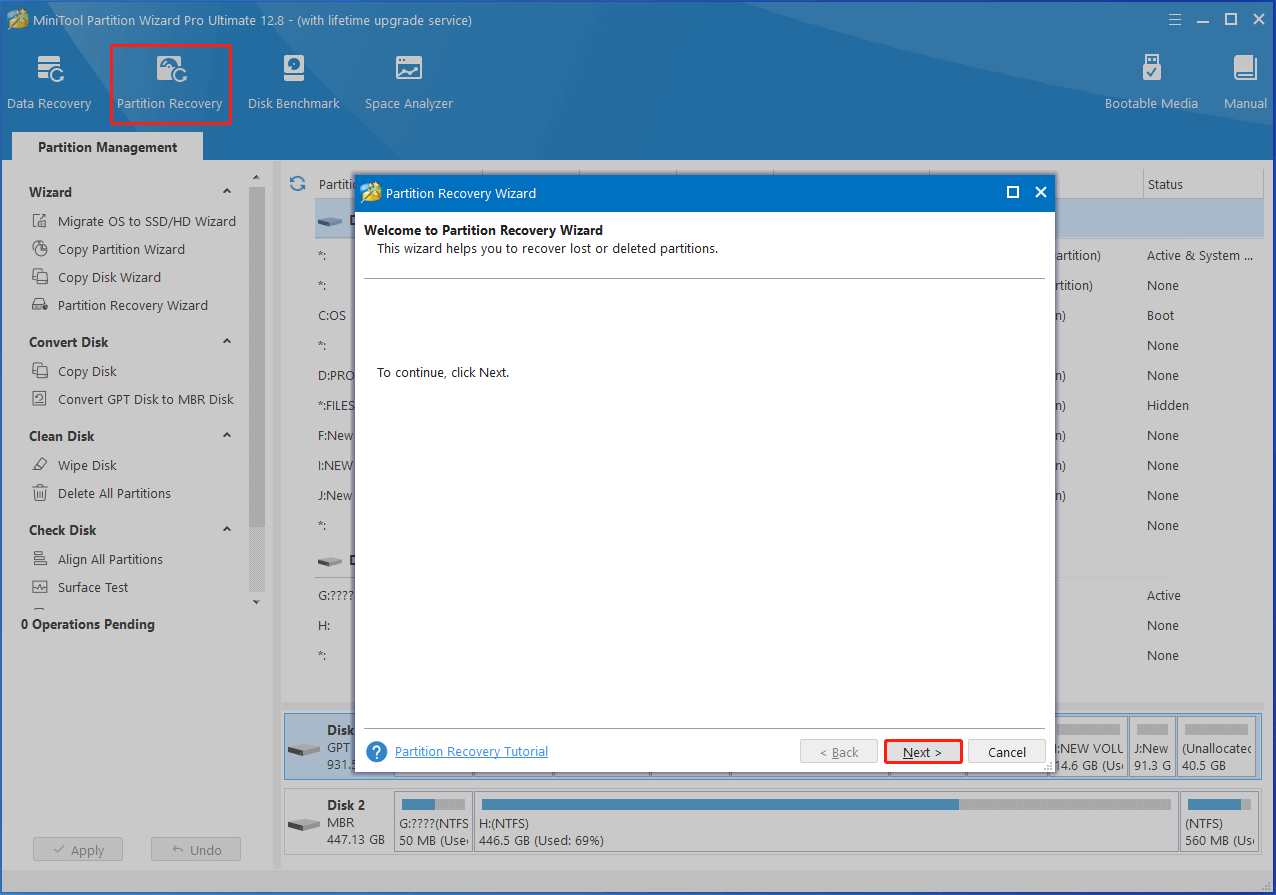
Step 2: Run into the main interface of MiniTool Partition Wizard and click Partition Recovery at the top toolbar. Then click the Next button in the pop-up window to continue.
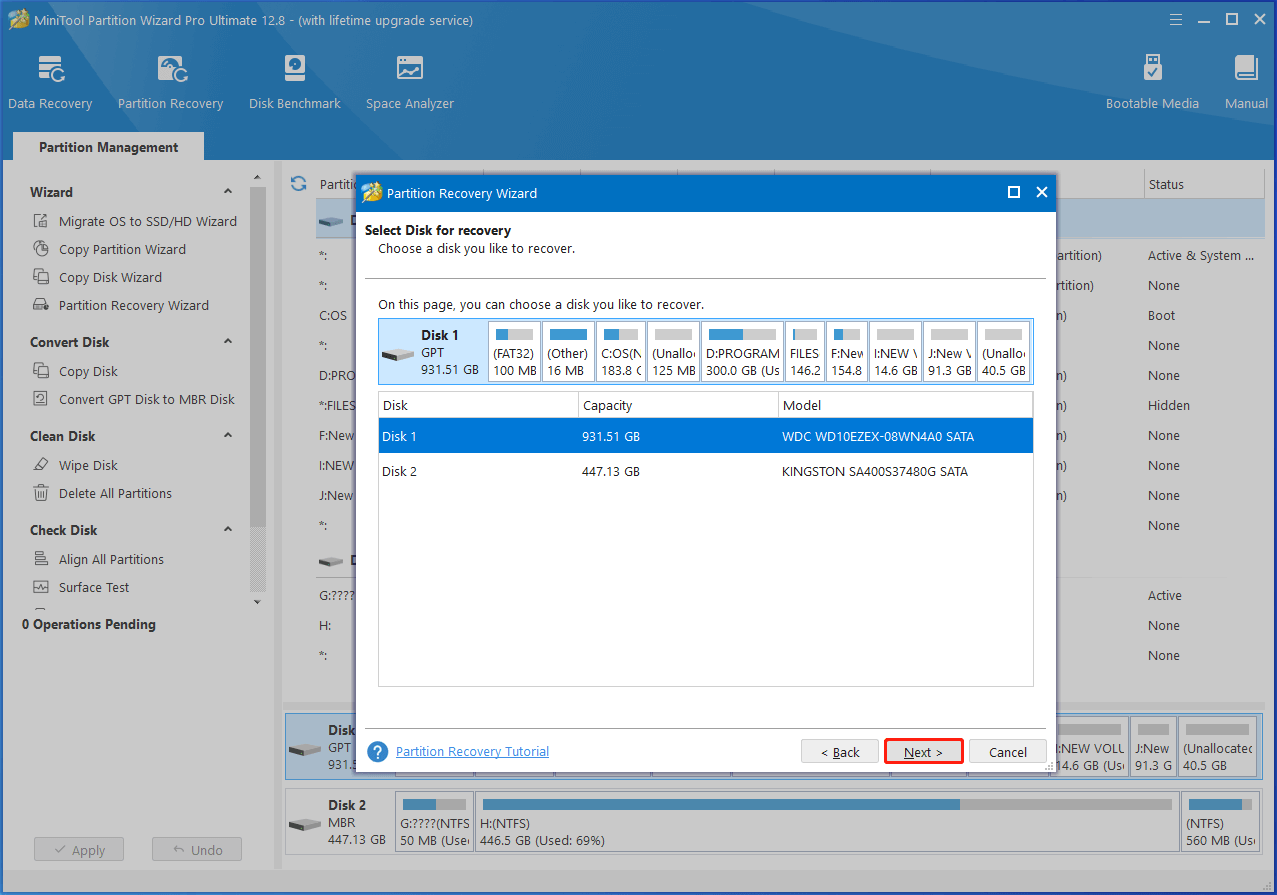
Step 3: In the Partition Recovery Wizard window, click on the disk where the recovery partition is located on and click the Next button.
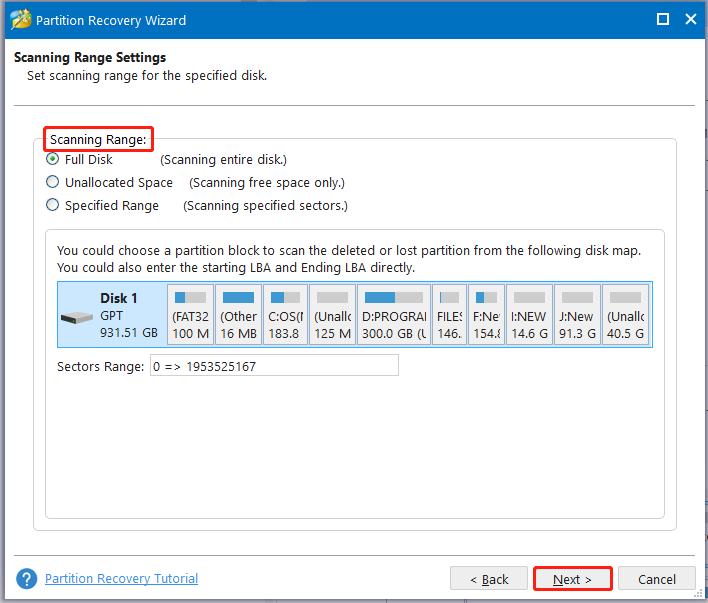
Step 4: Choose a scanning range in the next window and click the Next button to move on. It’s recommended to scan the full disk.
- Full Disk: The whole disk will be scanned to find the recovery partition.
- Unallocated Space: MiniTool Partition Wizard only scans the unallocated space on the selected disk for recovery partition.
- Specified Range: Only the specified range will be scanned. If you choose this option, you need to remember the starting LBA and ending LBA of the recovery partition.
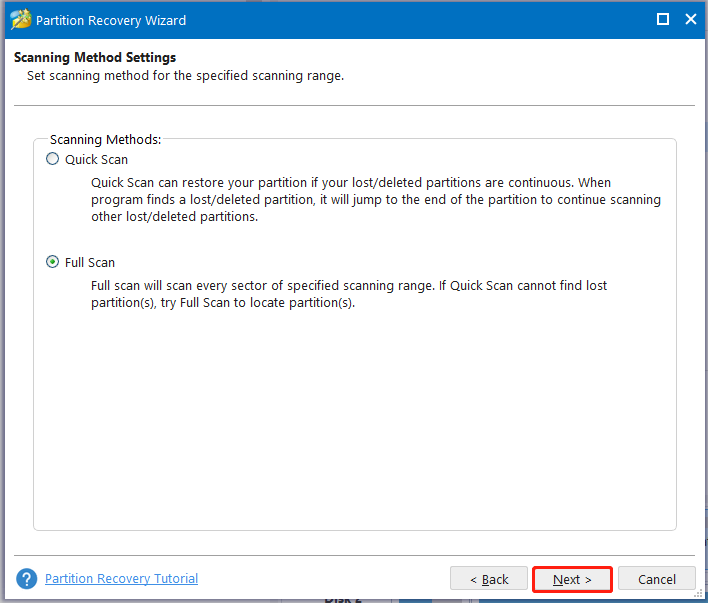
Step 5: Select a scanning method from the given options and click Next.
Step 6: Wait until the scanning process ends. The scanning time depends on multiple factors like the capacity of the hard disk, the amount of data, and the scanning method.
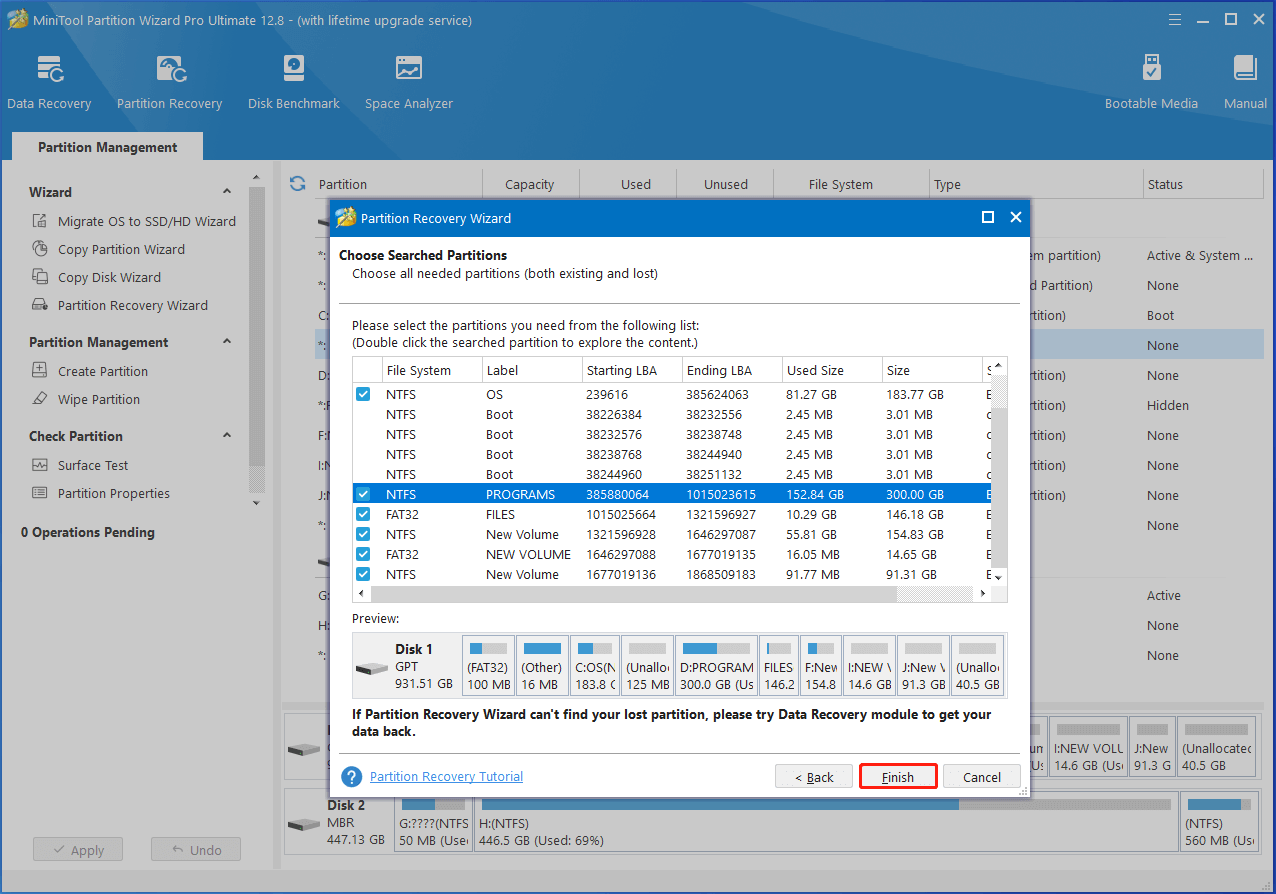
Step 7: Ensure that all the needed partitions are checked and click Finish.
Also read: How Long Does Data Recovery Take? It Depends on Various Factors
#2: Press the Correct Key
Generally speaking, you can press the F11 to start the OneKey recovery software. However, sometimes Lenovo F11 is not working. In this case, you’d better check the user guide to learn the specific key for starting the feature.
For instance, you might need to keep pressing F2 or the button next to the startup button to run the OneKey recovery feature. You can have a try!
The functions of ThinkPad function keys.
- F1: Mutes and unmutes audio
- F2: Lowers speaker volume
- F3: Increase speaker volume
- F4: Mutes and unmutes the microphone
- F5: Lower screen brightness
- F6: Increase screen brightness
- F7: Access options to manage the external display
- F8: Airplane Mode on/off
- F9: Access computer settings
- F10: Bluetooth on/off
- F11: Opens keyboard settings page
- F12: User Defined Functions
#3: Reinstall the Keyboard Driver
When Lenovo F11 is not working, try reinstalling the keyboard driver. Uninstall the driver first and then install it from scratch. Here’s a full guide for you.
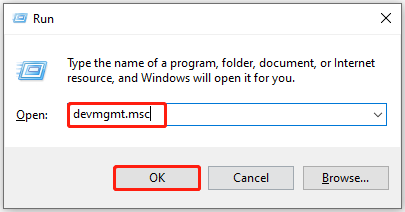
Step 1: Open the Run dialog window by pressing the Windows and R keys simultaneously.
Step 2: In the Run window, type devmgmt.msc and click OK. This will open the Device Manager window.
Step 3: Expand Keyboards by double-clicking on the option. Then right-click on your keyboard driver listed under Keyboards and click the Uninstall driver option on the context menu.
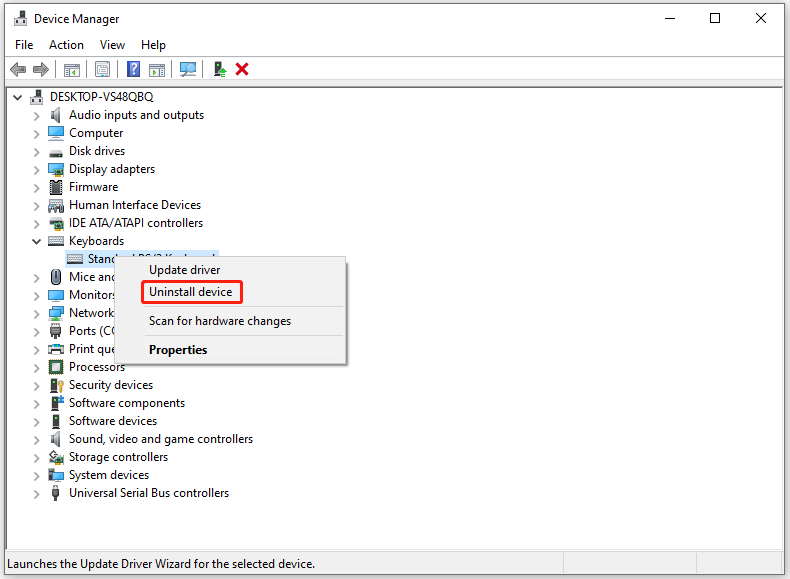
Step 4: In the pop-up warning window, click Uninstall to confirm the operation.
Step 5: Wait until the uninstallation process ends. Then download the keyboard driver on its official website and follow the on-screen instructions to complete the installation.
Recommended article: Here’s a Full Lenovo IdeaPad Gaming 3 SSD Upgrade Guide
#4: Send the Computer to a Repair Store
This is the last resort to fixing the Lenovo F11 not working Windows 11/10 issue. Send your Lenovo computer to a professional repair store. You can expect that the computer can be repaired successfully.
How to Use the F11 Function Key
If you want to use the F11 key properly, follow the steps below.
- Turn on the computer and press F1 to enter the BIOS setup screen.
- Tap on Security > Secure Boot > Reset to Setup Mode and press the Enter key.
- Change the Secure Boot Status from Setup Mode to User Mode.
- Press F10 to save the changes and exit the BIOS setup.
Wrap Things Up
To sum up, this post collects the potential causes, preliminary checks, and troubleshooting methods of the Lenovo F11 not working issue. Moreover, it shows you the steps to properly use the F11 key. If Lenovo F11 is not working on your computer, apply the given methods in this post.
You can also use OneKey Recovery alternatives like MiniTool ShadowMaker to get rid of the Lenovo F11 not working issue completely. When you encounter any issues while using MiniTool software, please contact us by sending an email via [email protected]. We will get back to you as soon as possible.
About The Author

Position: Columnist
Having writing articles about computer tech for a long time, I am rather experienced especially on the aspect of computer optimization, PC enhancement, as well as tech terms explanation. The habit of looking through tech forums makes me a great computer issues collector. And then, many articles related to these issues are released, which benefit plenty of users. Professional, effective, and innovative are always the pursuit of an editing worker.
User Comments :