What is fltmar.sys? Why does fltmgr.sys BSOD appear on Windows 10? How to solve this blue screen of death? Do you have any idea about these questions? In this post, MiniTool gives you the answers.
What Is Fltmgr.sys?
What is fltmgr.sys? Fltmgar.sys refers to a file related to Microsoft Windows file system filter manager. This file is used for making sure that all files on the hard drive stay in their respective locations. You can follow the path: C drive > Windows > System 32 folder to find it.
Can you delete flymgr.sys? Preventing fltmgr.sys from loading is not recommended. The reason is that the fltmgr.sys process is a part of Microsoft Windows. Once you remove it, some errors would occur or your Windows operating system would stop working.
The fltmgr.sys is not a threat to your computer. However, the fltmgr.sys BSOD is a serious Windows operating system error that can lead to irritating issues (like hard drive failure and system crashes) if it is not solved as soon as possible.
There are many reasons behind “fltmagr.sys BSOD Windows 10”. They are virus or malware attack, bug attack, corrupted file system, outdated or a faulty device driver, and so on.
Retrieve Data First When Running into Fltmgr.sys BSOD
After learning about the basic information of fltmgr.sys and fltmgr.sys BSOD, you may be eager to deal with this BSOD. But it is recommended that you get the lost data first. The reason is that the fltmgr.sys BSOD indicates that your Windows operating system is unable to read and process the data on the hard drive. This may lead to data loss.
To restore the lost data with ease, you can try MiniTool Partition Wizard. Apart from restoring the lost data, it can also help you repair the corrupted files system, one of the culprits behind fltmgr.sys BSOD.
If your computer cannot boot normally when the BSOD issue occurs, you need to prepare two things to recover the lost data with MiniTool Partition Wizard.
- A normal Windows 10 computer with Internet;
- A USB not saving important data (back up the USB if you have saved important data on it).
If your computer can boot normally, you can skip to Step 6 below directly to recover the lost data.
Step 1: Connect USB to the normal computer.
Step 2: Purchase MiniTool Partition Wizard by clicking the following button, install it on the normal computer and launch it.
Step 3: On the main interface of MiniTool Partition Wizard, click Bootable Media to create a bootable USB.
Step 4: Once the bootable USB is created, please disconnect it from the normal computer and then connect it to the problematic computer.
Step 5: Boot the problematic computer from the bootable USB.
Step 6: Click the Data Recovery feature on the toolbar when the bootable edition of MiniTool Partition Wizard has been launched.
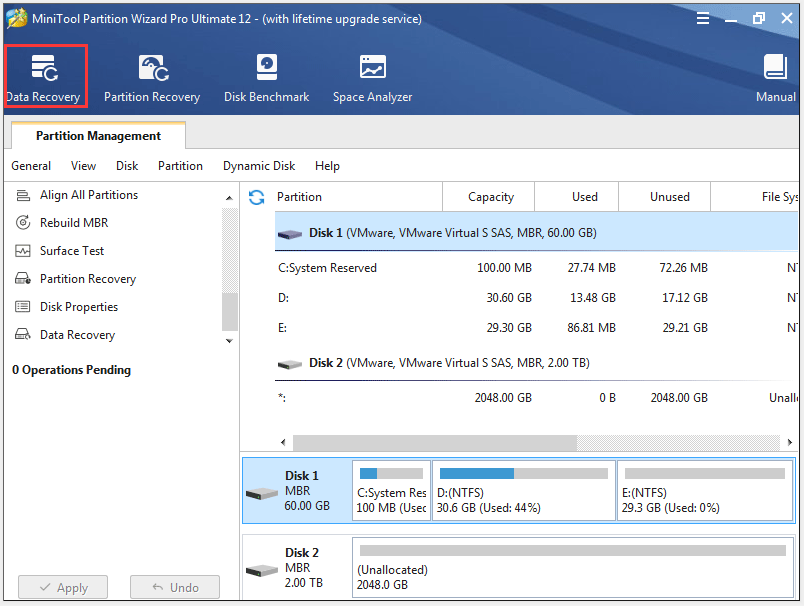
Step 7: Select the partition from which you want to recover the lost data and then click the Scan button.
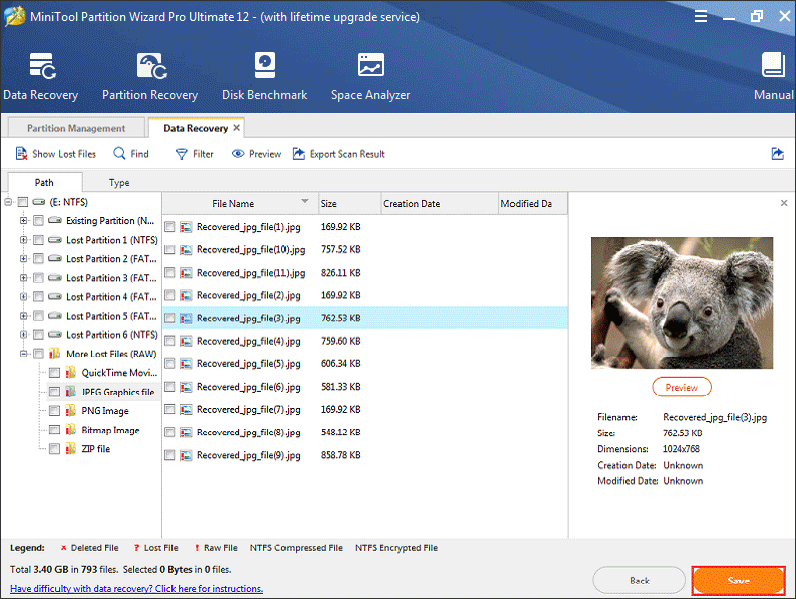
Step 8: MiniTool Partition Wizard will automatically scan the selected partition and display the lost data. When the scanning process comes to an end, please select the files you want to restore and then click the Save button.
Have you followed the above steps to retrieve lost data? If yes, let’s see how to get rid of fltmgr.sys BSOD Windows 10.
Try Restarting Your Computer First
The first possible solution is restarting your computer. The reason is that your hard drive is incorrectly connected to the system. For the driver to operate properly, making your hard disk connects to the system in an error free form is required.
In this situation, you just need to restart your computer. This will restart the driver from scratch and help it re-establish a connection between your hardware and the system.
If restarting the problematic computer is unable to fix the fltmgr.sys BSOD, you can try the following fixes. They should be carried out in Safe Mode if your computer cannot boot normally when the BSOD issue appears.
Follow the tutorial below to enter Safe Mode.
- Shut down your computer and then turn on it. Repeat that until you see Preparing Automatic Repair on your computer screen.
- Click Advanced options when Windows finishes diagnosing your computer.
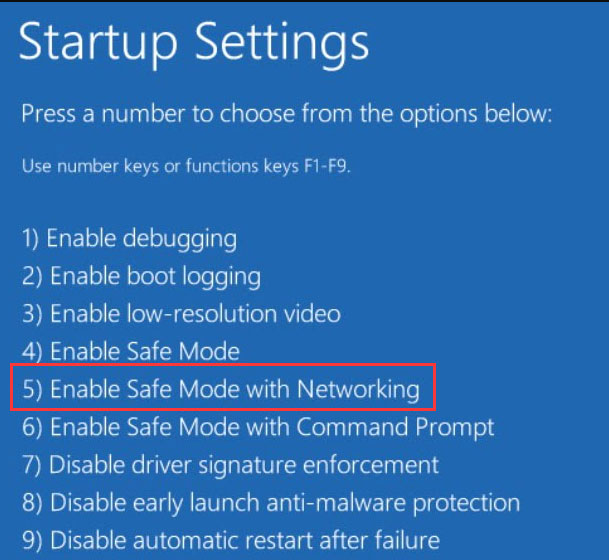
- Click Troubleshoot > Advanced options > Startup settings > Restart.
- Hit 5 on your keyboard to enable Safe Mode with Networking.
After finishing the above steps, your computer should be successfully booted into Safe Mode with Network. Continue fixing fltmgr.sys BSOD Windows 10.
Fix 1: Run Windows Update in Settings
Maybe running Windows update is helpful in this situation because the source of the fltmgr.sys Windows 10 is Microsoft.
To update your Windows, you just need to go to Settings > Update and security > Windows Update > Check for Updates. If any updates are available, they will be offered to you.
After updating, see whether the fltmgr.sys BSOD Windows 10 has been solved.
Fix 2: Update Driver in Device Manager
Apart from the corrupted file system, the outdated or a faulty driver can also lead to fltmgr.sys BSOD. So, you should go to the manufacturer’s website, download the latest drivers according to your build, and update each of the drivers manually.
Step 1: Press Windows + X to call out the Start menu and then select Device Manager from the menu.
Step 2: On the Device Manager window, please right-click the device and then click Update driver to update it.
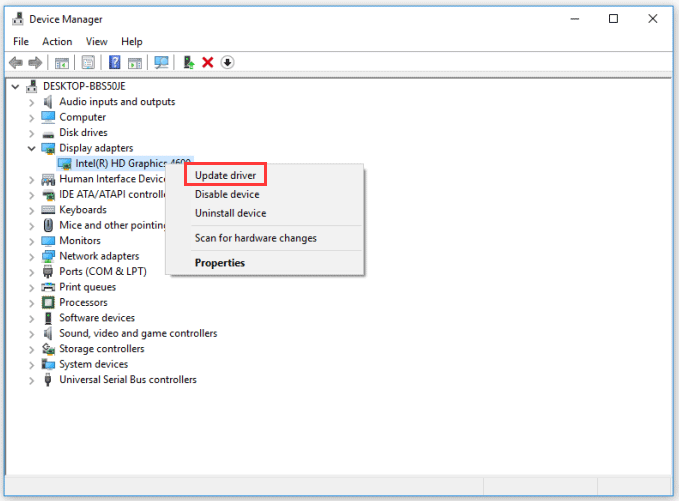
Step 3: Select Browse my computer for driver software and navigate to the drive you have downloaded and install it.
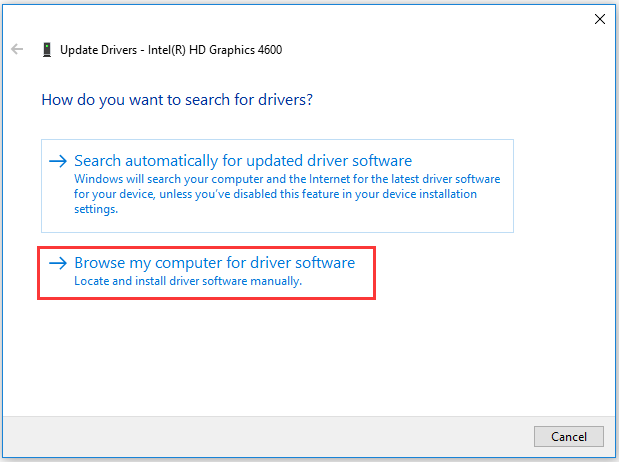
Repeat the above steps until you update all drives on your computer. Restart your computer to check whether flymgr.sys BSOD has been solved. If not, move to the following fixes.
Fix 3: Clean Junk Files in Windows Registry
The fltmgr.sys BSOD Windows 10 could be the indication that the registry has certain errors. This lies in that the registry is responsible for storing the important data which is required for smooth operations of an application or the driver.
Therefore, cleaning the junk files in Registry may be helpful. If you do not know how to clean the registry manually, you can download a trusted reliable software from its official website to help you complete this cleaning.
Fix 4: Run Blue Screen Troubleshooter
Blue Screen Troubleshooter is a Windows built-in tool. This tool is easy to run and fixes automatically. How to run this tool to fix fltmgr.sys BSOD? Refer to the tutorial below.
Step 1: Press the Windows icon on the keyboard and then choose the Settings icon.
Step 2: On the Settings window, please navigate to Update and security > Troubleshoot.
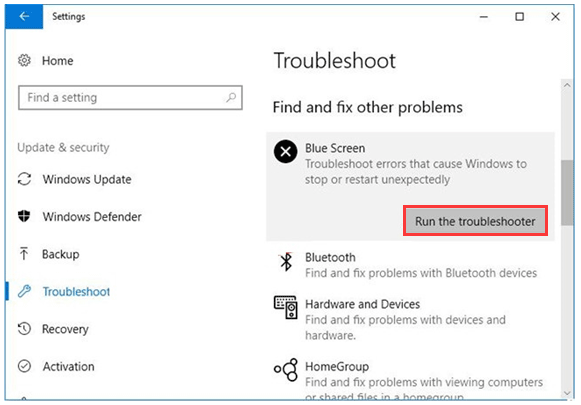
Run the Blue Screen Troubleshooter
If the troubleshooter is not helpful in this situation, please check the other workarounds.
Fix 5: Run SFC/scannow in Command Prompt
This fix is used for scanning the system files and repairing missing or corrupted system files to troubleshoot fltmgr.sys BOSD.
Here is the tutorial on running sfc/sacnnow.
Step 1: Launch Command Prompt as administrator.
- Type cmd in the Cortana’s search bar.
- Right-click Command Prompt and then select Run as administrator from the right-click menu.
Step 2: On the Command Prompt window, type sfc/scannow and hit the Enter key to run this command.
The process will last for some minutes. Once it finishes, please restart your computer for the changes to take effect and then check whether the BSOD issue persists.
Fix 6: Check Hard Drive Issue Through Two Ways
One of the possible reasons for fltmgr.sys BSOD is corrupted file system. In this situation, you can run CHKDSK and MiniTool Partition Wizard to get out of this issue.
Way 1: Run CHKDSK
The chkdsk command can help you check the hard drive issues and fix them, including bad sectors.
To run this command, please follow the steps below.
Step 1: Launch Command Prompt. Type chkdsk c: /f /r on the Command Prompt window and hit the Enter key to run this command.
Step 2: Wait for the progress finishing. Restart your computer and then see if the BSOD has been solved.
Way 2: Run MiniTool Partition Wizard
You can also try MiniTool Partition Wizard to check and repair some mistakes of the integrity of the files on hard drive.
Here is the tutorial on how to repair the corrupted file system with MiniTool Partition Wizard.
Step 1: On the main interface of MiniTool Partition Wizard, highlight the partition you want to check and then select Check File System from the left panel.
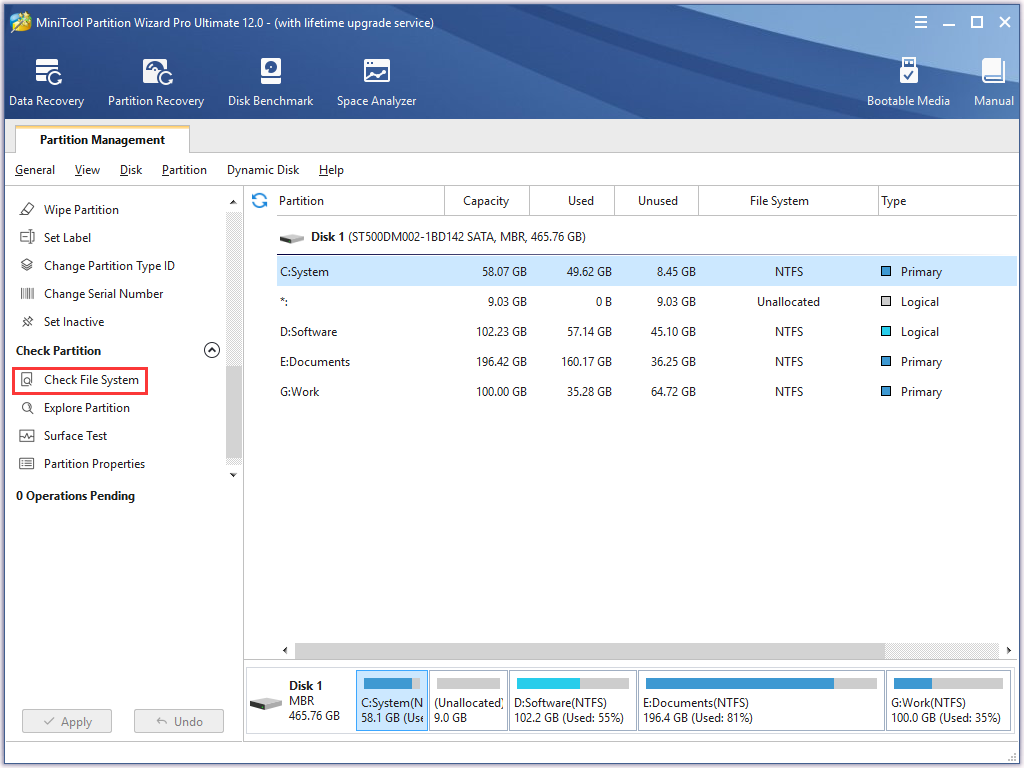
Step 2: On the Check File System window, please select the Check & fix detected errors and then click the Start button.
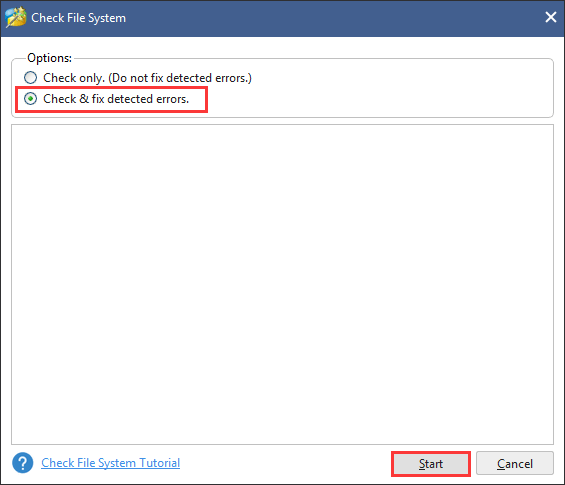
When the process finishes, check whether the BSOD issue has been solved. If not, please try the following fixes.
Fix 7: Check Hardware Issues
When the faulty hardware on your computer does not respond to the way your computer wants them to, the fltmgr.sys BSOD will occur.
If you have newly added some new hardware to your computer, please remove it and try replacing it with a different one.
Fix 8: Performance System Restore
If all the above fixes cannot help you get rid of fltmgr.sys BSOD, you can try restoring your system. This fix can never fail.
To performance system restore, please refer to the post: How to Restore Computer to Earlier Date in Windows 10/8/7 (2 Ways).
Bottom Line
Till now, you may have known what fltmgr.sys is and the solutions to flymgr.sys BSOD.
I would like to emphasize again that fltmgr.sys BSOD on Windows 10 is a really serious problem and you should address it as soon as possible to avoid further loss. Backing up your computer regularly is also recommended to avoid data loss caused by some errors.
Hope all the mentioned fixes can help you tackle the irritating issue. If you have any other solutions to this issue, please leave them in the following comment zone to share them with us. If you have difficulties in conducting the solutions in this post, please contact us via [email protected]. We will reply to you as soon as possible.
Fltmgr.sys FAQ
DPC Watchdog Violation is one of the blue screen error. When this error happens, the possible reasons are:
- unsupported SSD firmware.
- outdated SSD driver.
- hardware incompatibility.
- corrupted system files.
To get rid of this blue error, you can try these solutions.
- Update all drivers.
- Run sfc/scannow.
- Run DISM.
- Perform a clean boot.
- Uninstall the latest software
- Restore to the previous point.
- Check hard drive health.
To know the detailed steps about each solution, please click here.


User Comments :