Sometimes, the Dell laptop won't turn on. If you are facing this issue and don’t know how to solve it, you come to the right place. In this post, MiniTool Partition Wizard offers you 8 solutions.
Why Won’t My Dell Laptop Turn on?
Various problems may occur to every computer during its service life, and Dell computers are no exception. Some people report that the Dell laptop won’t turn on. The symptoms may be as follows:
- My Dell laptop won’t turn on but the power light is on. In this case, the power light and the charging light should be on but the screen and fan are off.
- The Dell laptop does not start (only power light on for few seconds). In this case, the power light and even the keyboard should turn on for a few seconds but then they turn off again. The screen won’t light up at all.
- Dell laptop screen black or blue. The Dell computer won’t turn on and display a black or blue screen.
Why won’t my Dell laptop turn on? The possible reasons are as follows:
- Hardware Issues: Too many components are important for the computer booting, like the motherboard (including the CPU and GPU), the hard drive, the display, the power supply unit, fans, the cables connecting these components, etc. You need to make sure they are working normally.
- Software Issues: Wrong firmware settings, missing or corrupt system files, malware, etc. may also cause the Dell laptop not turning on issue.
How to Fix the Dell Computer Not Turning on Issue
What to do if your Dell computer won’t turn on? You can try the following solutions.
Way 1. Perform a Hard Reset
If the Dell laptop not turning on issue is caused by small glitches and overheating, performing a hard reset can solve this issue. You can do that as follows:
- Turn off the computer.
- Disconnect the AC adapter or power cable from the computer, and remove the battery.
- Disconnect all devices such as USB drives, printers, webcams, and media cards (SD/xD).
- Press and hold the Power button for 15 to 20 seconds to drain residual power.
- Connect the AC adapter or power cable and the battery (for Dell laptops).
- Power on your Dell computer again to see if it can turn on now.
Way 2. Reset the Real-Time Clock (RTC) or Use Forced ePSA
Resetting the Real-Time Clock can reset the BIOS, the computer date and time, and unprovision Intel vPro to factory default settings. This will solve the Dell computer not turning on issue in most cases. Here is the guide:
- Turn off the computer.
- Connect the AC adapter to the computer.
- Press and hold the Power button (around 30-35 seconds), until the power LED blinks three times.
- Release the Power button.
- The RTC reset is complete after the Power button is released.
- Power on the PC again to see if the issue is solved.
Dell Latitude laptop PCs have a recovery feature called forced ePSA. It can help recover a Dell Latitude laptop PC in the following scenarios:
- The PC may show signs of power but does not display the Dell logo after powering on.
- Caps Lock LED indicator may not illuminate when toggled using the Caps Lock key.
- LCD screen may appear blank or black after powering on the PC.
- The PC may display the Dell logo after powering on but does not boot into the operating system.
Here is how to use Forced ePSA:
- Power off the PC.
- Disconnect the AC adapter.
- Remove the battery.
- Press and hold the Power button for 10 seconds to remove any residual power.
- Press and hold the Power button, and plug the AC adapter into the Dell PC. Do not release the Power button until some text or the Dell splash screen is displayed. Do not connect the battery to the PC until the recovery process is complete.
- Dell ePSA diagnostic screen will appear.
- At the prompt ‘Were color bars displayed? (Y/N)’, press the Y key to confirm.
- Press the Esc key to stop ePSA and click Exit to safely exit ePSA diagnostics and reboot the PC.
Way 3. Reset the BIOS or UEFI to Factory Default Settings
Incorrect boot settings in the BIOS or UEFI of the computer can cause boot-related issues. Then, the Dell computer won’t turn on. In this case, resetting the BIOS or UEFI settings to factory defaults can help resolve the issue. Here is the guide:
- Restart the computer and press the F2 key repeatedly at the Dell logo screen to enter BIOS.
- Go to Settings > General > Battery Information.
- Click Restore Settings, and select OK. Then, follow the on-screen instructions.
2. You can also choose to update the BIOS on the Dell computer to solve the issue.
Way 4. Repair the Missing or Corrupted Windows System Files
If the system files are missing or corrupt, the Dell computer not turning on issue may occur. In this case, you can follow the steps below to repair them.
Step 1: Restart the computer and boot into the Safe Mode with networking.
Step 2: Open Command Prompt and execute the command “sfc /scannow”. If this command detects errors but cannot fix them, you can then execute the following commands:
- DISM.exe /Online /Cleanup-image /Scanhealth
- DISM.exe /Online /Cleanup-image /Restorehealth
2. If the above methods don’t work, you can also try factory resetting the Dell computer or reinstalling Windows on it.
If reinstalling Windows also doesn’t work, you need to troubleshoot the hardware. You can try the following ways.
Way 5. Troubleshoot the Power Supply
You need to check the power supply if you encounter the following cases:
- The power LED is off and does not respond when you try to turn on the computer. This is similar to the case where the Dell laptop does not start (only power light on for few seconds).
- No fan noise is heard.
- Dell laptop screen black or blank. There is no indication of turning on the computer.
Now, you can use the following ways to troubleshoot the power supply.
- First, you need to check if the wall outlet is working correctly. If you plug the AC adapter into the surge protectors, power strips, or docking stations, you need to also check if these devices can work normally.
- Second, check for loose cables in the back of the desktop computer. For laptops, check for the loose power cable that is connected to the AC adapter. You should also check if the LED on the AC adapter, or the plug is turned on.
Some Dell computers even allow you to use the built-in self-test to diagnose power supply issues. Here is the guide:
- Turn off the computer.
- Press the BIST button on the PSU and verify if the LED turns on.
- If the LED is solid and not flickering or flashing, and the power supply fan turns on, the power supply is delivering power to the computer.
- If the BIST LED does not turn on or the PSU fan does not spin correctly, the power supply is not delivering power to the computer.
What if my Dell laptop won’t turn on but the power light is on? You can try the following methods.
Way 6. Troubleshoot the Display
Sometimes, the Dell computer won’t turn on just because of the display issues. You can check if the display is working normally in the following ways.
First, reconnect the power cable of the monitor and the video cable between the monitor and the computer. Then, turn on the monitor and check if it can work properly. In addition, you can also run the LCD Built-in Self-Test to check if the monitor can work normally. Here is the guide:
- Turn off the laptop.
- Disconnect any devices that are connected to the computer.
- Connect the AC adapter (charger) to the computer.
- Ensure that the LCD screen is clean (no dust particles on the surface of the screen).
- Press and hold the D key and turn on the computer to enter LCD built-in self-test (BIST) mode. Continue to hold the D key, until you see color bars on the LCD screen.
- The screen displays multiple color bars and changes colors to black, white, red, green, and blue.
- Carefully inspect the screen for abnormalities.
- Press the Esc key to exit.
- If the screen abnormality is not present in the diagnostics, the display is functioning normally.
Way 7. Check the Motherboard
If LEDs are blinking, beep codes are heard, or the computer stops responding or is stuck at the Dell logo, there should be something wrong with the inside components of the computer. Then, you should use M-BIST to diagnose the motherboard. Here is the guide:
- Press and hold both the M key and the Power button to initiate M-BIST.
- The battery-status light illuminates in amber when there is a system board failure.
Way 8. Run a Preboot Diagnostic Test
The preboot diagnostics is embedded within the BIOS and launched by the BIOS internally. It tests your hardware without using the operating system. Here is the guide:
- Turn on your computer.
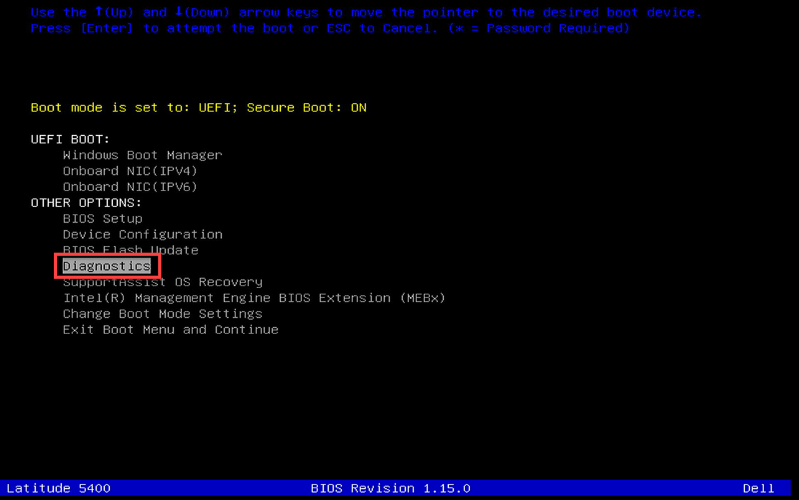
- At the Dell logo, press the F12 key several times until the One Time Boot Menu appears.
- On the boot menu screen, select the Diagnostics option and press Enter.
- The diagnostic test begins. The mouse is not active during testing. But on Dell laptops, user response is required during the LCD test.
- If there are any issues, error codes are displayed. Make a note of the error code, validation code, and service tag. Then, look up the error code on the Dell website.
If you find hardware issues that you cannot fix by yourself, you need to contact Dell customer support.
Recover Data from Unbootable Dell Computers
If you fail to fix the Dell laptop not turning on issue, you may need to recover data from this PC. Then, you can try MiniTool Partition Wizard. It can recover hard drive data and partitions, clone HDD to SSD, partition hard drive, convert MBR to GPT without data loss, etc. Here is how to use it to recover data from an unbootable Dell computer.
MiniTool Partition Wizard DemoClick to Download100%Clean & Safe
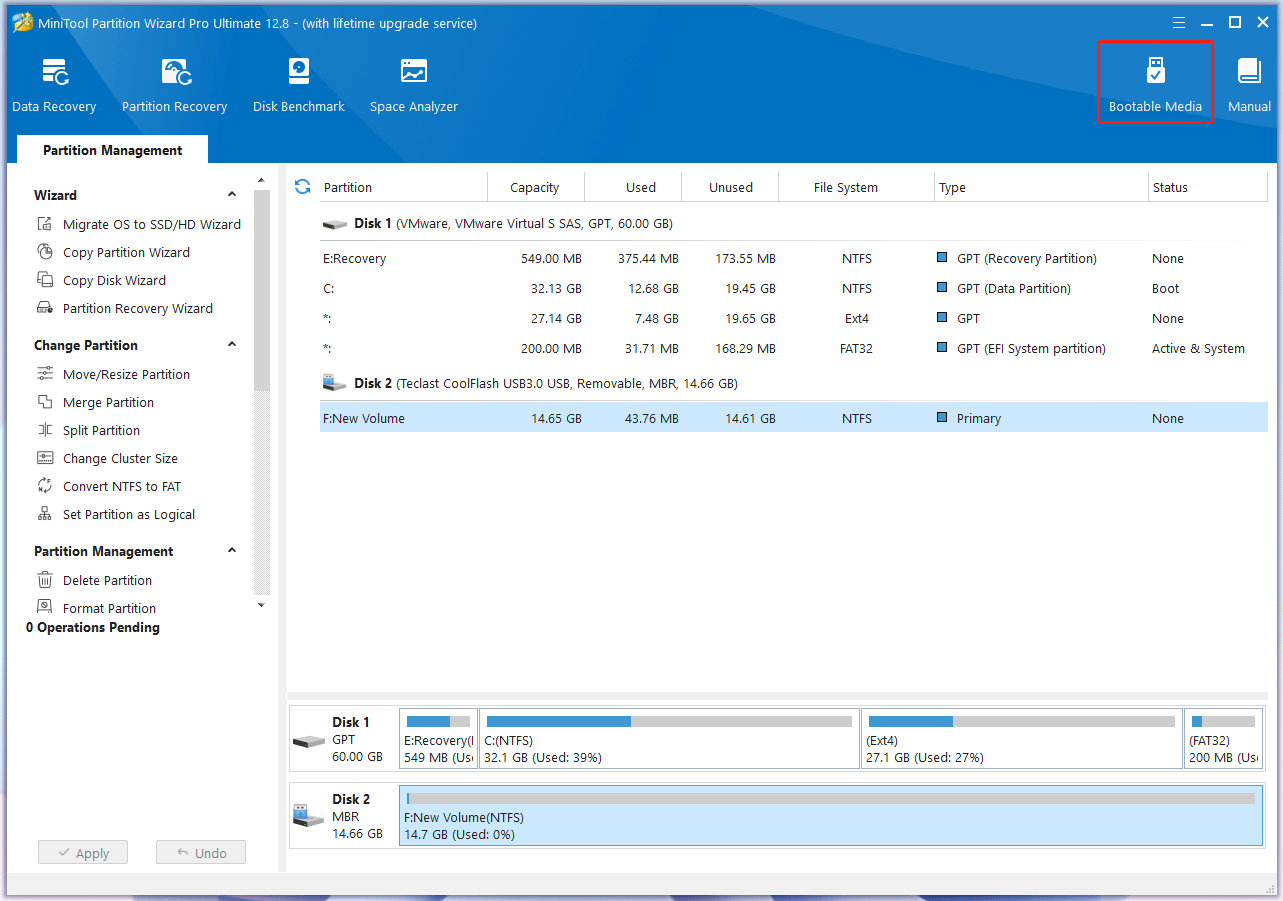
Step 1: Insert a USB drive into a normal PC. Launch MiniTool Partition Wizard and click Bootable Media.
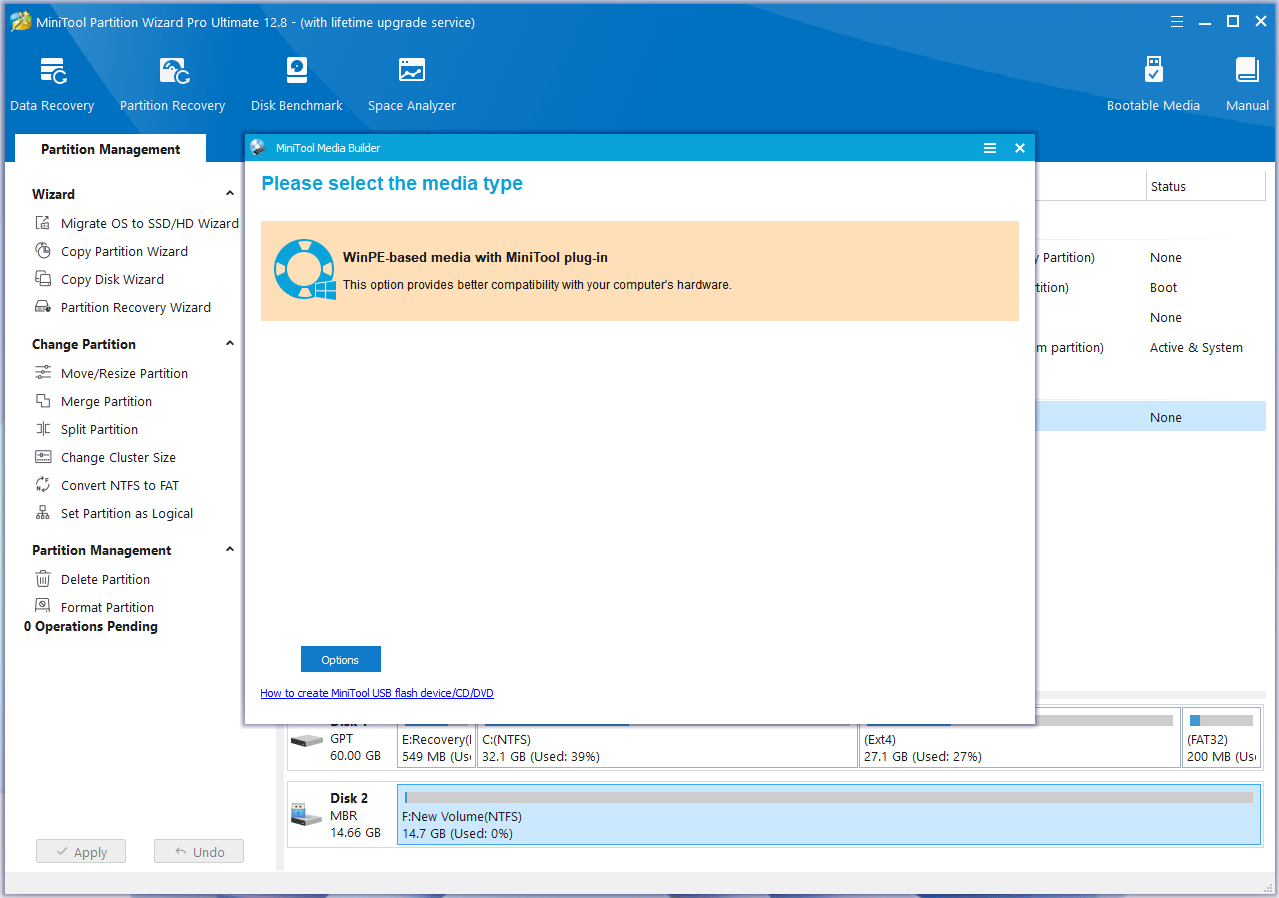
Step 2: Click WinPE-based media with MiniTool plug-in.
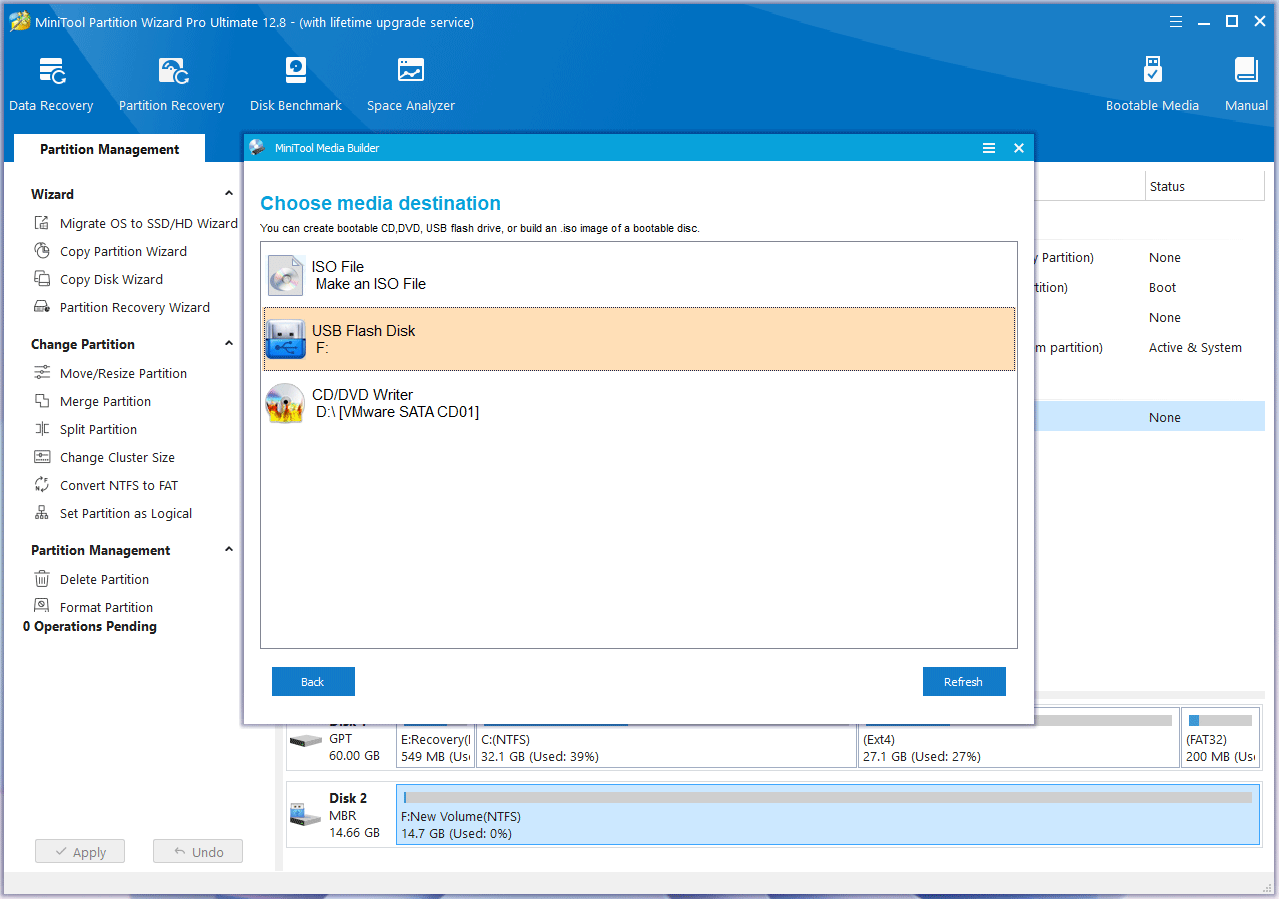
Step 3: Click the USB Flash Disk. You will be warned that the data on the USB disk will be destroyed. Click Yes and then MiniTool Partition Wizard will start to create a bootable drive.
Step 4: Insert the bootable USB drive into the unbootable Dell computer. Restart the computer and press the F12 key several times to open the One Time Boot Menu. Select the USB drive as the boot option.
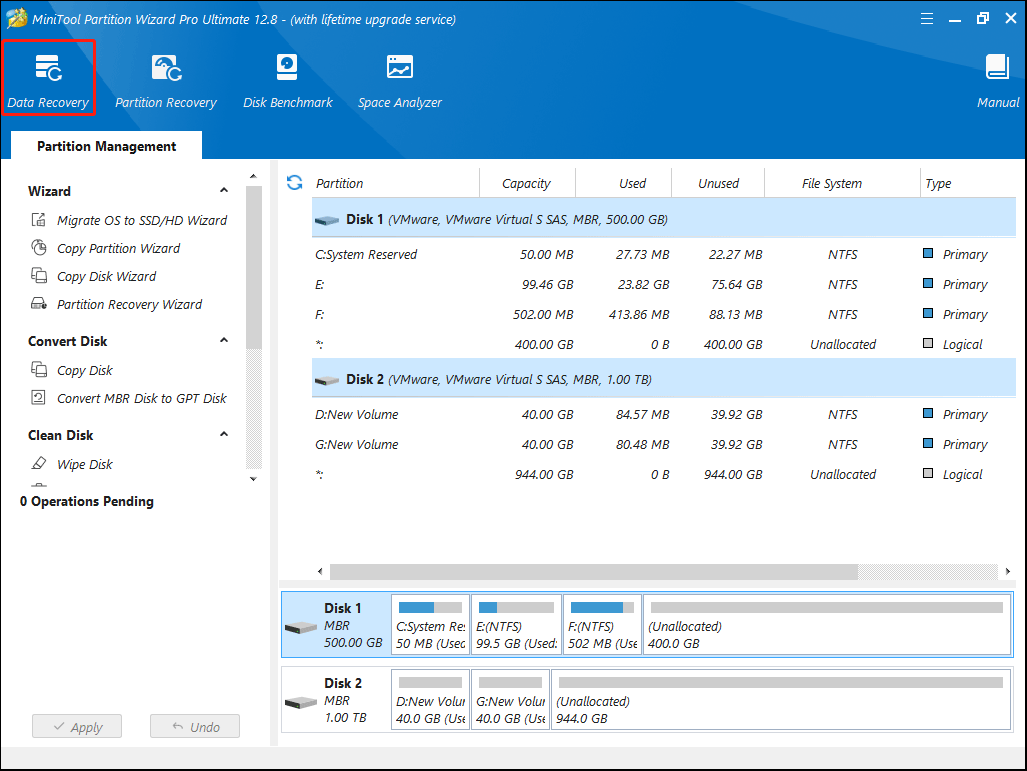
Step 5: After the PC boot from the USB drive, click OK twice and then you will see MiniTool Partition Wizard’s main interface. Click Data Recovery on the toolbar.
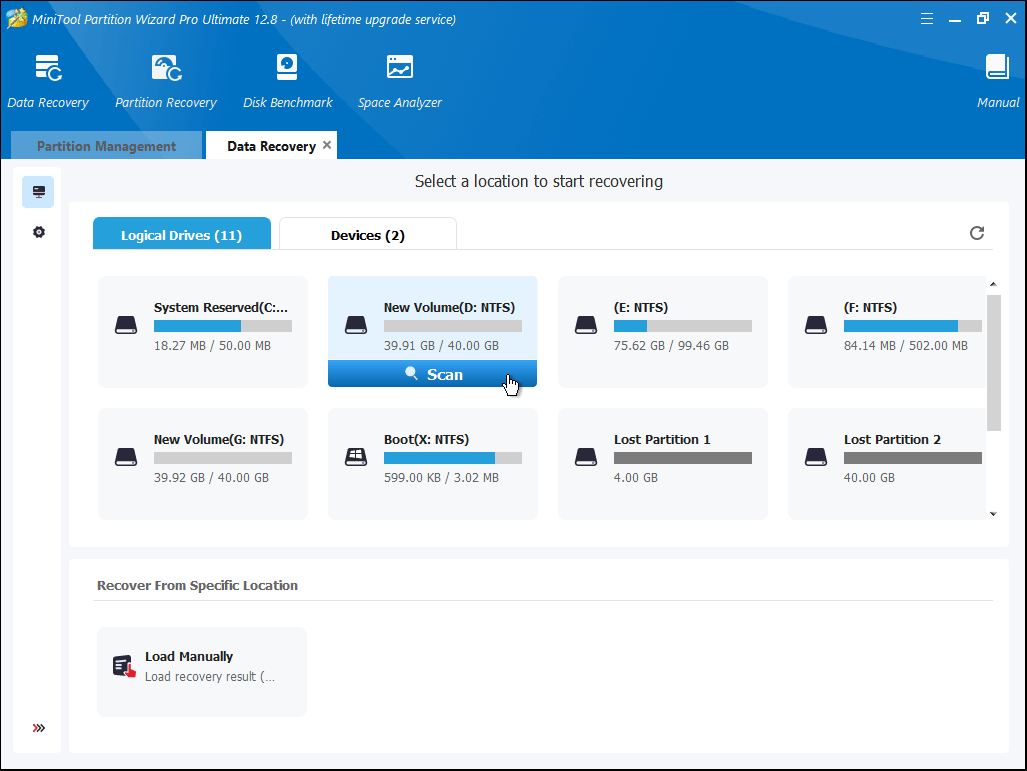
Step 6: Hover the cursor over a partition and click Scan.
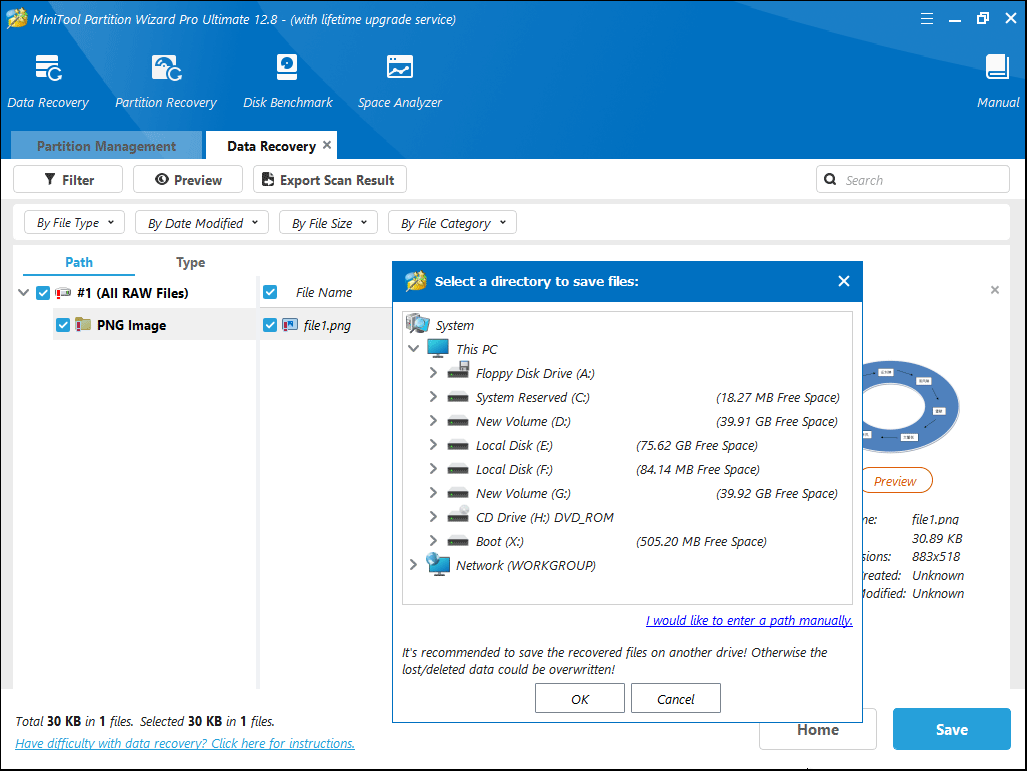
Step 7: Find the lost files using Path, Type, Filter, or Search tools. Check the box before the lost files and click Save. Then, select a safe place to recover these files.
If your Dell computer won’t turn on, this post may help you. It offers 8 solutions.Click to Tweet
Bottom Line
What to do if your Dell laptop won’t turn on? This post offers 8 solutions. If you have other solutions, share them with us in the following comment zone. In addition, if you encounter problems when using MiniTool Partition Wizard, please feel free to contact us via [email protected]. We will get back to you as soon as possible.
About The Author

Position: Columnist
Linda has been working as an editor at MiniTool for 5 years. She is always curious about computer knowledge and learns it crazily. Her articles are simple and easy to understand. Even people who do not understand computer can gain something. By the way, her special focuses are disk management, data recovery and PDF editing.
User Comments :