Lots of users reported that they encountered a blue screen after Windows update. If you are also trying to fix the error, this post from MiniTool Partition Wizard is what you need.
Blue Screen After Windows Update
Sometimes, some Windows users see a blue screen after updating Windows 10 to Windows 11. This is a common problem and will cause your PC cannot boot normally. Here is an example suffering the blue screen after Windows update from the Microsoft forum:
Blue screen after Windows updates. I updated my Windows 11 and now I’m receiving just a blue screen of death! I’ve tried uninstalling the last update, diagnosing the system, and prompt command and I can’t fix it! I also used safe mode to recover the system but it didn’t help. Is there any other way to resolve this issue?https://answers.microsoft.com/en-us/windows/forum/all/latest-update-of-windows-cause-blue-screen/a756ebe5-3554-48ba-89ec-82ff7f9997cc
Blue Screen of Death (BSOD) is a serious system error that can occur in Windows, usually caused by a system crash or software issue, and can result in the loss of unsaved data and a forced shutdown of the computer. In some cases, this can happen when a Windows update goes wrong, causing system instability and triggering a BSOD.
This can happen when the update has errors or becomes corrupted due to missing some essential files required to install the update during the download process.
So, how to solve this problem? Here are some troubleshooting tips worth trying.
Before You Do
Before you fix the Windows blue screen after update, you should do some preparations. Here we recommend you follow the steps to do that.
# 1. Recover Data
When a BSOD after Windows update displays on your computer, it means that there might be some corruption on your computer. Therefore, it is better for you to restore all data to another location to avoid data loss during the process of repairing BSOD.
To recover the data on your PC, MiniTool Partition Wizard is a good choice. It is a professional and reliable data recovery tool that enables you to recover lost data from an unbootable computer effectively.
In addition, it can also help you partition hard drive, convert MBR to GPT, format USB to FAT32, and so on.
For the problem that the system cannot boot, you should prepare a working computer and a USB or CD/DVD disc in advance, and then click on the provided button to download MiniTool Partition Wizard.
MiniTool Partition Wizard DemoClick to Download100%Clean & Safe
Here is a tutorial on how to recover data with the help of MiniTool Partition Wizard.
Step 1: Plug the prepared USB into the working computer or insert the prepared CD/DVD into its CD/DVD burner.
Step 2: Download the software and then launch it to access its main interface. Click on Bootable Media in the upper right corner and follow the on-screen instructions to create a bootable USB, CD, or DVD.
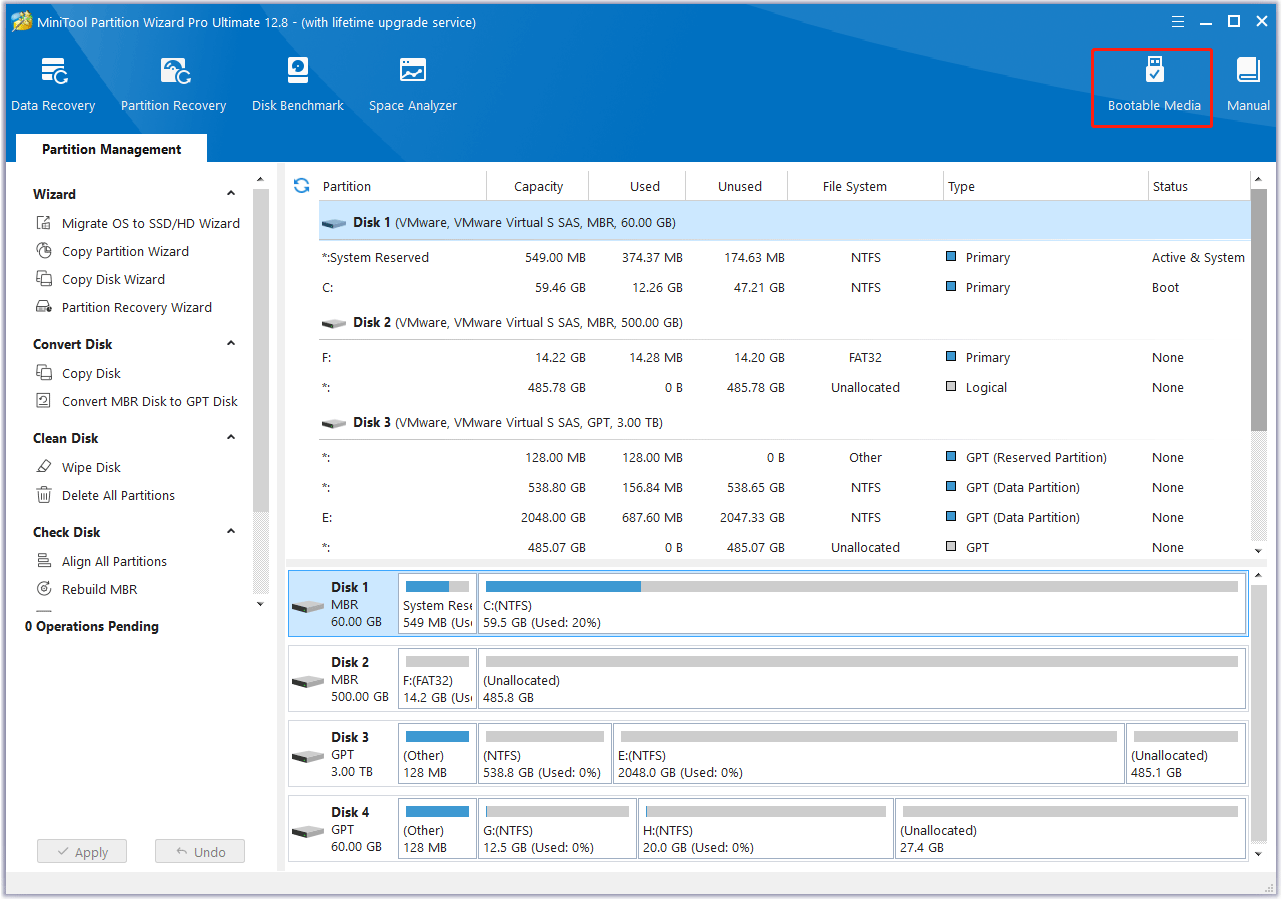
Step 3: Plug the bootable USB into the original computer which the operating system cannot boot or put the bootable CD or DVD into it.
Step 4: Restart the computer and press F2 or another key to enter BIOS menu. Change boot settings to make your computer boot from the USB flash drive or CD/DVD.
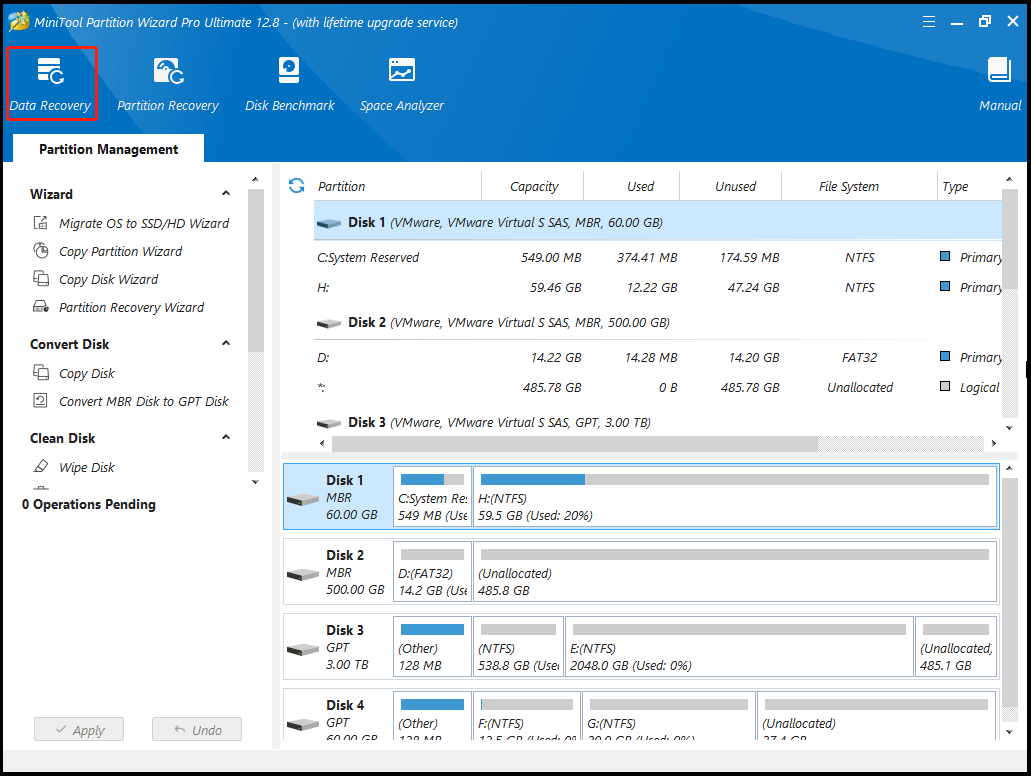
Step 5: In the main interface of MiniTool Partition Wizard, click on Data Recovery from the top toolbar.
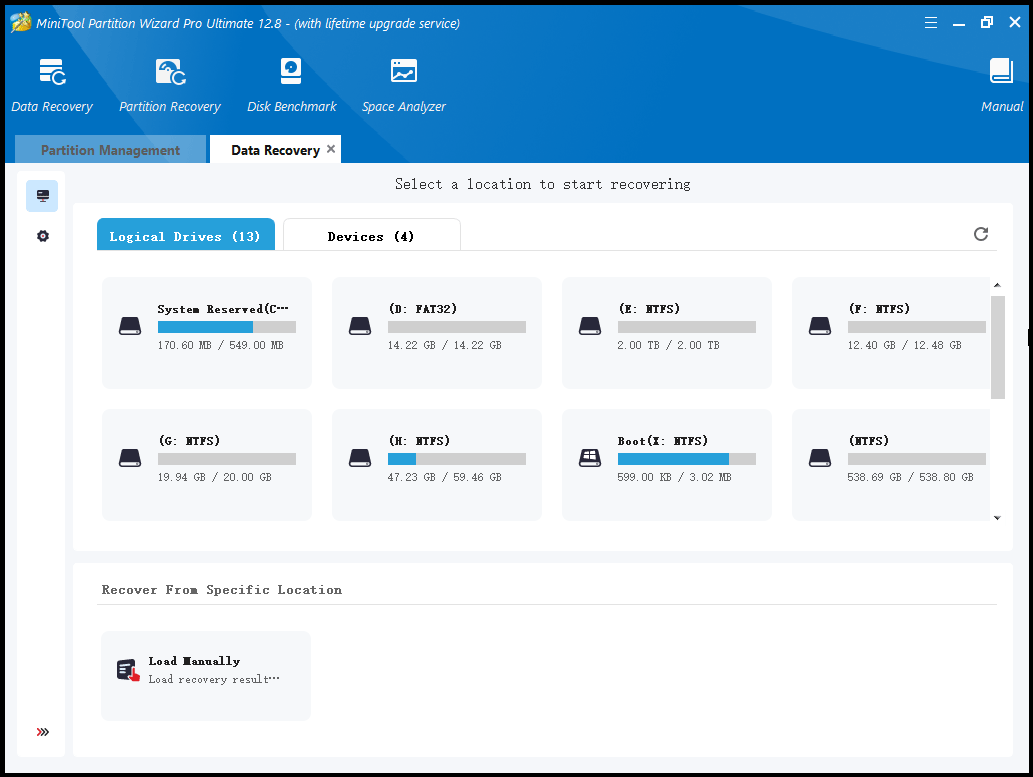
Step 6: Click on the Scan button under the partition you need to recover the data.
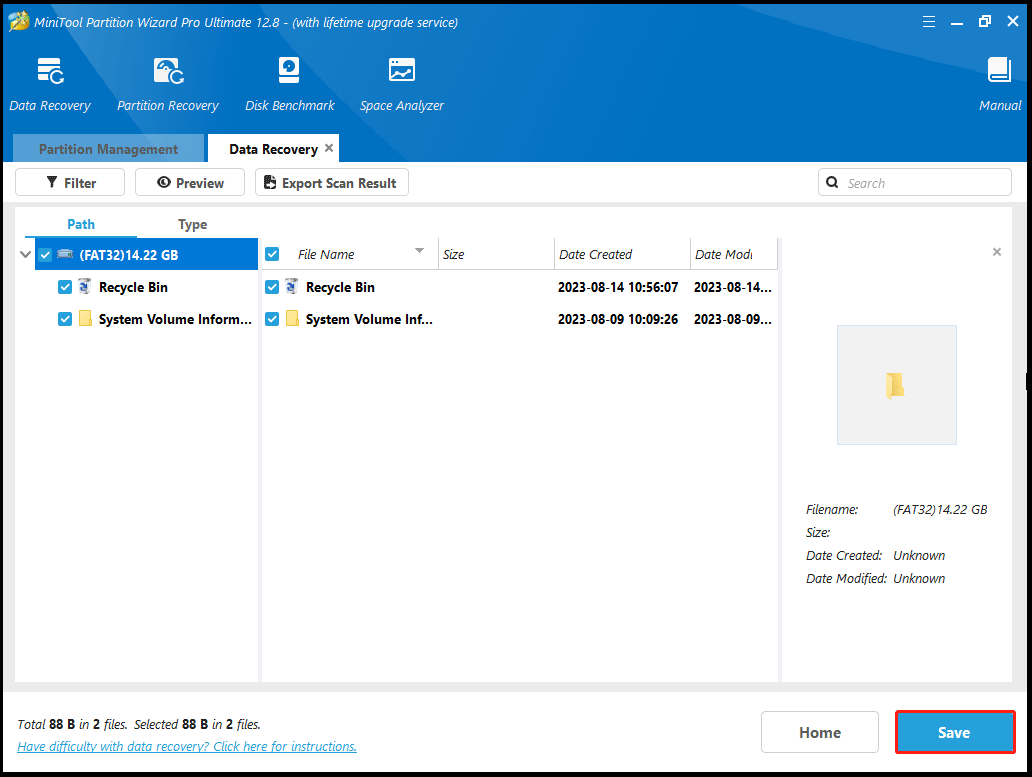
Step 7: Then wait for the scan to complete. Once the scan is complete, check all items that you need to recover and click on Save.
Step 8: Then select a directory to save the selected files and click on OK. You’d better save the recovered files to another drive. Otherwise, the lost/deleted data could be overwritten.
# 2. Boot Into Windows Recovery Environment
If you cannot access the system at all due to a crash, you should first boot into the Windows Recovery Environment (WinRE). Recovery environment is a bootable system repair tool. It helps troubleshoot and fix operating system problems, including crashes, boot failures, and other issues that prevent Windows from working properly.
To boot into WinRE, press and hold the Power button till the screen turns off. Repeat this operation three times and then the words “Preparing Automatic Repair” will appear under the Windows logo. When you are prompted to enter WinRE, choose Advanced Options.
After booting into the Recovery Environment, proceed with the troubleshooting methods one by one.
How to Fix Blue Screen After Windows Update
In this part, we summarize 7 feasible ways to fix the Windows blue screen after update. You can try them one by one until the problem gets solved.
Method 1. Run Startup Repair
Windows provides a Startup Repair tool to help fix Windows boot issues. So, you can try to run Startup Repair to solve the Windows blue screen after Windows update. To do that, you can follow the steps below:
Step 1: In the Recovery Environment mode, go to Troubleshoot > Advanced Options > Startup Repair.
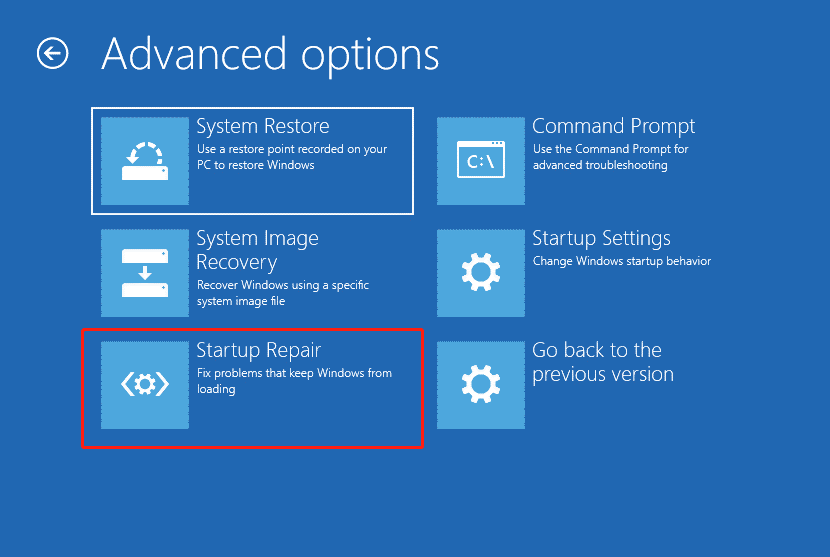
Step 2: Select the target operating system to fix. Then Windows will start diagnosing your system. If any problem is detected, Start Repair will attempt to fix it.
Method 2. Perform a System Restore
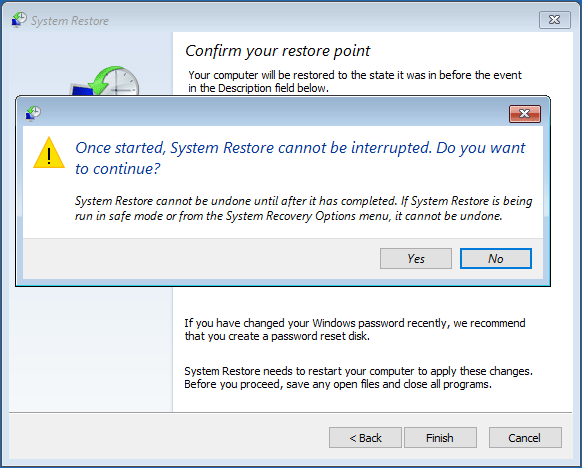
Since the Blue Screen of Death is caused by an update error, we recommend you do is perform a system restore. If you have previously created a system restore point, you should be able to restore your operating system to its previous state while your applications and registry files are still running fine. Here’s how to do that.
Step 1: In the Recovery Environment mode, navigate to Troubleshoot > Advanced options > System Restore.
Step 2: Choose an account to continue (you may need to enter the password as well).
Step 3: Click on Next to continue.
Step 4: Now select a restore point that will restore Windows back to the date when you weren’t getting the blue screen error and click on Next to go on.
Step 5: Click on the Finish button and then Yes to restore Windows.
Method 3. Uninstall Problematic Updates
A problematic update can also cause this BSOD after Windows update issue, and you can also use the Windows Recovery Environment to do this.
Step 1: In the Advanced options screen of WinRE, click on Uninstall Updates.
Step 2: You will be able to see two options now: Uninstall latest quality update and Uninstall latest feature update.
Step 3: Choose the appropriate option and follow the on-screen instructions to proceed.
Once the update has been uninstalled, check if the issue is resolved.
Method 4. Repair System Files
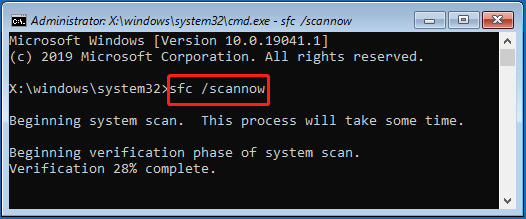
Corrupted or damaged Windows system files could cause a BSOD after Windows update. To get rid of this error, you can perform some scans by running DISM and SFC tools. The two tools should be used in Command Prompt. Here shows how to use DISM and SFC in Command Prompt.
Step 1: Choose Command Prompt in the Advanced options screen of WinRE.
Step 2: Type the following command in the Command Prompt window and hit Enter. The scan will take several minutes to complete.
sfc /scannow
Step 3: Once the command is executed, proceed with the following command:
dism /online /cleanup-image /scanhealth
Step 4: If DISM reports any issues, execute this command:
dism /online /cleanup-image /restorehealth
It will take several minutes for the repair to be completed. Once the command is executed successfully, restart your computer and check if the BSOD still occurs.
Method 5. Update Drivers
Outdated drivers can also cause Windows blue screen after Windows updates. So, you should try to update them.
Step 1: Boot your PC into Safe Mode.
Step 2: Press the Win + S key and type Device Manager in the Search box. Then press Enter.
Step 3: Expand the driver sections and look for any warning signs with the drivers. This sign indicates that the driver is either corrupt or outdated.
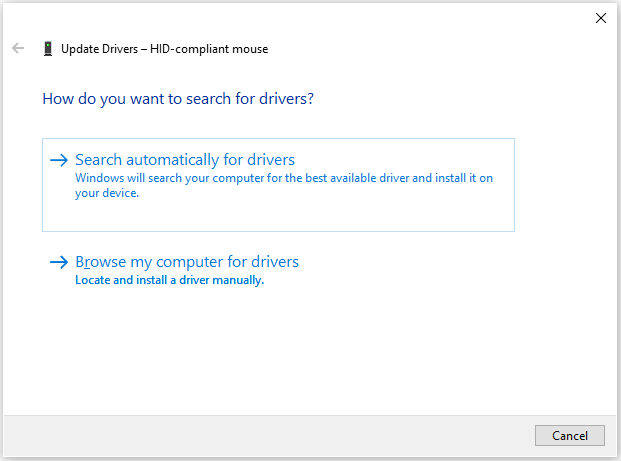
Step 4: Right-click on the faulty driver to select Update Driver.
Step 5: In a pop-up window, select Search automatically for drivers. Then your Windows will check, download, and install the latest and appropriate driver.
Then update all the outdated drivers and then restart your computer to see if the “Windows update causing blue screen” problem gets solved.
Method 6. Check for Viruses and Malware
If Windows update causes blue screen, it may be caused by a virus or malware. So, you should run antivirus software to scan and remove these viruses or malware. Alternatively, if you don’t have any antivirus program, you can use the Windows built-in utility – Windows Defender. To use Windows Defender to scan your computer for viruses, follow these steps:
Step 1: Boot your PC into Safe Mode.
Step 2: Press the Win + I key to open Settings. Then go to Update & Security > Windows Security > Virus & threat protection.
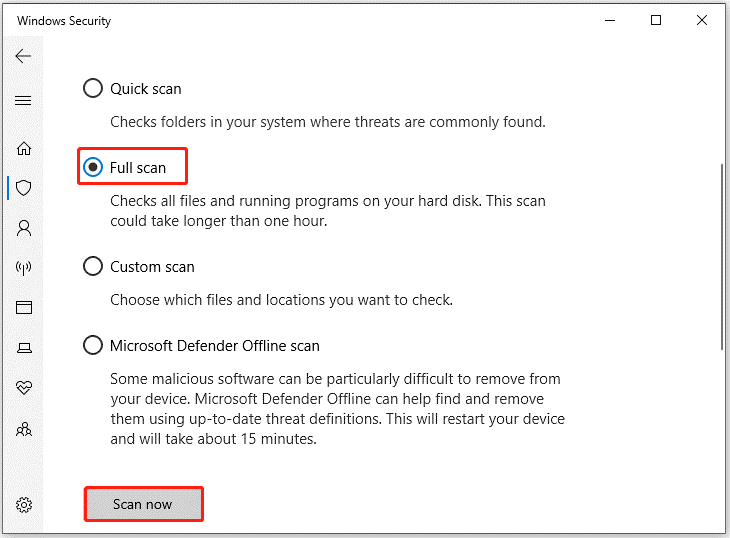
Step 3: Tap Scan Options and then choose a scan option based on your demands. Here I choose the Full Scan option.
Step 4: Click on Scan now to start the operation.
Method 7. Reset or Reinstall Windows
In case you still have this issue, we advise you to reset or reinstall Windows. We all know that reinstallation will delete all data on the hard drive, so you should back up all important files before doing this.
After backing up data, you can refer to the related article to reset your PC or clean install your PC.
Bottom Line
To sum up, this article has provided several useful methods to fix blue screen after updating Windows 10 to Windows 11. Now you can try these solutions out if Windows update causes blue screen.
For any other opinions about this error, you can leave a message in our comment area below. If you encounter certain issues while using MiniTool Partition Wizard, you can send us an email via [email protected] to get a quick reply.


User Comments :