The Windows installation process might fail with the error message “Windows could not prepare the computer to boot into the next phase of installation”. To help you get rid of this issue, MiniTool Partition Wizard develops a simple guide where some possible solutions from users are displayed.
Help! Windows Couldn’t Prepare Computer to Boot into the Next Installation Phase
Some users have reported the “Windows could not prepare the computer to boot into the next phase of installation” error on the forum. To get more details of the problem, let’s start with a real case scenario posted by the Windows user ZP9:
My PC shut off when it was updating. I created a USB boot drive and it will open to the Windows setup screen in my computer. It shows the steps “copying Windows files, getting files ready for installation, installing features, installing updates, finishing up”. When it finishes installing updates it presents an error message saying “Windows could not prepare the computer to boot into the next phase of installation. To install Windows, restart the installation.” I’ve done this multiple times. From www.windowsphoneinfo.com
As you can see, this error comes up during the process of Windows update and the user runs into an automatic repair loop due to this problem. Actually, you might also receive the “Windows couldn’t prepare the computer to boot” error message when you are installing Windows operating system on a computer.
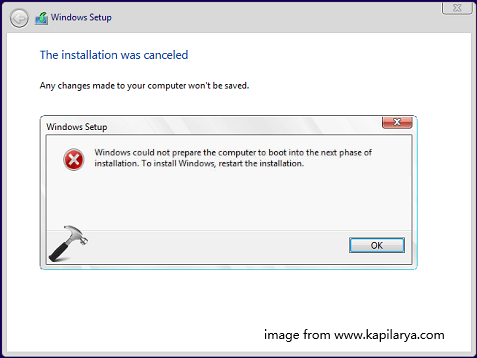
Similar to other issues that block the process of Windows update or installation, this error has been reported to appear on various versions of Windows, including but not limited to Windows 7, 8.1 and 10.
You may ask: why does this annoying problem happen to my computer? There are plenty of possible reasons for this error, and some common factors are listed below.
- You have too many external devices connected to your computer.
- Your BIOS is not compatible with the Windows version you are installing or updating to.
- The installation media is not properly created.
- The system files are corrupted.
Whatever the cause is in your case, you can try fixing the problem by yourself. Just keep on your reading to get the details.
How to Fix Windows Could Not Prepare the Computer to Boot Issue
After learning about some basic information about the error, it’s time to fix it. If you are facing the problem unfortunately and are looking for methods to get rid of this issue, this article might be helpful for you. In the following contents, I will show you 4 methods with detailed instructions to fix the issue.
Without any ado, let’s check out these solutions one by one.
4 Solutions to Windows Could Not Prepare the Computer to Boot Issue
- Remove unnecessary hardware
- Update BIOS
- Prepare a fresh installation media properly
- Delete all the partitions and clean install Windows
Fix 1: Remove Unnecessary Hardware
Sometimes, you might add some hardware to the computer for temporary usage and keep these devices connected after that. It is a common operation for a computer user. However, certain external devices could interfere with the proper functioning of the system and trigger certain critical problems like blue screen of death error.
If you are updating or installing Windows with too many external hardware plugged in, you are very likely to receive the “Windows could not prepare the computer to boot into next phase of installation” error message. Therefore, when you fail to update or install Windows due to this error, don’t hesitate to firstly disconnect any unnecessary hardware.
After disabling or removing the peripheral devices that are physically connected to your computer, you can try Windows update or installation again and check if the error has fixed.
Fix 2: Update BIOS
If the BIOS model present on your computer might not be compatible with the Windows version you are trying to install, you will certainly encounter problems during installation. In this case, you might need to update your BIOS to the version supported by the current Windows.
Warning: The BIOS is an essential but sensitive part of a computer. It is risky to make changes for the BIOS, as any improper operation might bring unrecoverable damage to your computer. So, if you don’t familiar with the operation, you’d better skip this method and jump to the next one.
If you don’t know how to update BIOS, you can back up your computer and refer to the steps below:
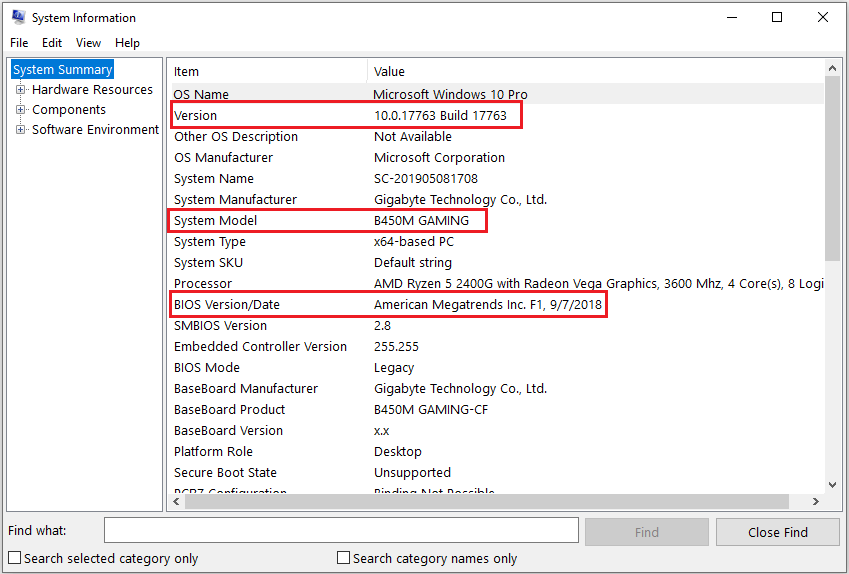
Step 1: Check the current BIOS version and some necessary system information.
Press Windows + R, input msinfo32 and press Enter to open System Information. Find the OS Version, System Model and BIOS Version/Date in the right pane and note them down. You can find this information by searching them in the search field on the bottom of the window.
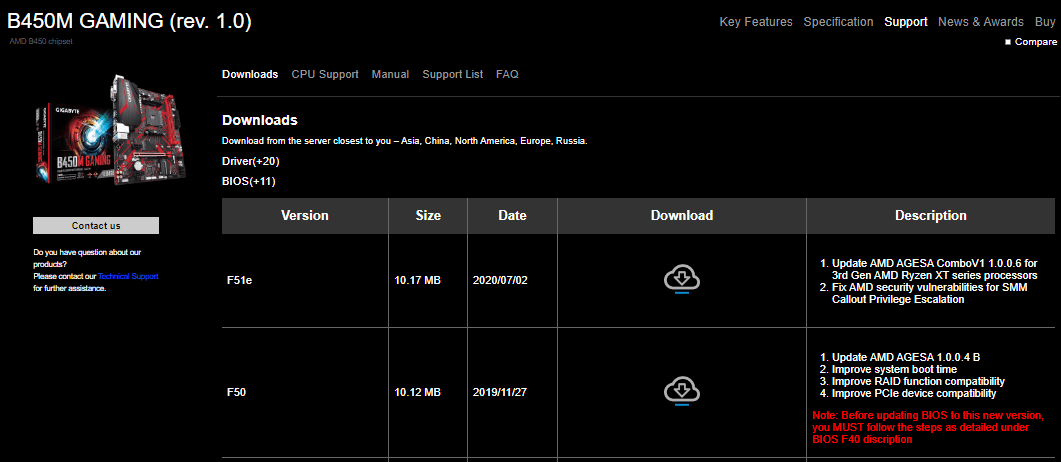
Step 2: Download the latest version of your BIOS from the official website.
Search your System Model and BIOS in the browser to find the right website. Then, go to the Support or Downloads page of the target system model and you can see a list of BIOS versions. Download the update file that is newer than your current BIOS version.
Step 3: Extract the download zip file and copy the BIOS file onto a prepared flash drive. Keep the drive connected to the computer during the update process.
Step 4: Boot into BIOS and back up the current BIOS if possible. Then, enable and use the BIOS update tool to update BIOS. Wait until the process is completed, restart your computer to apply the changes you’ve made.
Fix 3: Prepare A Fresh Installation Media Properly
Some users encounter the preparation for Windows 10 failed to boot into the next phase of installation when they are installing Windows with an installation media. It is possible that the installation media used to install Windows was not properly created or has been damaged.
If this scenario is applicable to your current situation, you can try creating a fresh installation media properly. You are recommended to use Windows 10 Media Creation Tool to make installation media if you encounter the problem in Windows 10. Here’s what you should do:
Step 1: Prepare a USB drive and connect it to a working computer. Download and launch Windows 10 Media Creation Tool on this PC.
Step 2: When you get the following screen, choose Create installation media (USB flash drive, DVD, or ISO file) for another PC and click Next button.
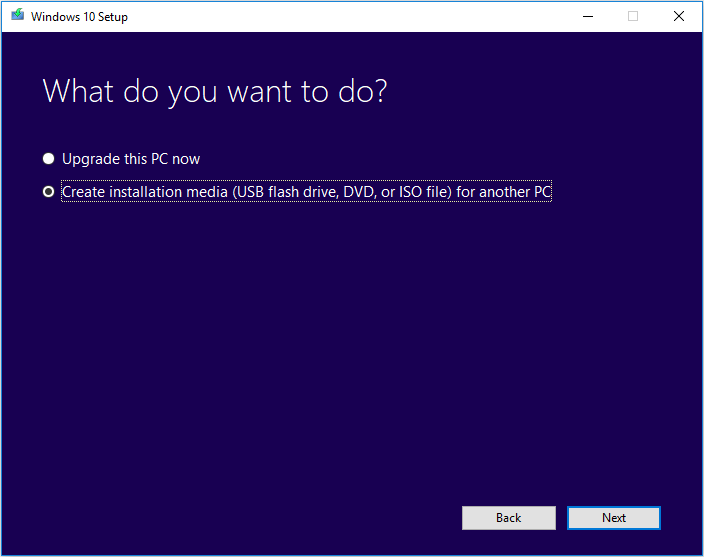
Step 3: Set your preferences and click Next button. Then, choose USB flash drive option, select the drive you prepare and click Next to start creating installation media.
If you are using other version of Windows, you can download the ISO file from Microsoft’s website and then create corresponding installation media referring to this article: [Complete Guide] How to Make A Bootable USB
Fix 4: Delete All the Partitions and Clean Install Windows
Some users report that they have removed the preparation for Windows 10 failed issue by deleting and reconfiguring all the partitions on the disk. And they eventually complete the installation process without the mentioned problem.
This is not a complicated operation, but it will erase all your data saved on the disk. If you are still bothered by the problem after trying the above fixes, you might have no choice but to try this method. To protect your data, you can use MiniTool Partition Wizard to back up the disk before deleting partitions.
As you are making changes for the system disk, you have to use a paid edition to boot your computer into recovery environment. Keep reading to get detailed steps.
Step 1: Download MiniTool Partition Wizard Pro Ultimate and make a bootable USB drive of it. Prepare an external storage device that is large enough to save all the data on the original disk and connect it to your computer.
Step 2: Boot your computer from this bootable USB drive by setting it as the first boot device and go to the main interface of the program.
Step 3: Right-click your disk and choose Copy, or select Copy Disk feature in the left pane after highlighting the disk.
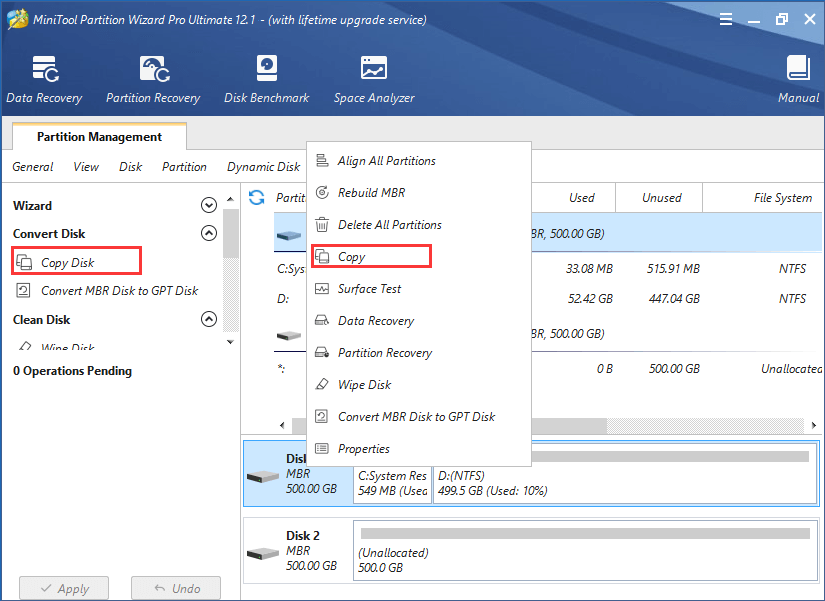
Step 4: Choose the external hard drive as the target disk and click Next. Then, choose Copy Options and configure Target Disk Layout as your needs. Click Next to continue.
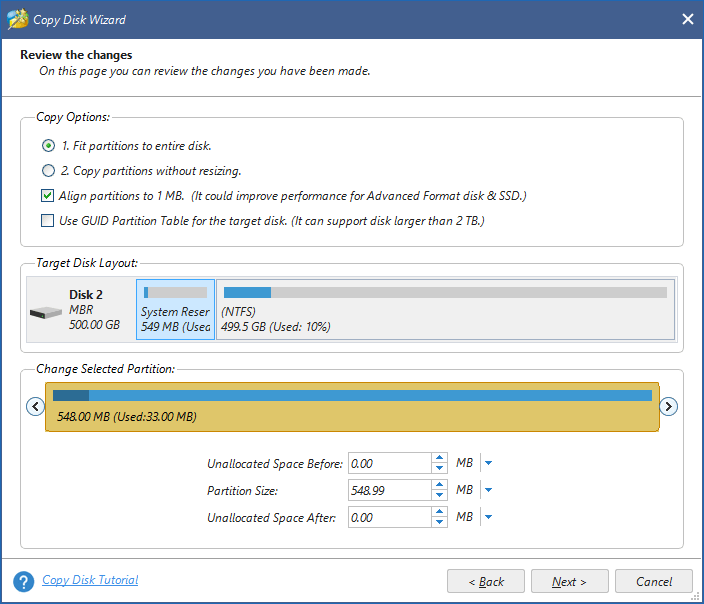
Step 5: Read the note on how to boot from the destination disk and click Finish button. When you go back to the main interface, click Apply button to execute the pending operations.
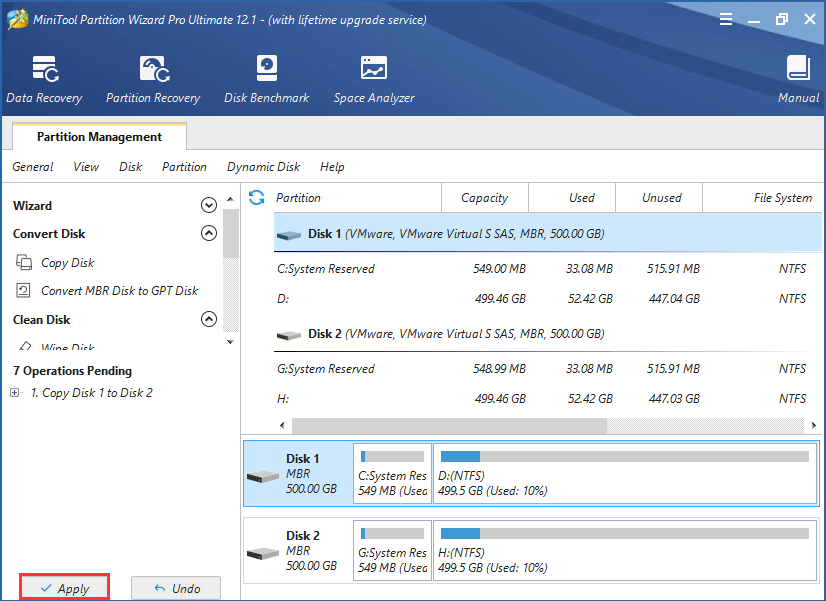
After making backup for the disk, you can delete all the created partitions and clean install Windows without any worries. For convenience, you can delete and reconfigure partitions during the Windows Setup.
When you get the following screen during Windows installation, remove all the listed partitions by selecting them and click Delete. Next, click New to create new ones on the unallocated space according to your needs.
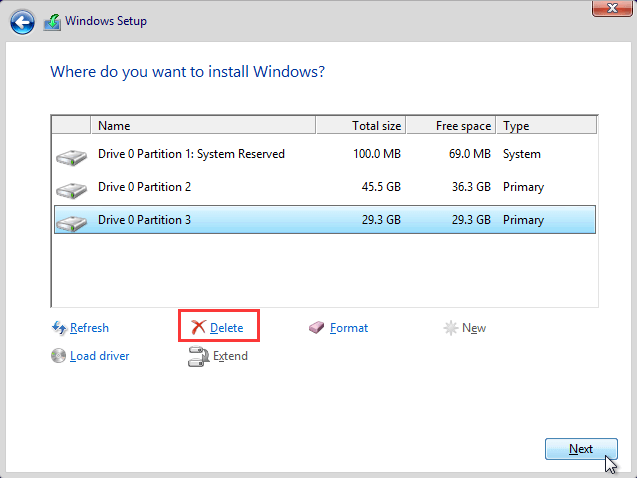
Then, you can choose a newly created partition to install OS and process with the Windows installation normally. Hopefully, you should be able to complete the process without the “Windows could not prepare the computer to boot into the next phase of installation” error.
Bottom Line
Have you fixed “Windows could not prepare the computer to boot into the next phase of installation” error with the introduces solutions? If you have any better ideas, please leave a message in the comment zone below. We are eager to improve this post to help more users who are facing the problem.
For any problems in using MiniTool Partition Wizard utility, you can also contact our support team via [email protected].

User Comments :