What to do if you want to upgrade your Surface Laptop Studio SSD but don’t know how. Don’t worry. This post from Partition Magic will introduce you to how to upgrade Surface Laptop Studio SSD without data loss in detail.
Why Upgrade Surface Laptop Studio SSD
When you want to download a lot of games but hate the slow startup of your computer; when you want better performance when using 3D rendering, video editing, and other applications, you need to upgrade your computer’s SSD. This will give you more storage space or faster running speed.
How to Choose Suitable SSD for Surface Laptop Studio
Before upgrading Surface Laptop Studio SSD, you need to choose the right SSD for your computer to ensure you’re making a compatible upgrade. Here are some factors you should consider when choosing a suitable SSD:
Storage Capacity:
First, you should determine the required SSD capacity based on the storage size required to save data and handle typical workloads. Common SSD capacity levels on the market include 128GB, 250GB, 500GB, 1TB, 2TB, and 4TB.
Form Factor:
There are three common types when choosing an SSD form factor:
- 2.5-inch SATA SSD: A 2.5-inch drive with a SATA interface can fit into the drive bay of most laptop models as internal storage.
- mSATA SSD: This type of drive is one-eighth the size of a 2.5-inch SSD and is commonly used in ultra-thin and mini-PCs.
- M.2 SSD: M.2 SSDs are also more compact than 2.5-inch hard drives, measuring 22mm in width.
For Surface Laptop Studio, it is compatible with both 2230 and 2280 M.2 NVMe SSDs form factor.

How to Upgrade Surface Laptop Studio SSD
How to upgrade the SSD of Surface Laptop Studio? I divide the whole process into three parts: preparation, cloning SSD to a new SSD, and replacement of the new SSD, with detailed steps attached.
Part 1: Preparation for Upgrading Surface Laptop Studio SSD
Before upgrading your Surface Laptop Studio SSD, you need to do some preparation. They are:
- New SSD: Choose a new SSD that needs to be compatible with your Surface Laptop Studio.
- T3 Torx screwdriver: You can use it to unscrew the laptop and open its back panel.
- Tweezers: You can use it to remove the rubber trim and two rubber feet on the bottom case.
- USB adapter: Connect your new SSD to your laptop using a USB adapter.
Part 2: Clone Surface Laptop Studio SSD to a New SSD
After preparing all the things for Surface Laptop Studio SSD upgrade, you can continue to clone Surface Laptop Studio SSD to a new SSD.
To do that, I recommend you use MiniTool Partition Wizard, which is very professional and reliable. It provides the Copy Disk feature to help you copy all partitions and data from one disk to another. All partition data on the target disk can be used normally.
In addition, this feature-rich partition manager can also help you format SD card FAT32, rebuild MBR, change cluster size, convert MBR to GPT, recover data from hard drive, and more.
MiniTool Partition Wizard DemoClick to Download100%Clean & Safe
Step 1: Connect your new SSD to your laptop using a USB adapter.
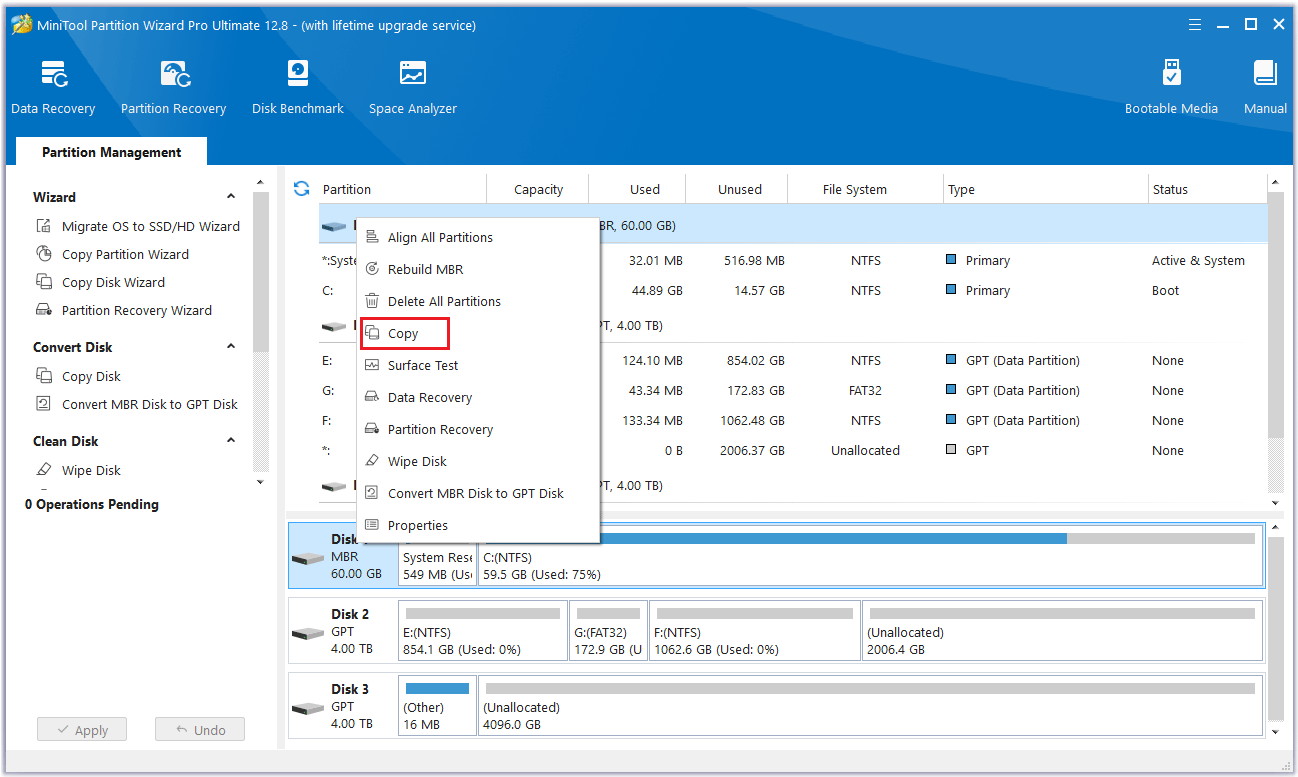
Step 2: Launch MiniTool Partition Wizard to its main interface, right-click the disk and select Copy.
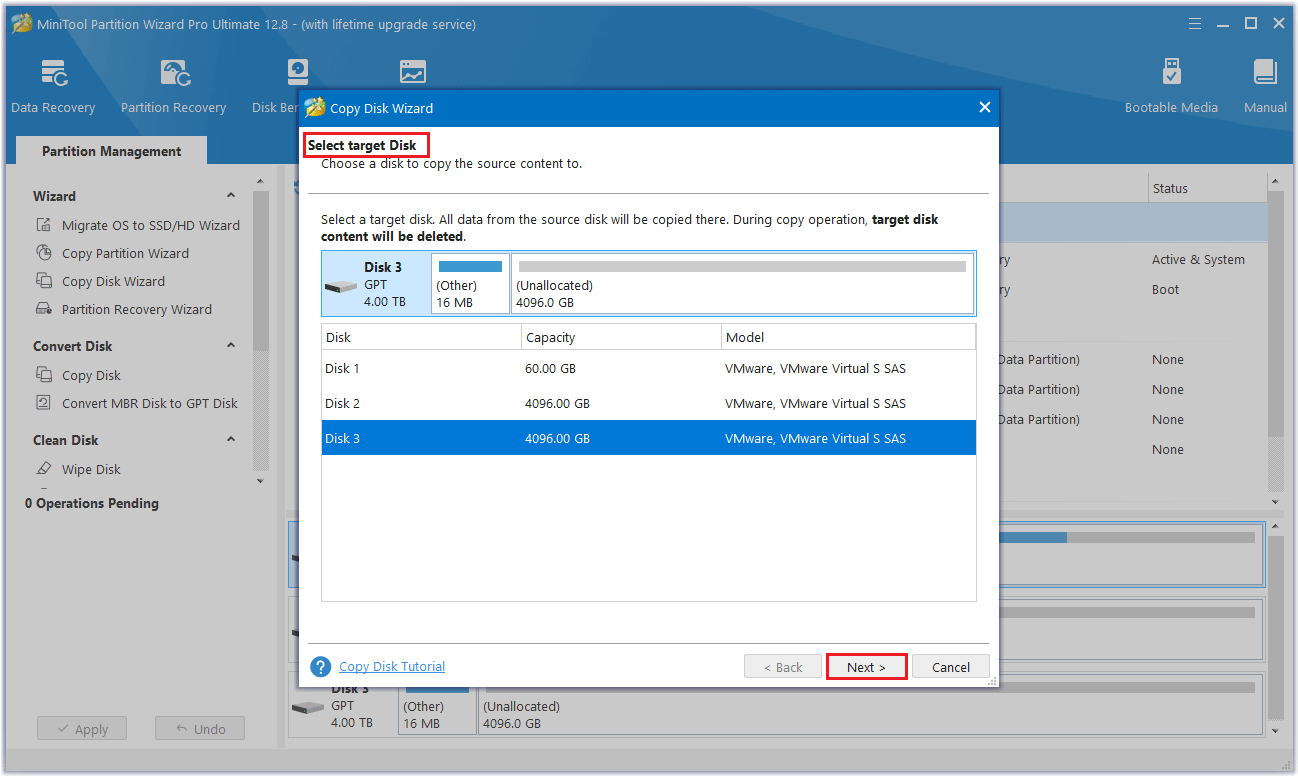
Step 3: In the new pop-up window, select the target disk where the copied data will be saved. Then click the Next button.
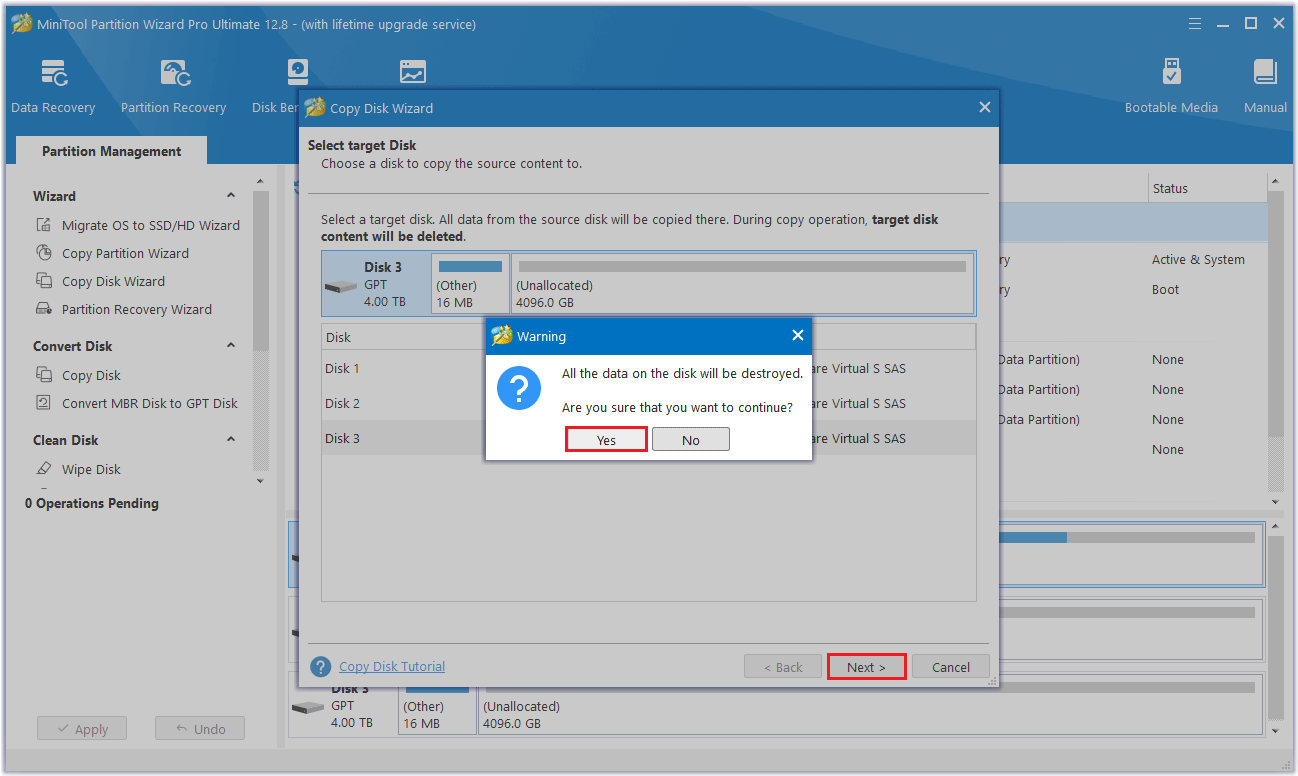
Step 4: In this interface, a warning will appear telling you all the data on the disk will be destroyed. To perform the cloning operation successfully, click the Yes button.
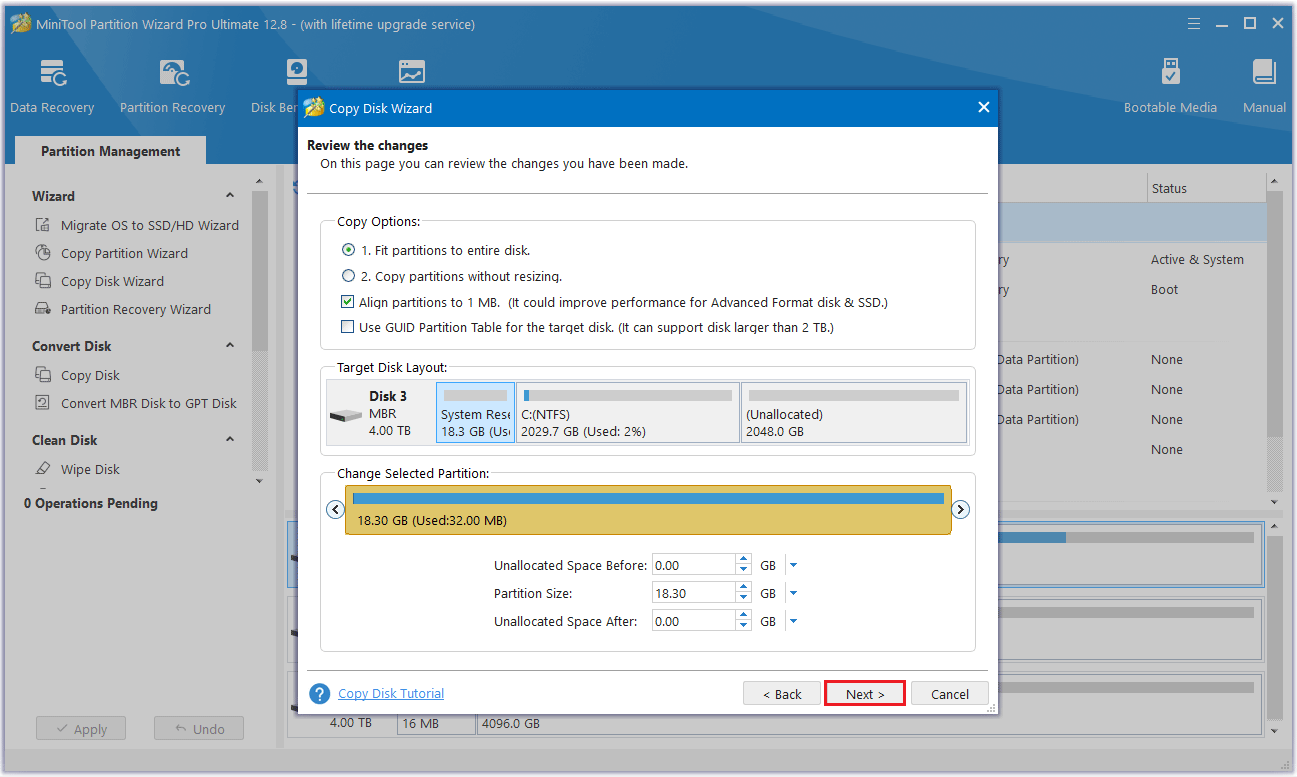
Step 5: After that, choose the desired copy options and click Next. In addition, there is an option “Align partitions to 1MB” which is checked by default. After checking it, all partitions on SSD will be aligned automatically so that performance can be improved largely.
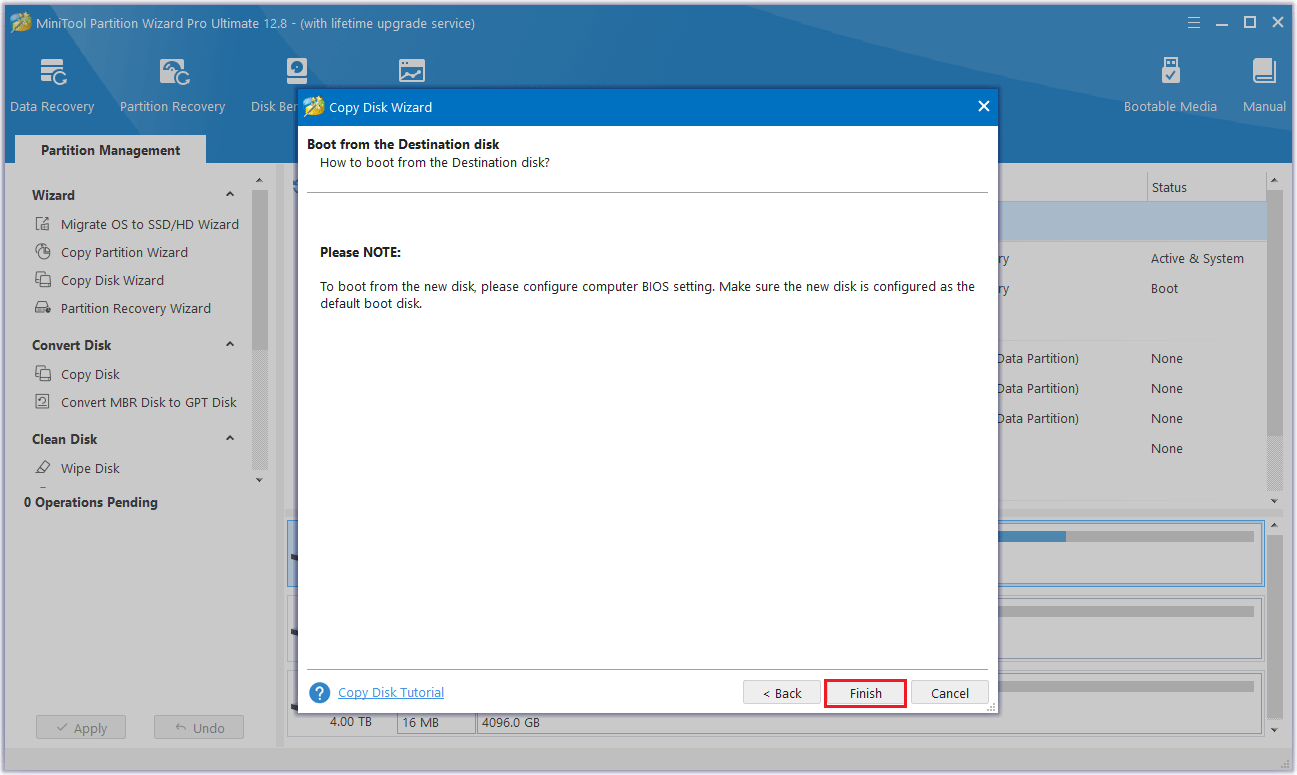
Step 6: Read the note carefully which shows how to boot from the target disk, and click Finish to go back to the main interface.
Step 7: MiniTool Partition Wizard will return to its main interface. Here you can preview all the changes. Click Apply to make the operation effective.

Part 3: Replacement of the New SSD
Once you have finished migrating your partitions and data to the new SSD, you can disconnect it from the Surface Laptop Studio and shut down the computer. Then, follow the steps below:
Step 1: Use tweezers to remove the rubber trim and two rubber feet on the lower case.
Step 2: Use a T3 Torx screwdriver to remove the screws on the bottom cover and carefully remove it.
Step 3: Locate your SSD near the motherboard and remove the 3 screws securing it, then you can replace the old SSD with the new one. This step requires extreme care and caution.
Step 4: Reassemble your device. Before you do this, you’ll want to double-check that the new SSD is firmly seated in its slot.
Bottom Line
Upgrading your Surface Laptop Studio SSD is a good choice to improve your laptop’s performance and increase storage capacity. But how to upgrade Surface Laptop Studio SSD without data loss? By now, you probably know the answer. This post provides a step-by-step guide to help you upgrade Surface Laptop Studio SSD. Hope this guide helps you.
If you have any questions or suggestions while using MiniTool Partition Wizard, you can contact us via [email protected] to get a quick reply.
About The Author

Position: Columnist
Cecilia is a new member of MiniTool. She works as an English editor on the MiniTool team. She likes to learn articles about computers and is passionate about partition management and Windows operating systems. She is committed to allowing readers to use simple, efficient, and fast methods to solve the computer problems they encounter. To provide more professional solutions, she will continue to learn and master computer knowledge.
User Comments :