Do you want to upgrade your laptop from HDD to SSD? Are you still hesitant about replacing hard drive just because you don't know the detailed replacement method? If so, you should read this post. This post will tell you how to upgrade to SSD with MiniTool Partition Wizard, a cable, and a screwdriver.
Compared with HDDs, SSDs enjoy lots of outstanding features. For example, SSDs have access speeds of 35 to 100 micro-seconds, which is nearly 100 times faster than those of HDDs. Therefore, more and more people tend to upgrade their HDDs to SSDs.
However, some people dare not replace laptop hard drive to an SSD, because they are afraid of troubles caused by the lack of general notices during the replacement. If you are facing the same situation, read this post to get a step-by-step tutorial on upgrading your laptop’s hard drive to an SSD.
Preparatory Work
In this part, I mainly show you what tools you’ll need for laptop SSD upgrade.
A Suitable SSD
Generally speaking, the size of HHDs in laptops is mainly 2.5 inches, but some ultraportable notebooks may use the 1.8-inch disk size. In addition, even the 2.5-inch drives can have different thicknesses- 7 mm or 9.5 mm. Hence, you should check HDD information before buying an SSD, so that you can get an SSD with the right size.
There is another point you should pay attention to when you decide to upgrade to SSD. That’s computer hard drive interface. Although Laptops most widely use SATA interface, you should check the hard drive interface type of your computer to make sure you buy an SSD with the proper interface.
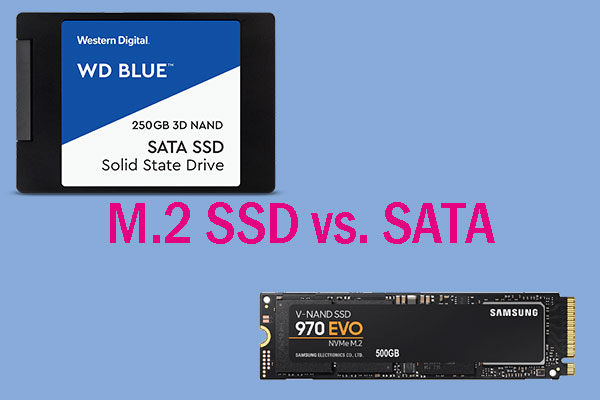
If your computer is very old and only supports IDE interface, you’d better not upgrade to SSD. If your computer only supports SATA interface, it’s not worthwhile to buy any other faster SSDs like M.2 SSD.
How to check the above information? You can check them by disassembling your computer, or utilizing the laptop manual or a reliable software.
A SATA to USB Adapter
Because of interface, the SSD can’t connect to your laptop directly for disk clone. You should buy a SATA to USB adapter or other devices like that. This kind of devices can connect your SATA SSD to your computer through the USB port.
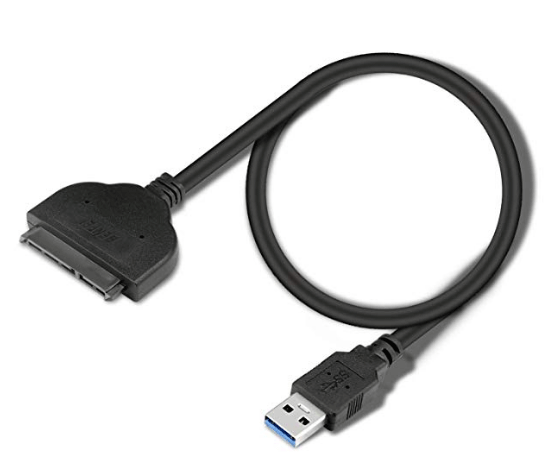
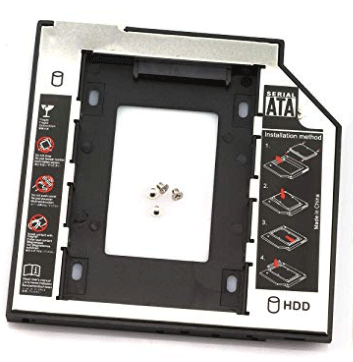
In addition, this adapter can not only connect the SSD for the cloning process, but also can turn your current HDD into an external storage device for other use. Of course, some people may like to buy a hard drive mounting bracket for CD-ROM bay, so that they can mount the HDD in CD-ROM position.
Finally, you also need a high-quality small-head phillips screwdriver to help you disassemble your laptop smoothly.
Clone HDD to SSD
Since most laptops have only one hard drive bay, you should clone HDD to SSD or migrate OS to the SSD first lest your computer can’t boot up after upgrading to the SSD. That’s why you need a SATA to USB adapter. As for the free disk clone software, you can choose MiniTool Partition Wizard.
Of course, if you want to perform a clean installation of Windows after upgrading to SSD, you can skip this step.
Here is the tutorial on cloning HHD to SSD.
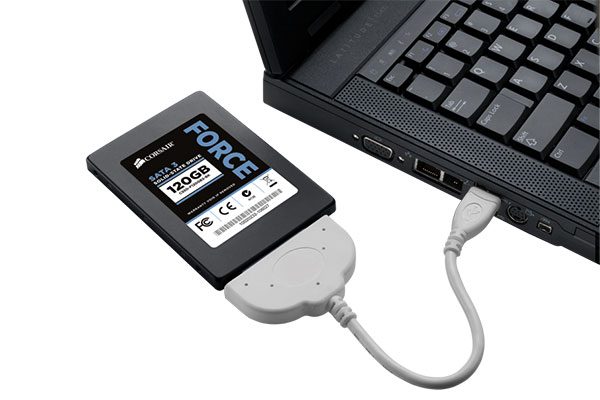
Step 1: Connect your SSD to your laptop computer through the SATA to USB adapter.
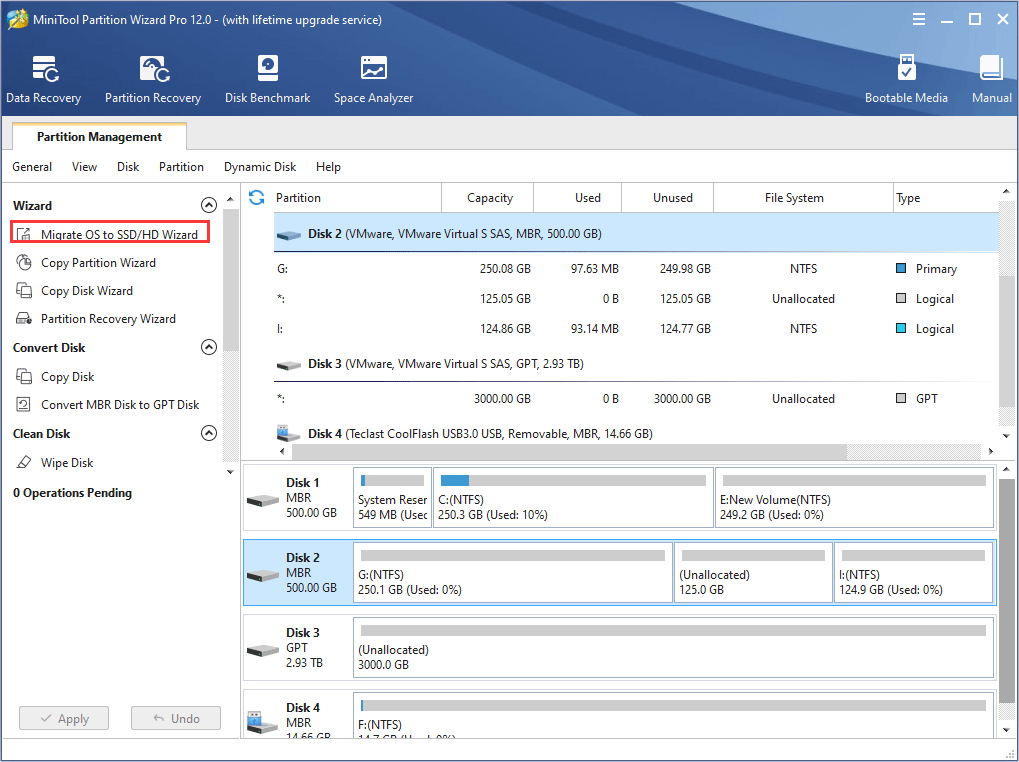
Step 2: Buy MiniTool Partition Wizard and launch it to get its main interface. Then click on Migrate OS to SSD/HD Wizard on the action panel.
Step 3: Click Next button to continue and then choose the system disk to copy. Then, click Next button again.
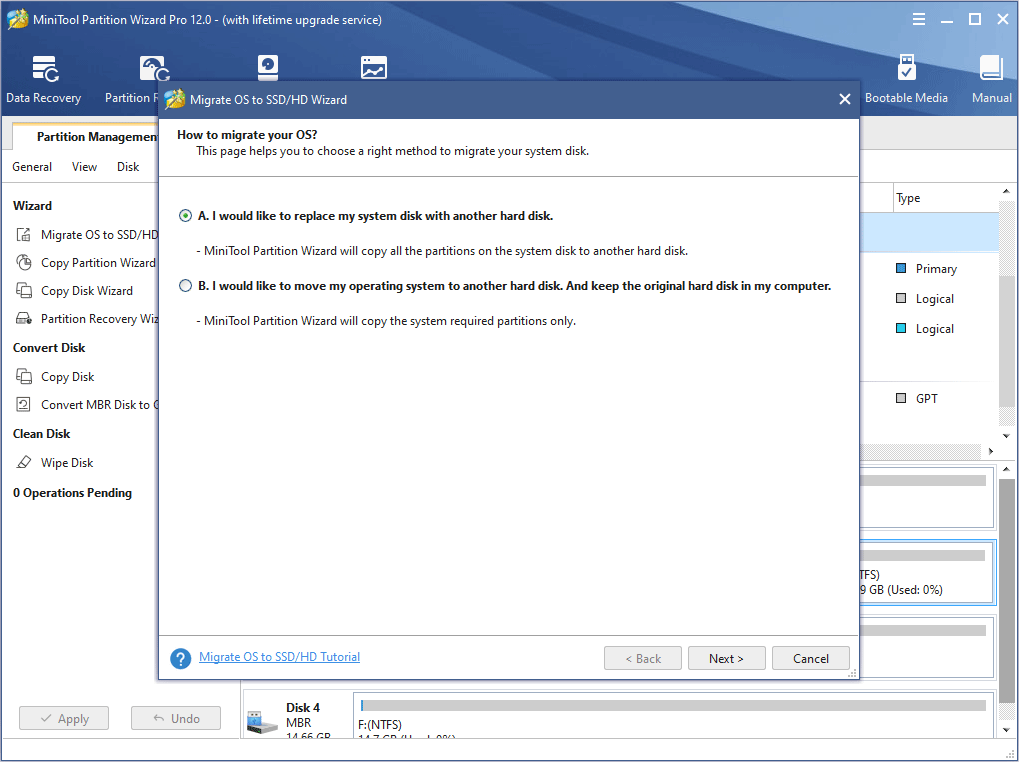
Step 4: Select the target disk (SSD) to clone HDD to and click Next to continue.
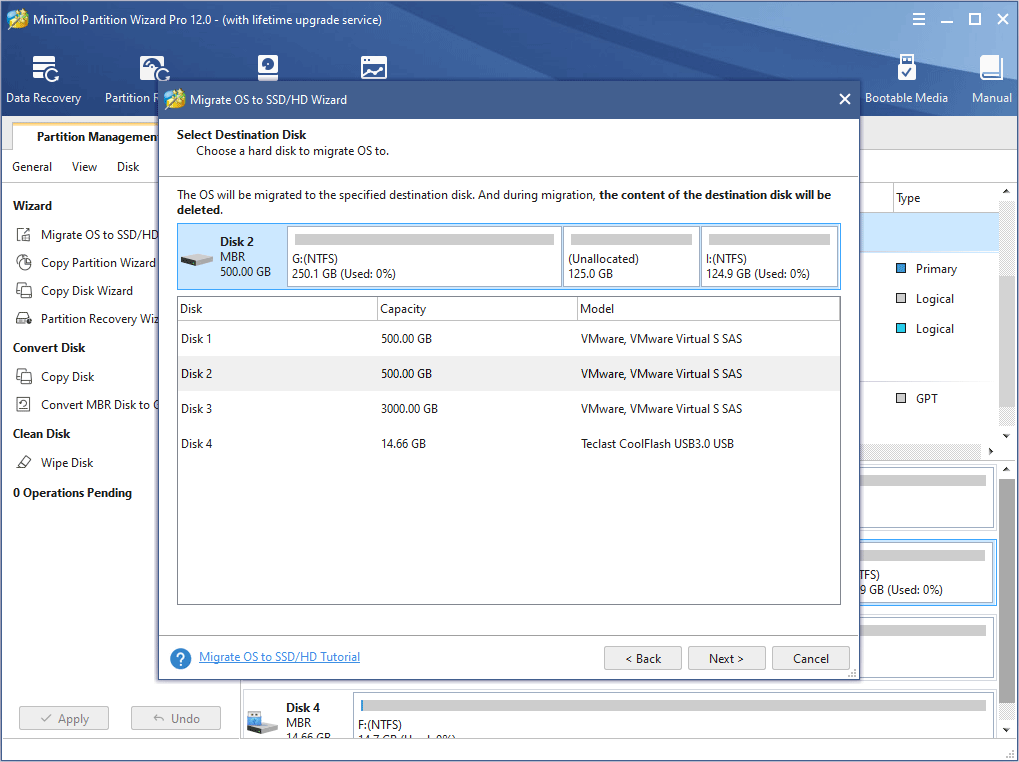
Step 5: Choose right copy options and adjust the target disk layout. Then, click Next button.
- Fit partitions to entire disk: All the partitions on the HDD are shrunk or extended by an equal proportion to fill the entire SSD.
- Copy partitions without resizing: All the partitions on the HDD are copied into the SSD without changing size.
- Align partitions to 1 MB: It is 4K alignment, which is good for improving computer performance.
- Use GUID partition table for the target disk: If the HDD is an MBR disk while the SSD is a GPT disk, you should choose this option, otherwise your laptop can’t boot from the SSD. This feature is not free. Click MBR vs. GPT to know more about them.
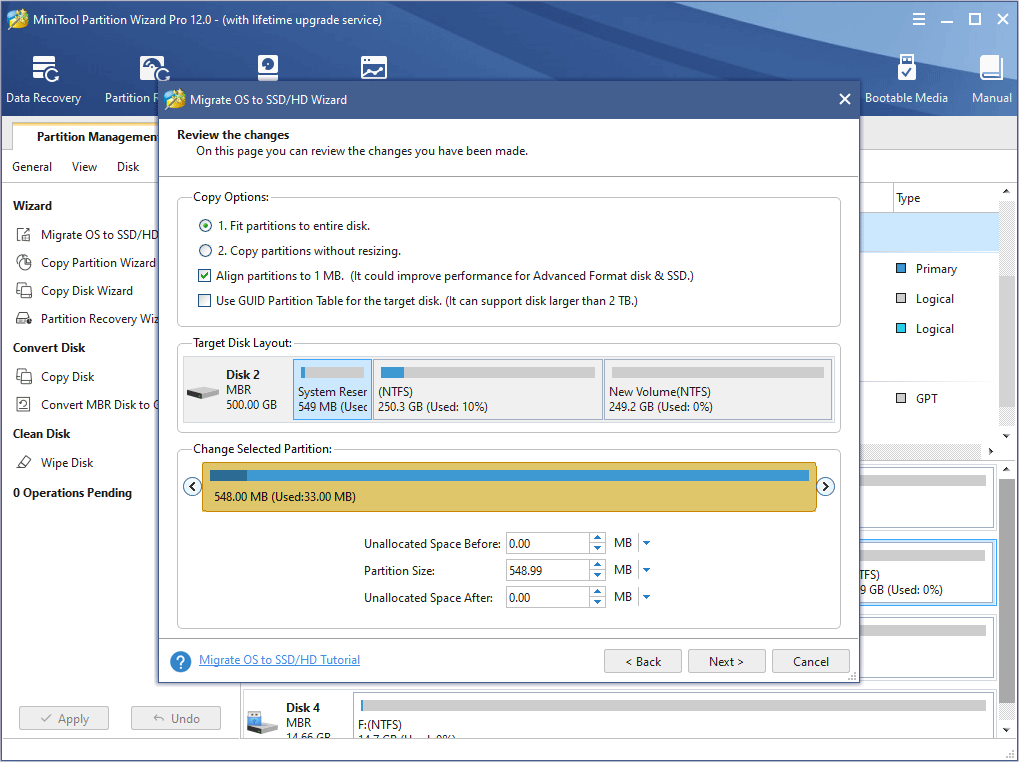
Step 6: Carefully read a popup boot note and click Finish button to go back to the main window of Partition Wizard.
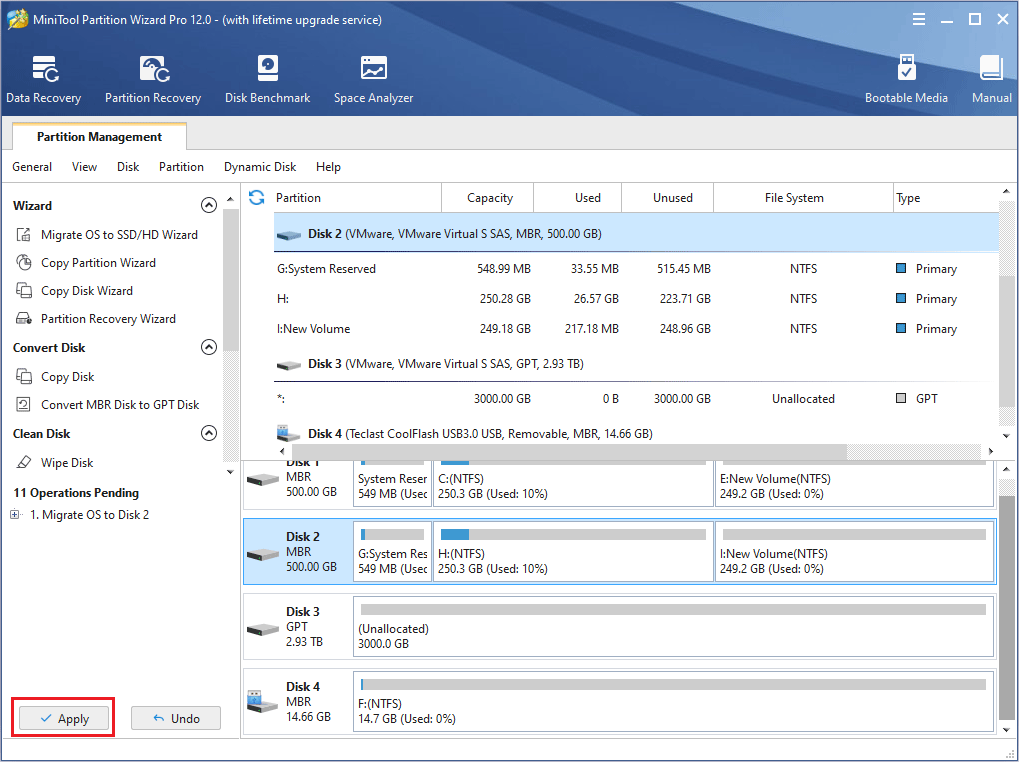
Step 7: Click Apply button to make all changes finally performed.
How to Install SSD
After completing the above works, you can start on replacing laptop hard drive and installing the SSD. Please follow the steps below to upgrade laptop HDD to SSD.
Here is the tutorial on how to upgrade laptop to SSD.
Step 1: Prepare a workplace and deal with power problem.
- Transfer the computer to a clear, flat, and stable work surface over a non-carpeted floor.
- Make sure the laptop is unplugged and the battery has been removed. Actually, we’d better press on the power button of laptop for several seconds to remove any residual charge.
Step 2: Remove hard drive from laptop.
Firstly, you should locate the compartment for hard drive. Most laptops’ hard disk is located under a removable panel like this:
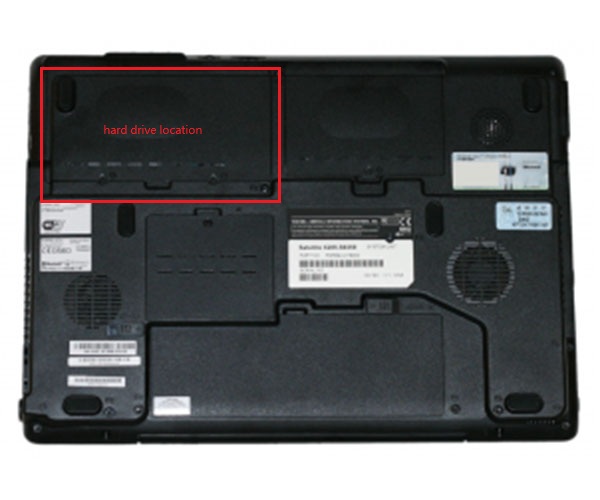
If your laptop hard drive is also positioned like above, it’s very easy to take hard drive out. Please carry out the following actions:
- Use screwdriver to remove screws that fasten the removable panel and take the panel away.
- Remove the screws that secure the hard drive to laptop,
- Slightly detach any retaining clips and cables, and then take the hard drive out.
- If there is a frame or carrier to fix hard disk, remove it and take out the real hard disk.
Attention:
Don’t try to force things apart, because there might be hidden fasteners, screws, or cables. If you have to exert more force to remove or separate parts, stop immediately and then check whether there is such a tiny thing to block the disassembling, for any force could damage your computer.
Further Reading:
Some of you might be unable to find the hard disk even after removing all removable panels from the bottom of the laptop. That is because some designers hide hard disk under keyboard or motherboard. In this case, the disassembly procedure seems much more difficult and should go like this:
- Remove the screws that hold the keyboard deck.
- Detach any snaps that connect the lower portion of the case and keyboard deck.
- Remove the keyboard deck.
- Remove the keyboard and other parts that hide the hard disk or prevent you from taking away motherboard, after taking out screws and detaching cables.
- Take the motherboard away if the hard disk is located under motherboard.
- Remove screws, cables, and any other things that fasten hard disk to laptop, and take out the hard disk.
- Remove the frame mounted on hard disk.
Kindly Reminder:
Don’t try disassembling blindly if you think it’s difficult and dangerous to remove hard drive from laptop, because you may ruin your computer. The best choice is to ask professionals for help, or turn to your laptop manufacturers.
Of course, if you have confidence to do this, just do it by following our steps or other tutorials on the internet, but keep in mind: DON’T FORCE THINGS!
Step 3: Hook SSD to laptop. In this step, you just need to reverse the procedure to insert the SSD and reassemble the laptop.
Step 4: Power on your computer to see whether it can boot from the SSD. If the computer can’t boot, you may click Top 5 Solutions to Fix SSD Won’t Boot Windows 10 to get solutions.
Step 5: Adjust your computer to make it more adaptable to SSD.
Upgrade Laptop HDD to SSD FAQ
Bottom Line
Do you have any problem about SSD upgrade after reading this guide? Do you have any other ideas on how to upgrade laptop HDD to SSD or on how to utilize the old HDD? If so, please leave a comment below to give us feedback or to share your thought.
Of course, if you have any problem in performing the above SSD upgrade steps, please also leave a comment or email us at [email protected]. We will reply to you as soon as possible.


User Comments :