Overview of System Image Backup
What Is a System Image Windows 10
It is believed that most of you have heard about the conception of system image when using a computer to deal with things. So, what is a system image?
Simply speaking, a system image refers to an exact copy of your system drive.
It contains not only the partitions that Windows requires to run (here Windows 10 itself included) but also system files, programs, and settings.
Why Make a System Image Backup
In brief, it is for system image recovery Windows 10 after Windows fails to boot due to some reasons.
- Disk Failure: This is one of the main causes. Actually, each disk has its own limited use of If your hard drive has something wrong, Windows detected a hard disk problem may appear, and more seriously system is unbootable.
- System Crash: System issues often occur, for example, black screen, blue screen and more. And then, Windows is unable to boot normally.
- Virus Infection: The virus always attacks your computer at all time, which is a threat to your system security.
Once the above cases happen to you, you can’t run your computer as normal.
So, under this circumstance, to own a system image backup is very important to restore Windows 10 system to its previous normal status.
On the other hand, it is also necessary for system backup in Windows 10. If you have many new computers without OS, you can use system image backup to do system migration without reinstalling Windows.
How to create system backup and make a system image recovery Windows 10? Two programs are recommended here, a piece of third-party backup software and Windows 10 Backup Utility.
Use MiniTool ShadowMaker for System Backup & System Image Recovery Windows 10
System Image Backup Windows 10
In order to create a system backup for Windows 10, many of you choose to use a piece of professional third-party software. Here we highly advise you to use MiniTool ShadowMaker offered by MiniTool Software Ltd.
This dedicated backup software can be used as backup software and also is used as a system image recovery Windows 10 tool with its powerful features such as Backup and Restore. How to create a Windows 10 system image backup?
Before you start to create a system backup in Windows 10, please free download MiniTool ShadowMaker Trial Edition and install it on your computer for a 30-day free trial. To enjoy all features all the time, its Pro Edition is recommended.
MiniTool ShadowMaker TrialClick to Download100%Clean & Safe
Step 1: Choose a backup mode
- Launch MiniTool ShadowMaker.
- Choose local backup or remote backup and click Connect to go on.
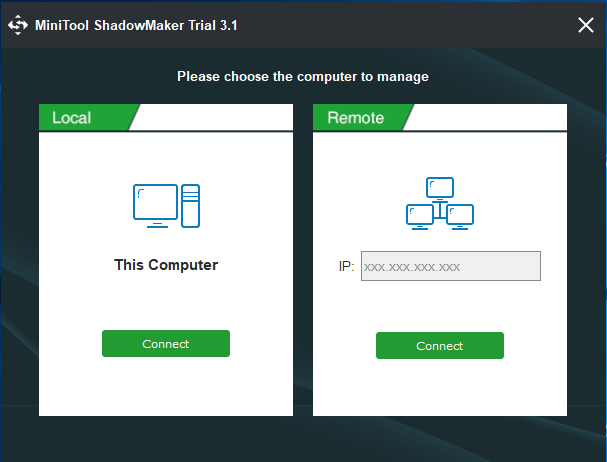
Step 2: Specify backup source and destination
- This software will choose system-related partitions to back up by default.
- Choose an external hard drive, USB flash drive, NAS or network as the storage path. Here, we will show you how to back up your computer to an external drive.
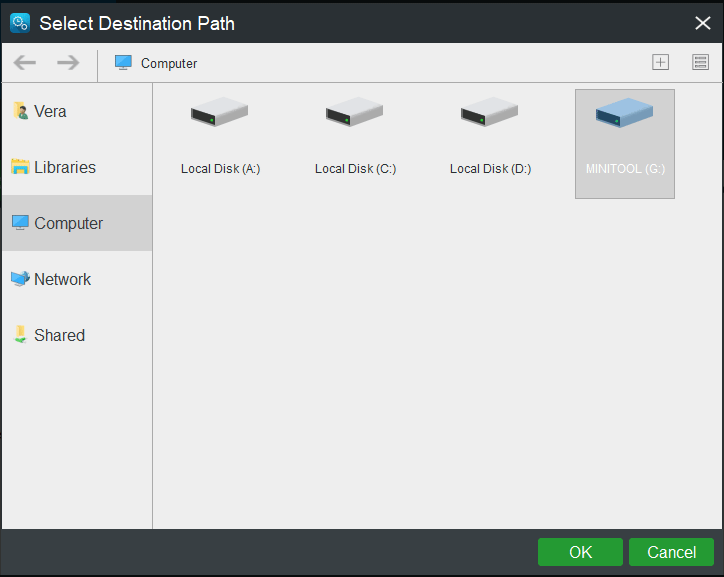
Step 3: Run a system backup
- Then click Back up Now to begin the system image backup.
- The system image backup Windows 10 operation will be performed in the Manage tab.
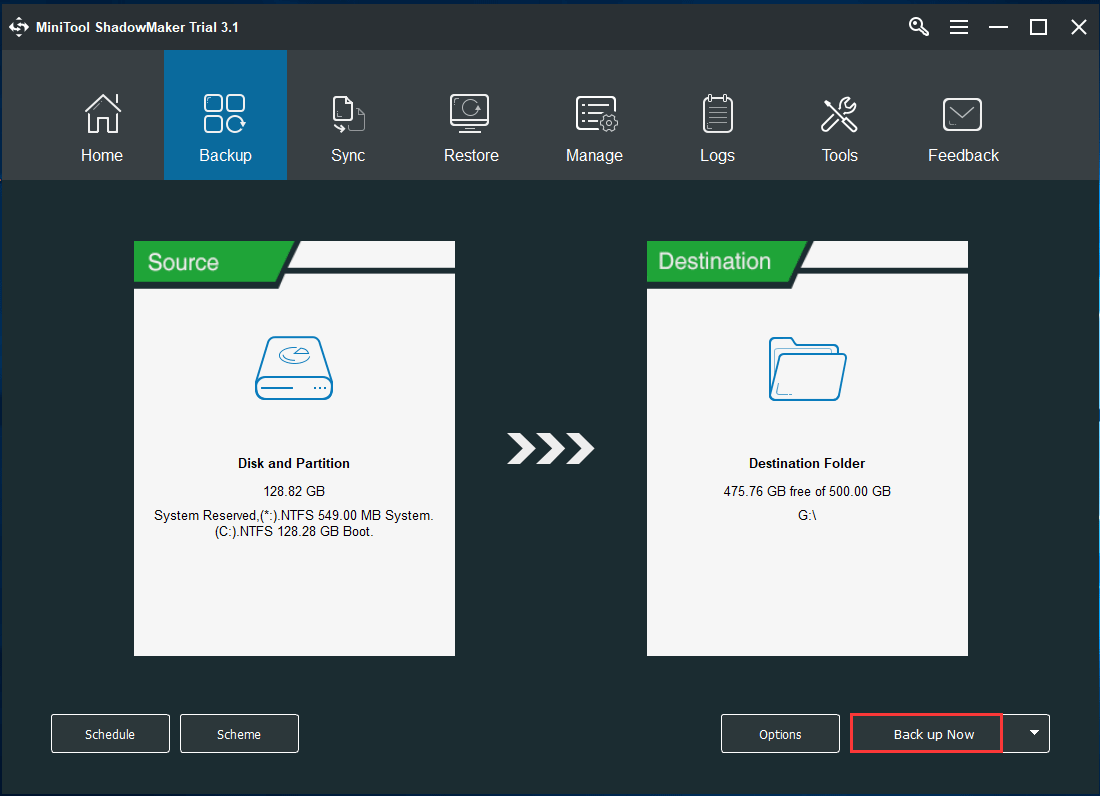
By making Windows 10 system image backup to an external hard drive according to the above guidance, after the system fails to boot, you can use the backup to restore system image from external hard drive.
So, you will ask: how do I restore my computer from a backup or how to restore Windows image backup from external hard drive? See the following contents.
System Image Recovery Windows 10
Now, it is time to restore Windows 10 from system image with MiniTool ShadowMaker. Step-by-step guidance is as follows:
Step 1: Click Restore for system image recovery Windows 10
- Enter Restore interface, you can see all the back tasks are here.
- Choose a system backup image and click the Restore button.
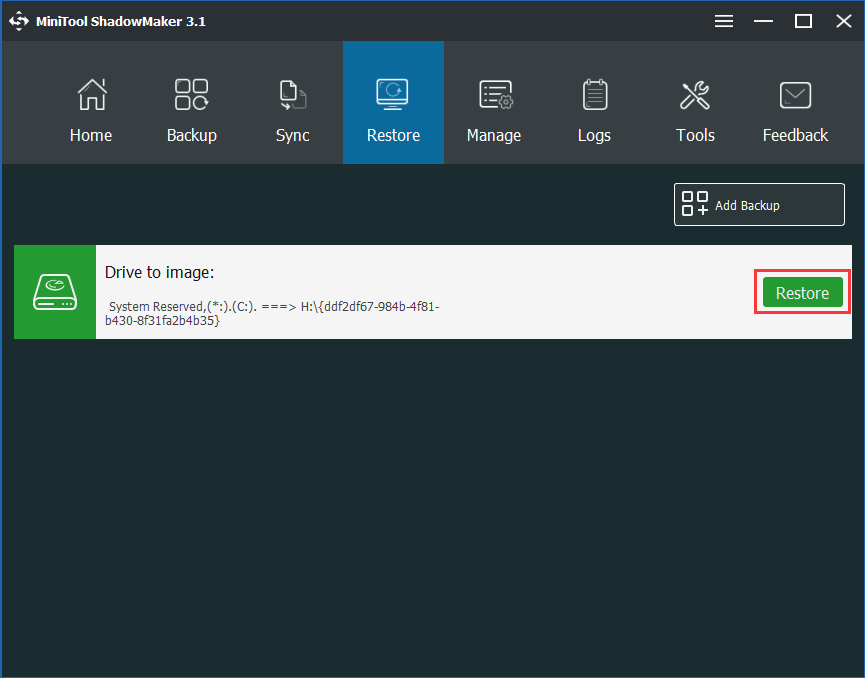
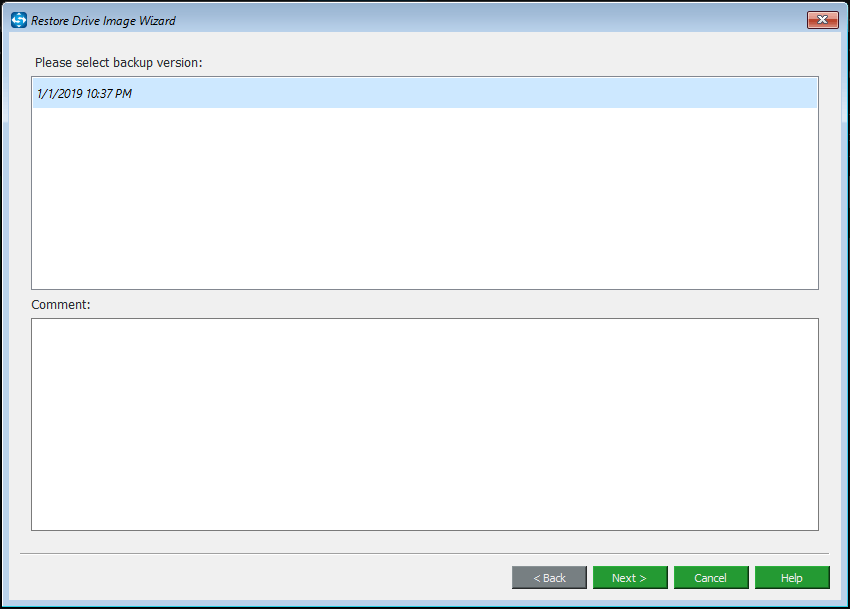
Step 3: Choose a backup version
- Select the backup version according to the backup time.
- Click the Next button to continue the Windows 10 system image recovery.
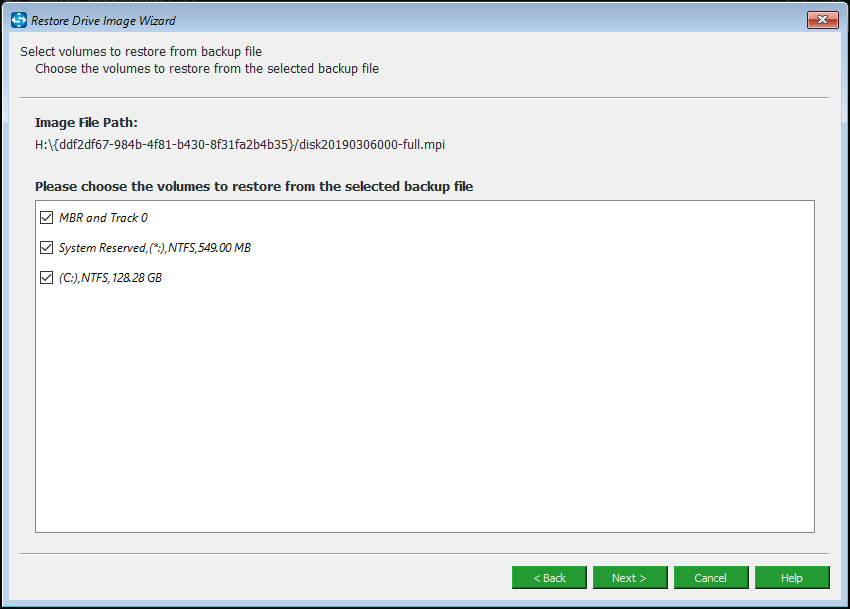
Step 4: Select volumes to restore from the selected backup file
- Here all partitions that the backup contains are checked by default. From the screenshot, you see MBR and Track 0 which is necessary for the recovery, thus, don’t uncheck it.
- Then click Next.
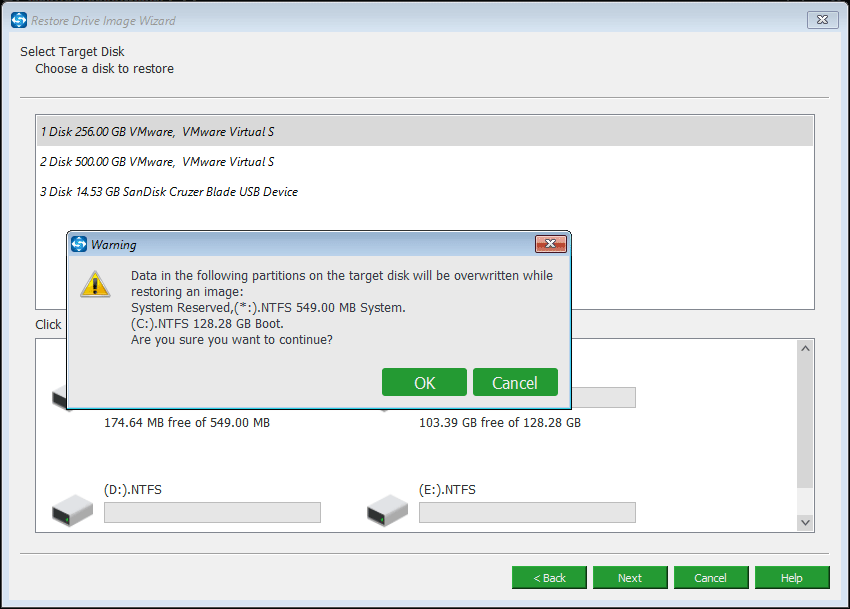
Step 5: Select a target disk for the recovery of Windows 10
- Usually, you will choose the disk originally containing the operating system as the target disk. From the following interface, you see a notice telling you which partition data will be overwritten during restoration.
- Click OK and Next.
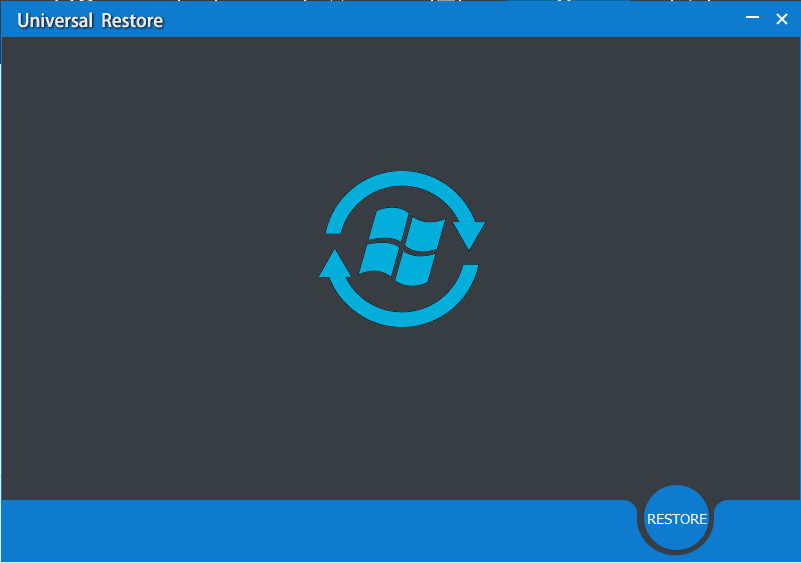
Step 6: Perform system image recovery Windows 10
You need to wait for a few minutes for the system image recovery in Windows 10.
Now we have introduced you how to create Windows 10 system image backup to an external hard drive and how to restore system image from external hard drive with the assistance of the third-party backup and restore software – MiniTool ShadowMaker.
If you are interested in our software, you can download it now or share it with your friends.
MiniTool ShadowMaker TrialClick to Download100%Clean & Safe
Windows 10 Backup and Restore (Windows 7)
In addition to using the third-party program to create a system backup and restore Windows 10 from system image, some of you probably choose to use Windows 10 built-in tool called Backup and Restore (Windows 7).
As for system backup with Windows backup utility, it is simple. Follow the guidance below to begin system image backup and restore for Windows 10.
Create a System Image Backup
Step 1: Go running the snap-in backup tool
- Right-click on Start button to select Control Panel.
- Click Backup and Restore (Windows 7) under the System and Security tab.
- After opening the backup tool, please click Create a system image on the left side.
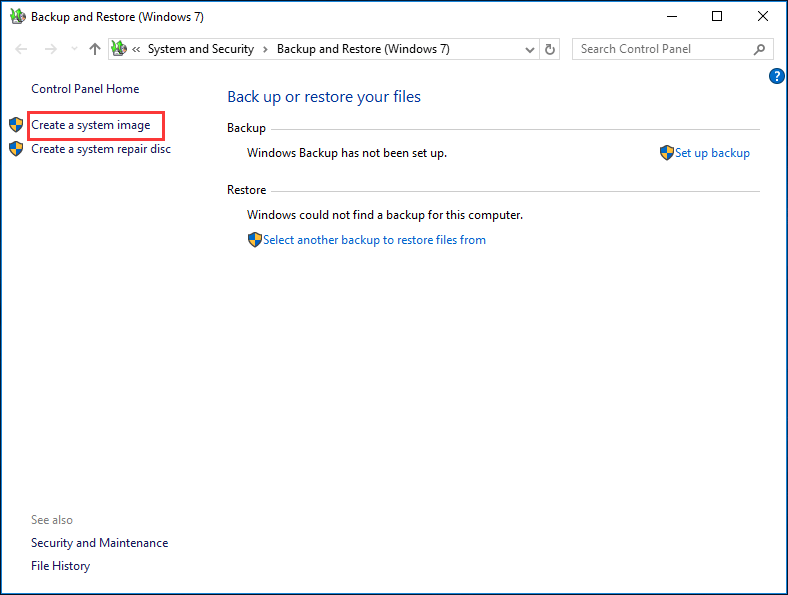
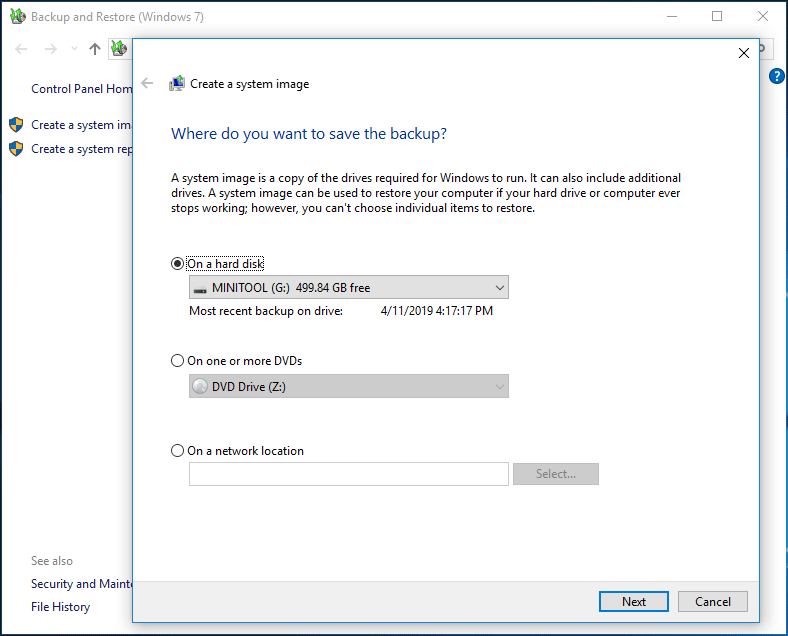
Step 2: Choose a storage path
A hard disk, a DVD disc or a network location is available. Here we choose to back up to an external hard drive.
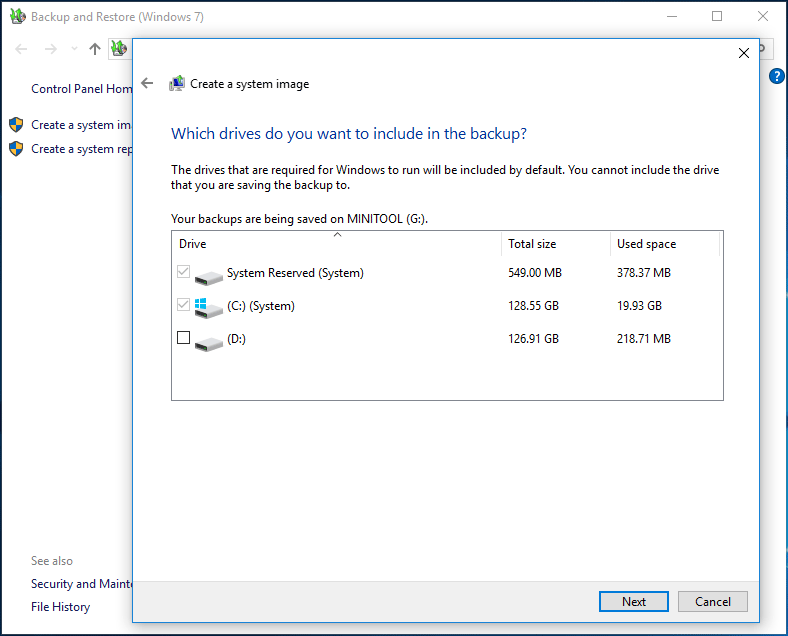
Step 3: Decide the backup source
Next, in the pop-up window, you can see the partition(s) that are required for Windows to run will be included in the system backup.
Step 4: Start a backup
- Confirm your backup
- Then click the Start backup button to perform Windows 10 system image backup.
After a few minutes, the backup will be finished. In the case of a system issue, the backup can be used to recover your computer.
Restore System Image in Windows 10
How to do system image recovery Windows 10 with the Windows built-in tool? If your Windows cannot boot with a system issue, usually, Windows 10 will automatically enter the interface of WinRE.
If your computer is unable to enter the interface, you need to prepare a Windows installation disc to achieve the aim.
Step 1: Go to WinRE for system image recovery Windows 10
- Click Troubleshoot > Advanced Options.
- Click System Image Recovery to recover Windows by using the specific system image file you have created.
Step 2: Restore system image from external hard drive
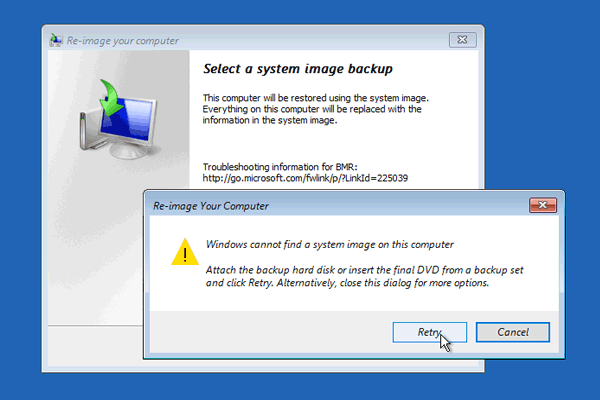
- Select a system image backup to start a system image recovery.
- Then you don’t need to choose Format and repartition disks, just click Next.
- Then you will enter a summary screen, please click Finish.
- A warning will appear, saying “All data on the drives to be restored will be replaced with the data in the system image. Are you sure you want to continue?”, please click Yes.
MiniTool ShadowMaker VS Backup and Restore (Windows 7)
Now two ways to create system backup and Windows 10 system image recovery are introduced to you. When reading here, you may be curious: which one you should choose? What’s the difference between them?
By contrast, you know MiniTool ShadowMaker is more powerful than Windows 10 snap-in Backup and Restore tool. Look at the following aspects:
- The third-party software supports schedule backup, incremental backup, and differential backup. But if you use Create a system image feature of Windows Backup and Restore (Window 7), it doesn’t support these backup types.
- The software has the feature Media Builder which can be used to create a bootable CD/DVD or USB flash drive and boot your failed Windows 10 system.
- It is possible that you fail to create a system image with Windows 10 Backup and Restore, for example, Windows backup failed with 0x80780119 code issue appears when restoring the system.
- The latter tool is time-consuming, including the backup and restore process.
Bottom Line
Now we come to the end of this post. In this post, you know how to create a system image recovery Windows 10 with two tools.
By comparison, we recommend you to use the professional software – MiniTool ShadowMaker. Please choose to make a local backup or remote backup of your system or the entire disk for data protection.
MiniTool ShadowMaker TrialClick to Download100%Clean & Safe
Should you have any question or suggestion to this post, please tell us. You can choose to leave a comment in the text box below or email us via [email protected]. Much appreciated.
System Image Recovery Windows 10 FAQ
- Boot your Windows 10 PC from the created bootable USB flash drive or DVD disc.
- Click Repair your computer to go to the Windows Recovery Environment (WinRE).
- Go to Troubleshoot > Advanced options > System Image Recovery.
- Start the recovery by following the on-screen guide.




User Comments :