Do you want to expand the storage on Surface Laptop 5? If so, this post is worth reading, in which Partition Magic offers a step-by-step Surface Laptop 5 SSD upgrade guide.
Introduction to Surface Laptop 5
Surface Laptop 5 is a laptop developed by Microsoft to replace the Surface Laptop 4. It was released on October 12, 2022, alongside the Surface Pro 9 and Surface Studio 2+.
The main differences from its predecessor include newer Intel Alder Lake processors, support for Thunderbolt 4, the removal of AMD configuration options, and the replacement of the Ice Blue fabric finish option with a Sage Metal option.
Surface Laptop 5 comes with USB A and USB C (Thunderbolt 4) ports, as well as 1 Surface Connect port. It has up to 1 TB of SSD storage space, but no microSD slot for expansion.
Some people want to upgrade Surface Laptop 5 SSD. As we all know, the most common reason why users want to upgrade the SSD in their laptops is because the hard drive is small or slow. You may be wondering: can you upgrade the SSD? How to upgrade it? To find the answer, please keep reading.
Can You Upgrade Surface Laptop 5 SSD?
Can you upgrade Surface Laptop 5 SSD? Of course, you can. The quickest way you can get more storage capacity to improve the performance of your laptop is by upgrading your Microsoft Surface Laptop 5 SSD.
It is important to note that the M.2 2230 SSD is the type of SSD used by the Surface Laptop 5. Therefore, make sure you buy an M.2 2230 and not an M.2 2280 SSD, which is too large.
How to Choose the Best SSD for Surface Laptop 5?
When you choose an SSD for Surface Laptop 5, you should consider the following factors.
#1. Storage
Since the Surface Laptop 5 only has one SSD slot, it is recommended that you choose an SSD that is large enough.
#2. Form Factor
Surface Laptop 5 uses an M.2 2230 SSD that supports PCIe 3.0 x4 and PCIe 4.0 x4. The 2230 SSD is smaller than the common M.2 2280 SSD, so there are fewer purchasing options.
#3. Speed
The speed of the Surface Laptop 5 SSD tested by everyone is a little different. It is recommended that you test it on your own Surface Laptop 5 computer first, and then choose a new SSD that is faster than the current SSD.
To benchmark the SSD on your computer, you can try the Disk Benchmark feature of MiniTool Partition Wizard. This tool is versatile and powerful. It can also help you format SD card FAT32, rebuild MBR, change cluster size, convert MBR to GPT, resize/move partition, partition hard drives, recover data from hard drives, etc.
MiniTool Partition Wizard FreeClick to Download100%Clean & Safe
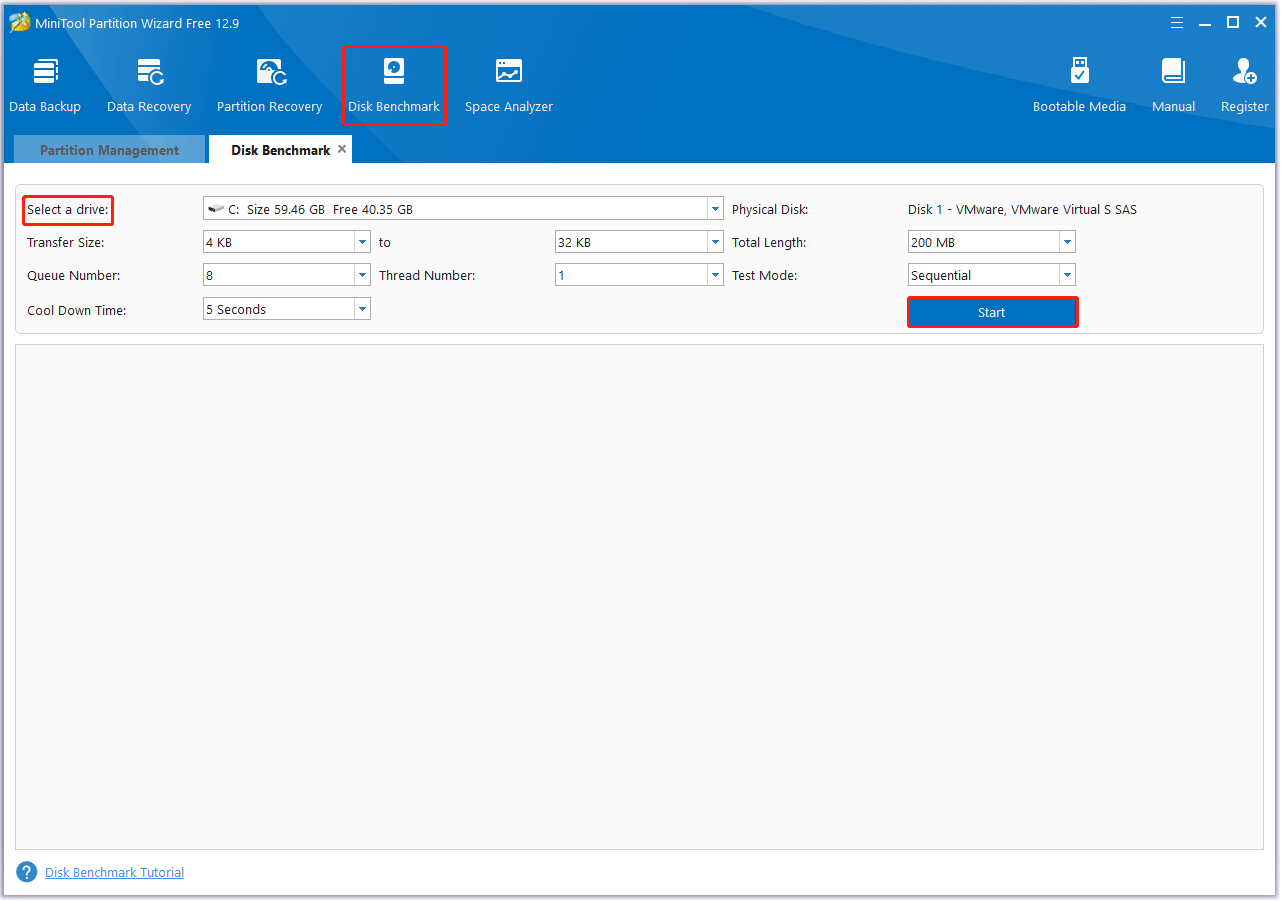
Step 1: Launch MiniTool Partition Wizard to enter the main interface.
Step 2: Click on Disk Benchmark from the top toolbar, and then select the C drive from the drop-down menu and specify its parameters based on your needs. After that, click on the Start button. Here you can set the Transfer Size, Queue Number, Total Length, and Test Mode.
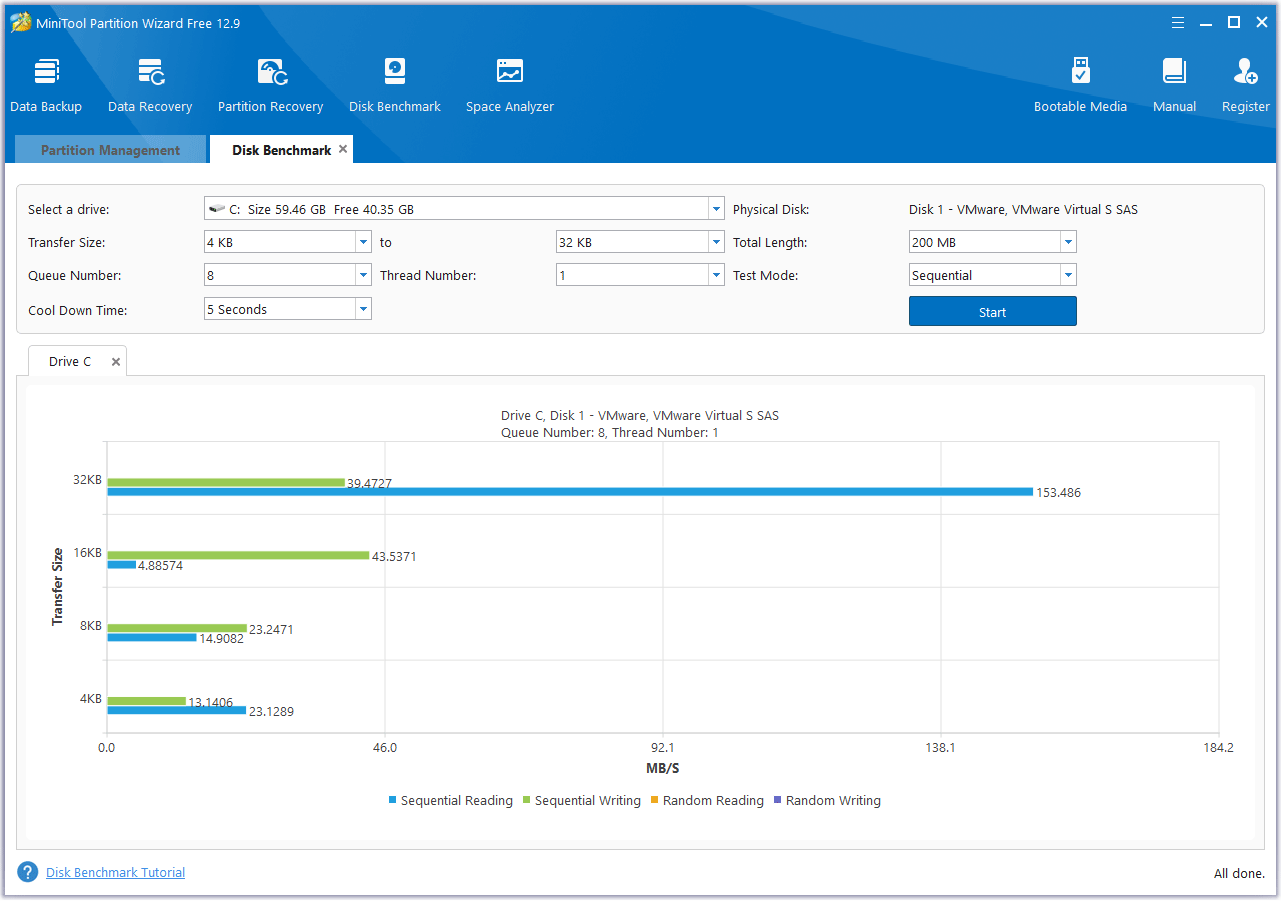
Step 3: Wait for some time to complete this disk benchmark. From this test result, you will know the speed of the SSD.
#4. Recommendation
Here I recommend a more suitable Surface Laptop 5 SSD, which you can use as a reference.
The CORSAIR MP600 MINI Gen4 PCIe x4 NVMe M.2 SSD delivers high-performance storage in a small package. The ultra-compact M.2 2230 form factor is perfect for thin and light devices and is a great fit for Valve’s Steam Deck and Microsoft Surface Pro devices.
It delivers sequential read speeds of up to 4,800MB/s and sequential write speeds of up to 4,800MB/s, so files open faster, games load faster, and devices boot up faster. High-density TLC NAND flash memory provides an ideal combination of performance and endurance in a 1TB capacity.
How to Perform the Surface Laptop 5 SSD Upgrade?
Once you have chosen a suitable SSD for Surface Laptop 5, you can start the Surface Laptop 5 SSD upgrade process. The process is not difficult, just needs three stages: initialize the new SSD; upgrade Surface Laptop5 SSD; and replace the old SSD with a new SSD.
Now, let’s begin performing the Surface Laptop 5 SSD replacement.
Stage 1. Initialize the New SSD
Since the new SSD is brand new, it needs to be initialized to MBR or GPT before it can be used. You can do this in Windows Disk Management. The steps are as follows:
Step 1: Connect the new SSD to your Surface Laptop 5 via the M.2 to USB adapter.
Step 2: Press the Win + R key to open the Run dialog box. Then input diskmgmt.msc and click on OK to open Disk Management.
Step 3: In the Disk Management window, right-click on the new disk and select Initialize Disk.
Step 4: In the pop-up window, select MBR or GPT according to your needs and click on OK. Then follow the on-screen instructions to finish the operation.
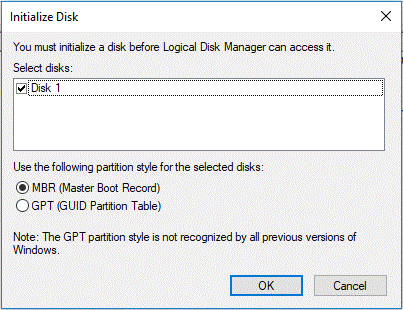
After initializing the disk, you can keep the new disk connected to your computer and then go to Stage 2 to do the Surface Laptop 5 SSD replacement.
Stage 2. Upgrade Surface Laptop 5 SSD
Generally speaking, when you upgrade your Surface Laptop 5 SSD, you have two options.
- Surface Laptop 5 SSD upgrade without OS reinstallation: Clone your entire computer to the new SSD and then replace the SSD.
- Surface Laptop 5 SSD upgrade with OS reinstallation: Back up important data to an external hard drive; replace the SSD; clean install Windows on your computer.
In this part, we will show you how to upgrade Surface Laptop 5 SSD without OS reinstallation using the migration method. To migrate the OS, MiniTool Partition Wizard can be useful. It provides the Migrate OS to SSD/HD feature to help you migrate OS to SSD without reinstalling OS. Here is the guide:
MiniTool Partition Wizard DemoClick to Download100%Clean & Safe
Step 1: Launch MiniTool Partition Wizard to enter its main interface.
Step 2: Select Migrate OS to SSD/HD Wizard from the left action panel. In the pop-up window, choose an option to migrate the OS based on your needs. Then click Next.
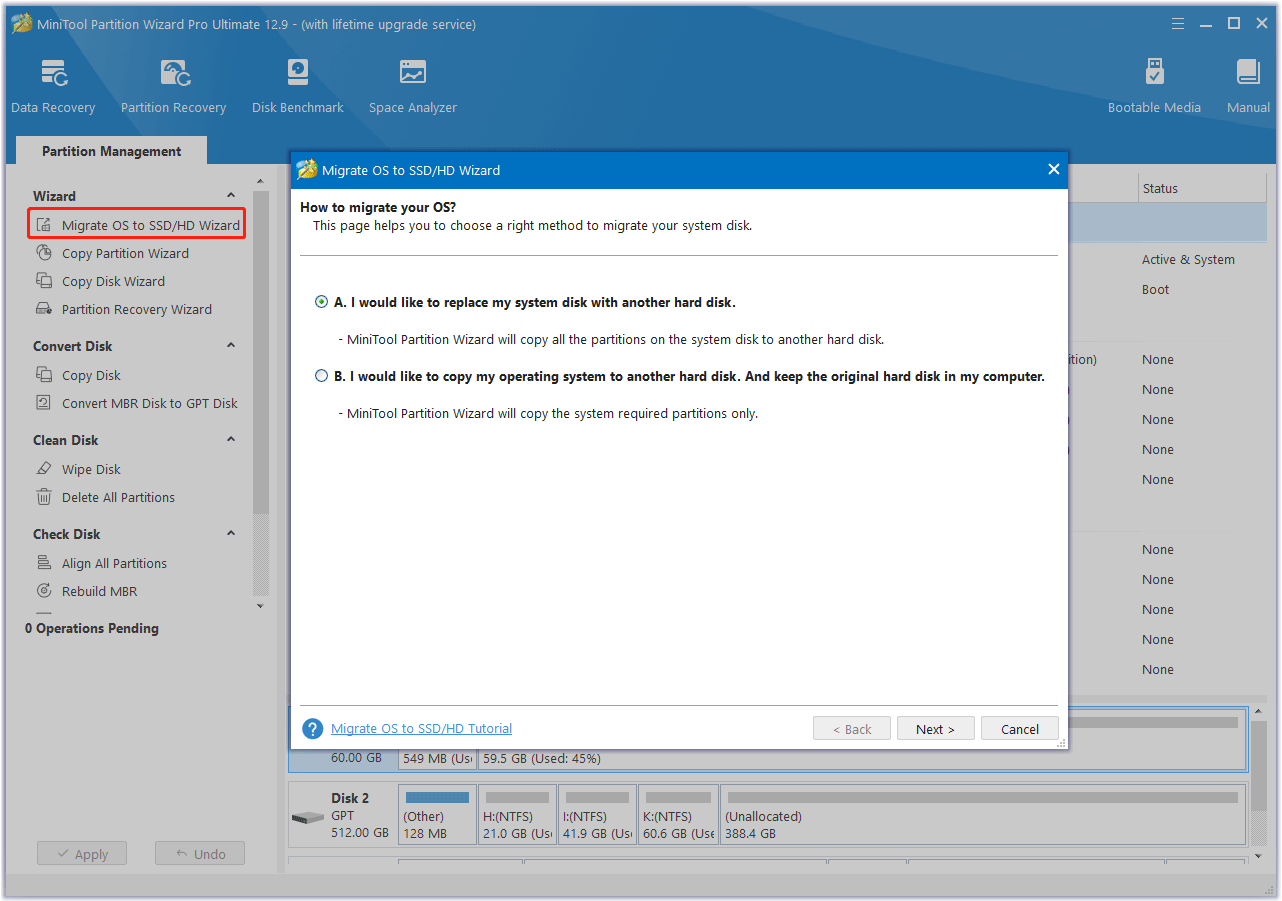
Step 3: In the next window, select the new SSD and click Next. When prompted, click Yes to continue.
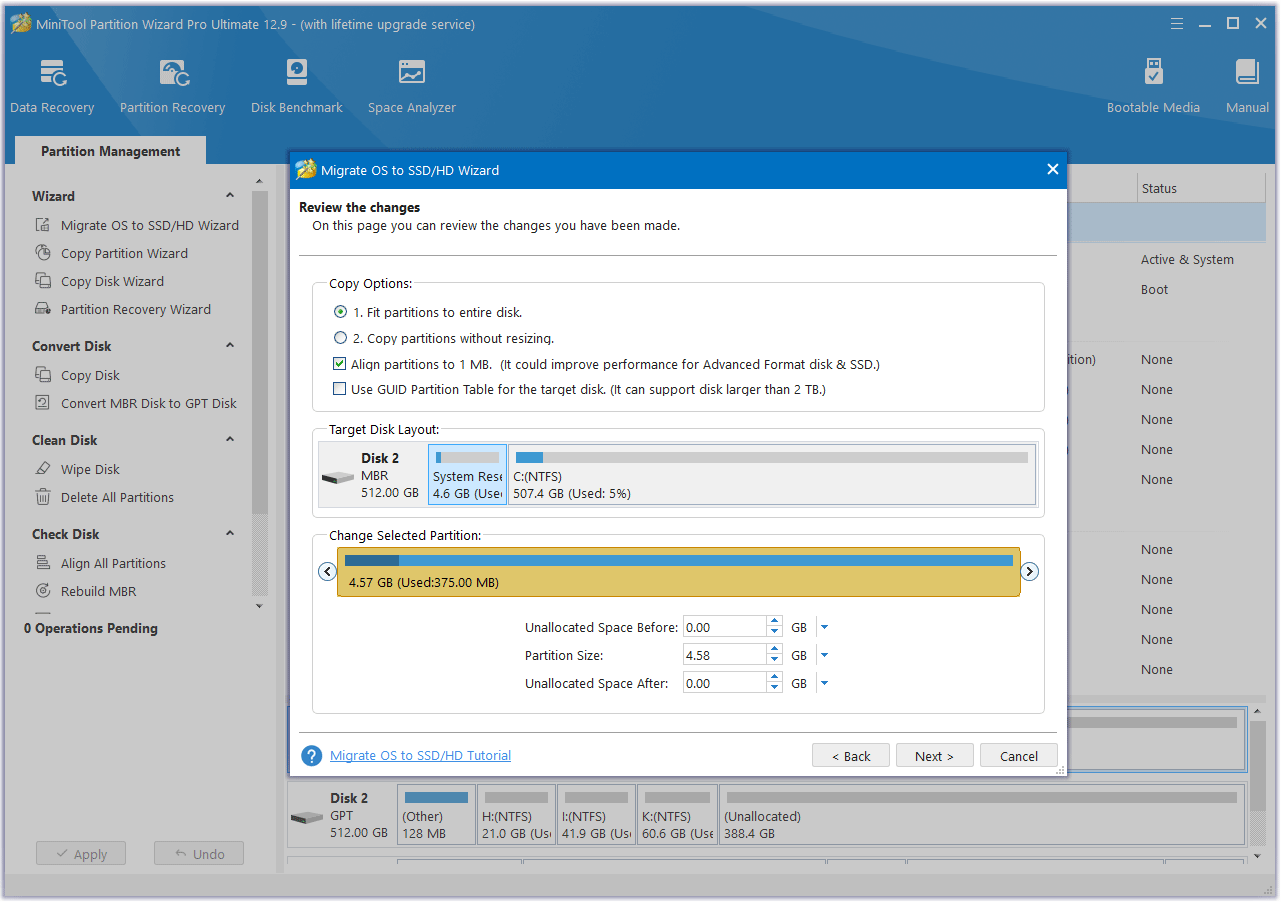
Step 4: After that, choose the desired copy options and change the Disk Layout. Then, click Next.
- Fit partitions to entire disk: All the partitions on the original disk will be extended by an equal proportion to fill the entire hard drive.
- Copy partitions without resizing: All the partitions on the original disk are copied into the hard drive without changes in size or location.
- Align partitions to 1 MB: It is recommended for improving the read and write performance of the SSD.
- Use GUID partition table for the target disk: This option only appears when your original disk is an MBR disk, which can only use 2TB disk space at most.
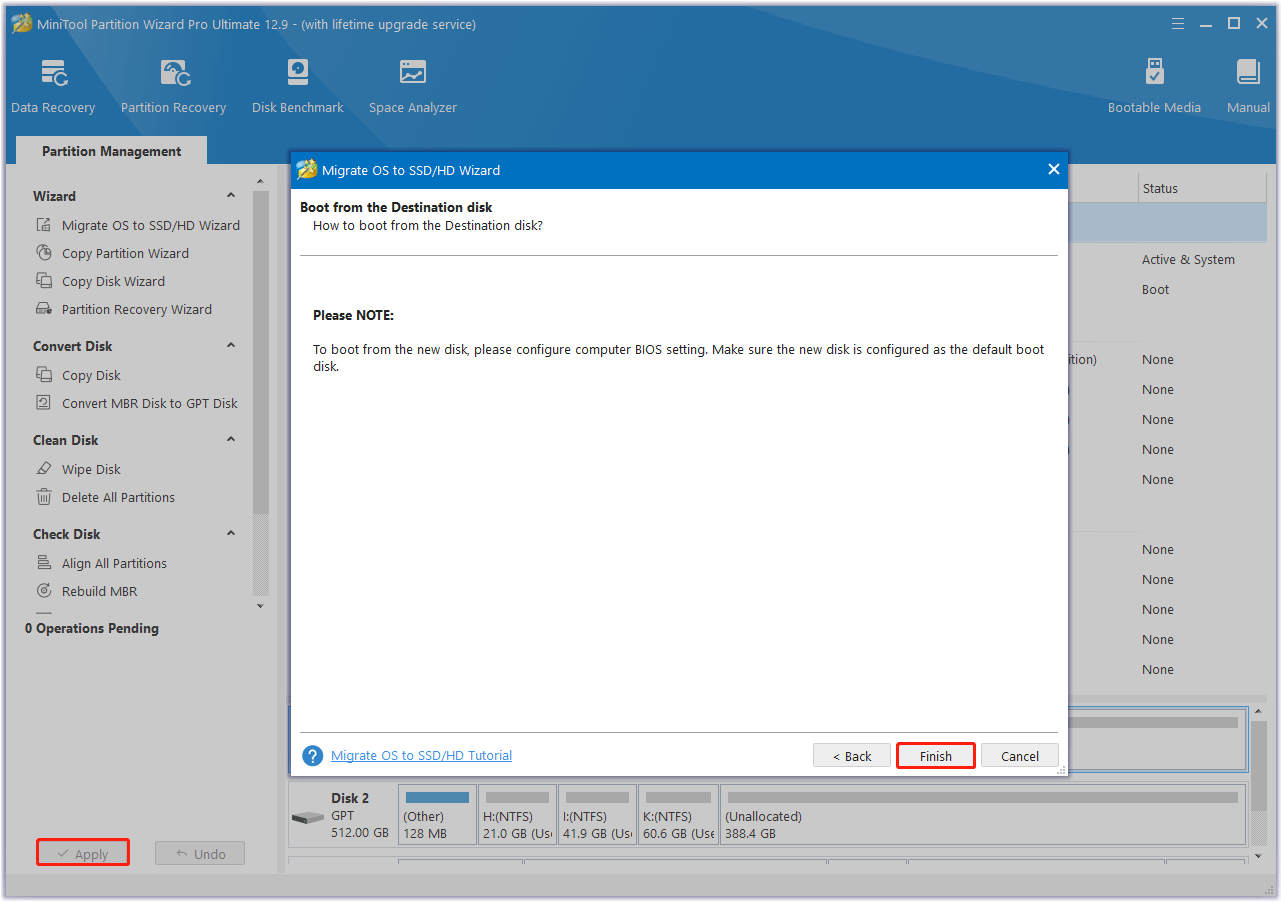
Step 5: Finally, click Finish and Apply to complete the pending operation.
In addition to the Migrate OS to SSD/HD feature, the Copy Disk feature can also help you migrate all the partitions and data of old SSD data to the new SSD. Here’s the guide:
- Launch MiniTool Partition Wizard to enter its main interface.
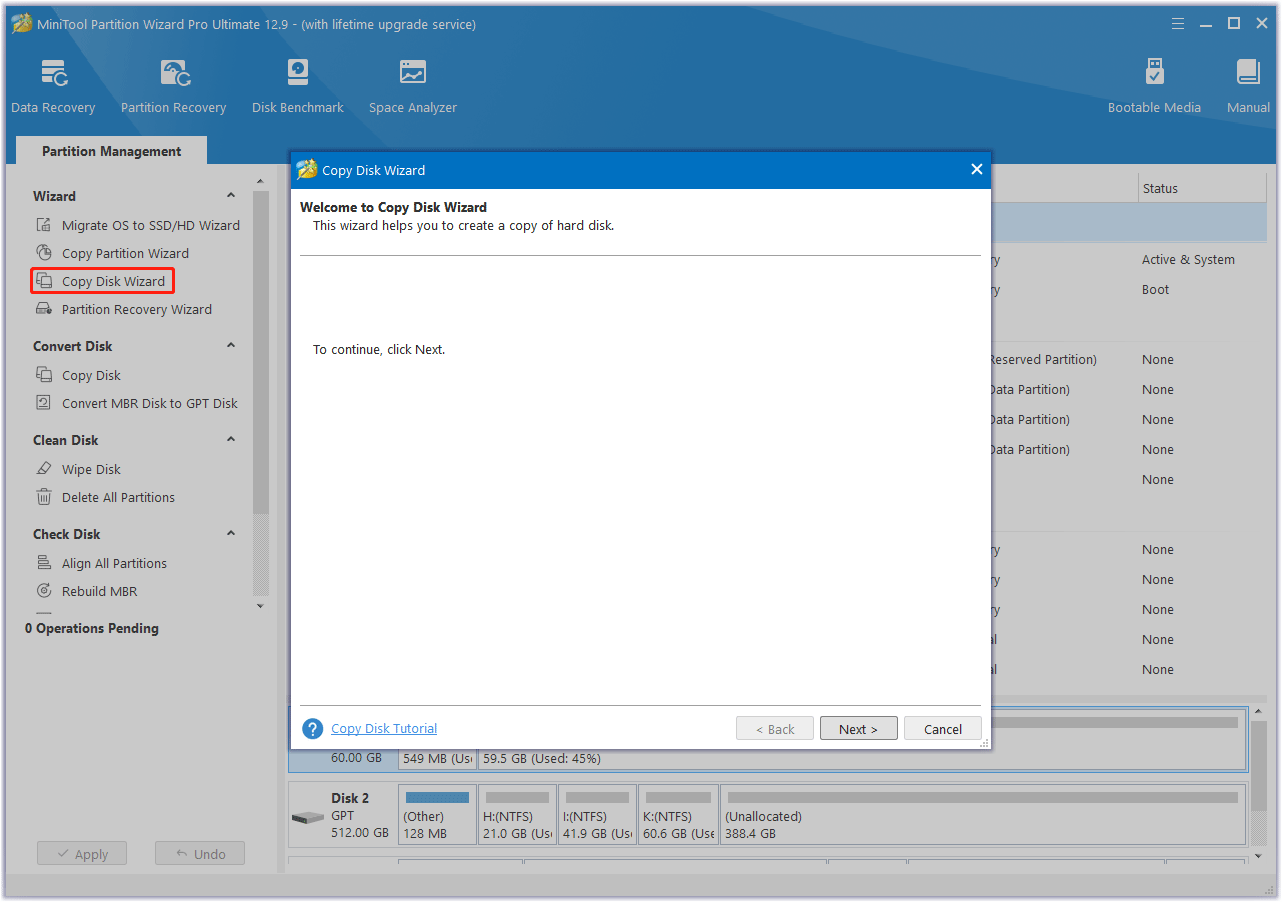
- Select Copy Disk Wizard from the left action panel. Then click on Next to continue.
- In the next window, choose the original disk to copy and click on Next.
- After that, select the new SSD as the destination disk and click on Next. If you are warned that all the data on the disk will be destroyed, click on Yes to confirm.
- In the Review the changes window, choose the preferred copy options. Also, you can configure the target disk layout according to your needs. Once done, click on Next.
- Finally, click on Finish and Apply to complete the pending operation.
Stage 3. Replace the Old SSD with the New SSD
Now, you need to remove the old SSD and install the new SSD on your Surface Laptop 5. Before that, you should prepare a T5 Torx screwdriver, spudger, and tweezers. Use these tools to remove the rubber feet and screws from your laptop.
- Unplug all cables and shut down the laptop completely.
- Turn off the screen and lay the laptop down with the back cover facing up to access the four rubber feet.
- Use tweezers to remove the 4 rubber feet on the back cover of the laptop.
- Use a T5 Torx screwdriver to remove the four 3mm screws holding the upper case.
- Turn the Surface Laptop 5 over and open it as usual. Then lift up the top case. Be careful not to remove it completely as it is still connected to the laptop by the cables.
- Insert the tip of the spudger under one edge of the magnet connector and pry up to disconnect the keyboard and touchpad cables.
- Remove the upper case and place it keyboard-side down on a clean surface.
- Use a T5 Torx screwdriver to remove the 2.7mm screw holding the SSD.
- Pull the SSD out of the slot and remove it, then replace it with a new one.
- Then put the computer back together.
Bottom Line
How to do a Surface Laptop 5 SSD upgrade? This post has provided a step-by-step guide for you. With MiniTool Partition Wizard, you can upgrade Surface Laptop 5 SSD without OS reinstallation. It saves much time and ensures the safe transmission of all your data.
If you encounter certain issues while using MiniTool Partition Wizard, you can send us an email via [email protected] to get a quick reply.


User Comments :