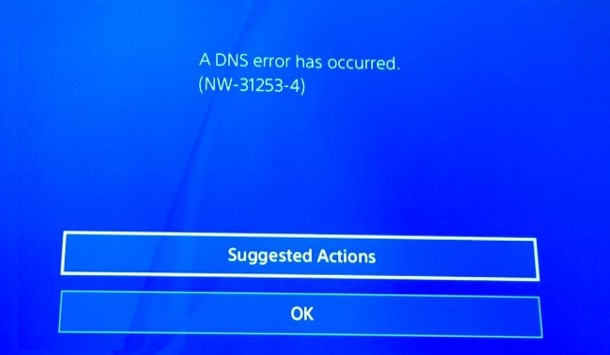
Many users are troubled by the PS4 DNS error NW-31253-4. What causes the PS4 DNS error? How to fix it? If you are also searching for the answers, you come to the right place. MiniTool will introduce some effective troubleshooting methods for you.
When this PS4 DNS error NW-31253-4 pops up on the screen, you won’t able to play games or use any services of PS4. The PS4 DNS error often occurs when there is something wrong with the PS4 DNS settings.

The internet connection including Wi-Fi and LAN connection is also responsible for the DNS error PS4. To make sure there is no problem with your Wi-Fi and LAN connection, you can try connecting PS4 to the same network on other devices. If they haven’t any problems during the process, it indicates that the Wi-Fi and LAN connection can work well.
Then you can try the following methods to fix the PS4 DNS error. Let’s begin!
Fix 1. Change Your DNS Settings
Changing DNS settings can help break many limitations with your IP addresses and access PlayStation services. This method has been proven by lots of users to be useful for many issues such as League of Legends high ping, lol RADS error, and other types of issues.
If you are troubled by the PS4 DNS error NW 31253 4 and can’t access the PlayStation service, you can try changing the default DNS to the free DNS provided by Google. Here’s how to do that:
Step 1. Open the PS4 Home Menu, and then navigate to the Settings icon and press the X button on the console.

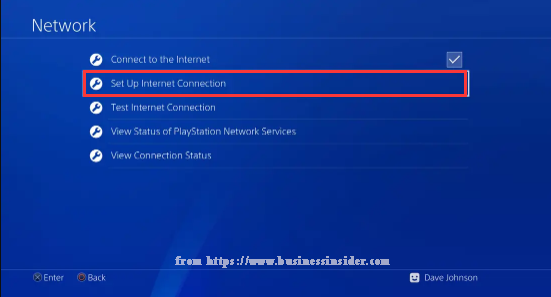
Step 2. Click on Network in the Settings menu and click on Set Up Internet Connection.

Step 3. Then you will be asked how to connect to the network. Here you can select Wi-Fi or a LAN Cable, which depends on what types of network you want to connect to. We will show you how to use Wi-Fi and LAN cable respectively.

If You Are Using Wi-Fi Network:
Step 1. Select Use Wi-Fi and click on Custom.
Step 2. Select your Wi-Fi network and enter the Wi-Fi password to connect the network.
Step 3. Select Automatic in the IP Address Settings and select Manual in the DNS settings.
Step 4. Select the option for Do Not Use in the DHCP Host Name.
If You Are Using LAN Cable:
Step 1. Select Use a LAN cable and select Custom.
Step 2. Change the IP Address Settings to Automatic, and then Do Not Use in the DHCP Host Name.
Step 3. Change the DNS Settings to Manual. Then set the Primary DNS to 8.8.8.8 and Secondary DNS to 8.8.4.4 or 8.8.8.8.
Step 4. Click on Next to get the MTU Settings, and then select Automatic in the MTU Settings and select Do Not Use in the Proxy Server.
Step 5. Click on Test Internet Connection to see if the PS4 DNS error NW 31253 4 is fixed.
Fix 2, Reset Your PS4
Hard resetting your PS4 will refresh the connection between your PS4 and router. It also means all the settings will come to default, which can help fix the DNS error PS4. We recommend that you back up all the important data before resetting PS4.
Step 1. Turn off your PS4 completely and remove the power cable from the back of the device.
Step 2. Disconnect all the peripherals from your PS4 including modem, router, controller, and other external devices.
Step 3. Wait for at least 2 minutes, and then reconnect everything to PS4 and make sure there is no damage when connecting again.
Step 4. Plug the power cable again and turn on your PS4 console.
Fix 3. Run Online Support Troubleshooter
If the above 2 methods can’t help you fix the error, you may consider using the Online Support Troubleshooter provided by Sony. This Fix & Connect tool is often used to troubleshoot the PS4 connectivity issues.
You can click here to visit the official website and follow the on-screen instructions to fix the PS4 DNS error. This online troubleshooter also provides the methods to fix the error other than PS4 DNS error NW-31253-4.

![How to Fix Stardew Valley Won’t Launch on Windows 10 [Full Guide]](https://images.minitool.com/partitionwizard.com/images/uploads/2020/07/stardew-valley-wont-launch-thumbnail.jpg)
User Comments :