Many users encounter the Night Light not working Windows 11 issue. What causes the problem? How to fix Night Light not working in Windows 11? Let’s start exploring the answers together with MiniTool.
Windows 11 is the next version of the Microsoft Windows 10 operating system that was revealed on June 24, 2021. This new version also inherits many features from Windows 10 like Night Light. The Night Light feature in Windows 11 can help reduce the blue light on the screen to ease eye strain and improve sleep quality. However, some users encounter the Windows 11 Night Light not working issue after upgrading. Don’t worry. There are 7 effective fixes.
Fix 1. Make Sure You Enable Night Light in Windows 11
Before you move done to the following fixes, you need to make sure that the Night Light feature is enabled. Here’s how to enable Night Light in Windows 11:
Step 1. Press Win + I keys to open the Settings window.
Step 2. Go to System from the left pane, and then select Display from the right side.
Step 3. In the new window, locate the Brightness & color section and toggle on the switch next to Night Light.
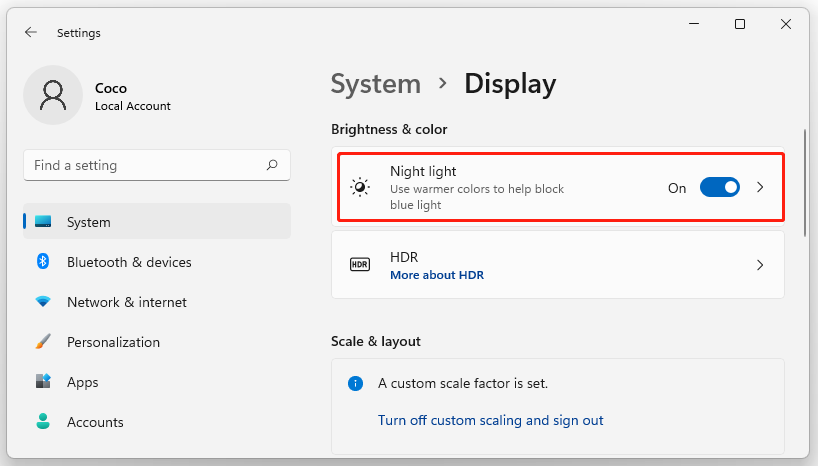
Step 4. To prevent the Night Light feature from self-starting or self-stopping, you can click on the Night Light title to expand advanced settings.
Step 5. Toggle on the switch next to Schedule night light, and then select Set hours and use the Turn on and Turn off options to set a period when you want to use Night Light Windows 11 automatically.
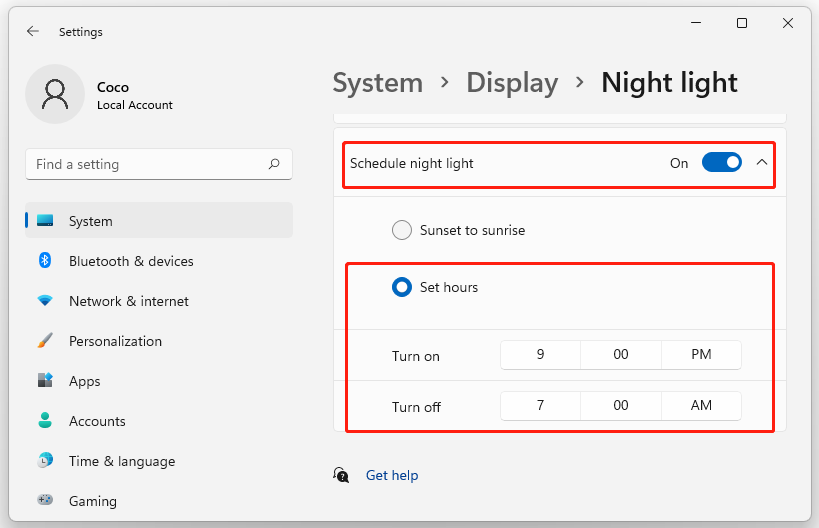
Now, restart your computer and check if the Night Light not working Windows 11 issue gets solved.
Fix 2. Change the Date and Time
According to a survey, incorrect date and time settings can trigger the Windows 11 Night Light not working problem. So, we recommend you check the date and time on your PC.
Step 1. Open the Settings window, and then select Time & language and click on Date & time from the right pane.
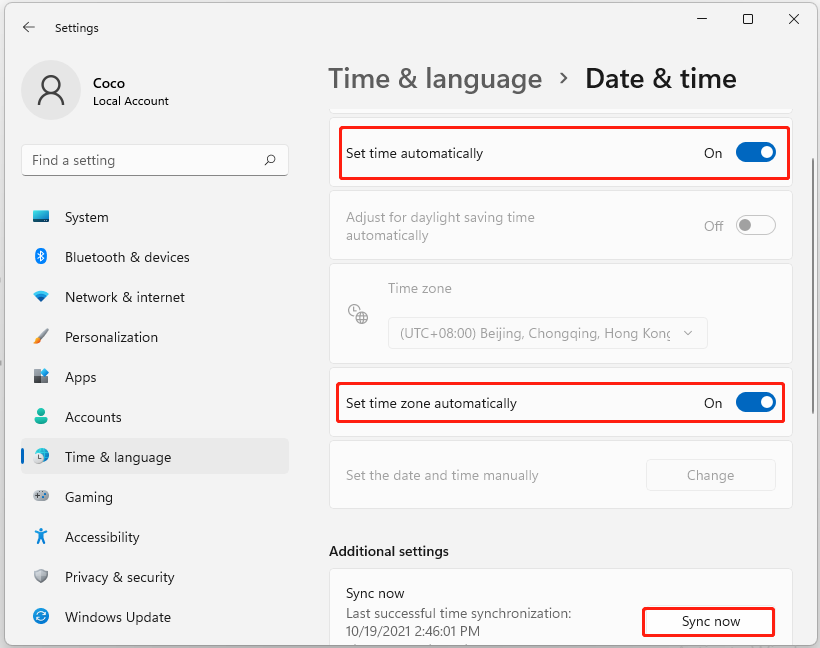
Step 2. Toggle on the switches both next to Set time automatically and Set time zone automatically.
Step 3. Scroll down to the Additional settings section and click on Sync Now. Then your system date and time will be synchronized automatically.
Fix 3. Enable the Location Services
As you might know, the option to automatically enable Night Light in Windows 11 also requires the location of your computer to determine the time of sunset and sunrise. Here you can try enabling the Location services to avoid the Night Light not working Windows 11 issue.
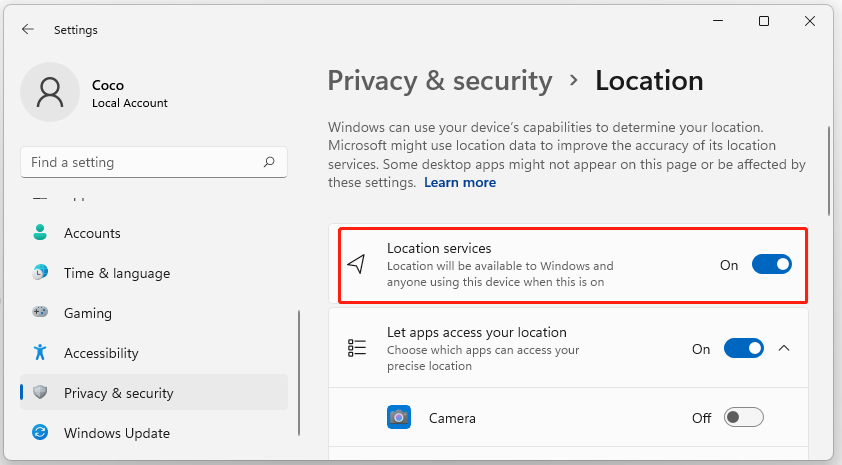
Step 1. In the Settings window, select Privacy & Security from the left side and scroll down the right sidebar to Location under the App permissions tab.
Step 2. Toggle on the switch next to Location services.
Fix 4. Reinstall Your Graphics Card Driver
Sometimes a corrupted or outdated graphics card driver can trigger various problems like Valorant FPS Drops, slow startup Windows 11, and the one discussed in this post. To fix Night Light not working Windows 11, you can try reinstalling the display driver.
Step 1. Press the Win + R key to open the Run dialog box, and then type devmgmt.msc in the box and hit Enter.
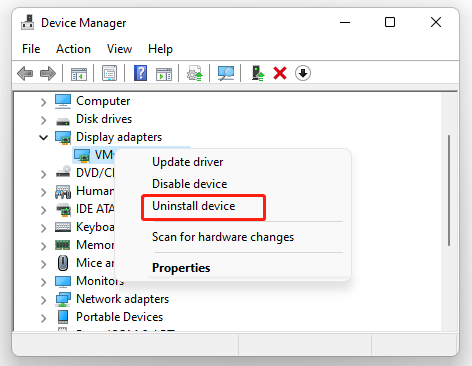
Step 2. Expand the Display adapters category, and then right-click the graphics card driver and select Uninstall device.
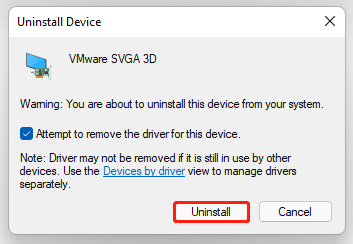
Step 3. In the pop-up window, tick the checkbox next to Attempt to remove the driver for this device and click on Uninstall.
Step 4. Restart your computer and Windows 11 will automatically do a fresh installation of the default graphics card driver.
Fix 5. Disable and Re-enable the HDR Feature
The DHR feature is used to improve the bright visibility and vibrance in images. If you encounter the Windows 11 Night Light not working problem when waking your computer from Sleep mode, it could be caused by the HDR feature. Here you can try disabling and re-enabling the option.
Step 1. In the Settings window, navigate to System > Display.
Step 2. You can toggle Off or On the Use HDR option and see if the issue is fixed.
Fix 6. Change the Night Light Settings in Registry Editor
In addition, you can try resetting the Night Light feature in Registry Editor and see if it works. To do so, please follow the steps below carefully.
Step 1. Press the Win + R key to open the Run dialog box, and then type regedit in the box and hit Enter.
Step 2. Locate the following path via the left navigation bar:
HKEY_CURRENT_USER > Software > Microsoft > Windows > CurrentVersion > CloudStore > Store > DefaultAccountCloud > Cloud
Step 3. Right-click the folder with the following name and select Delete.
default$windows.data.bluelightreduction.bluelightreductionstate
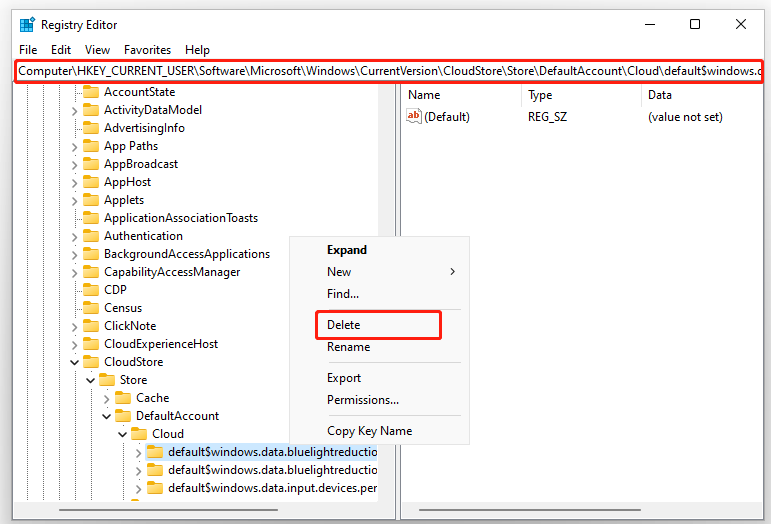
After that, reboot your computer and check if the Night Light issue is gone.
Fix 7. Reset Windows 11
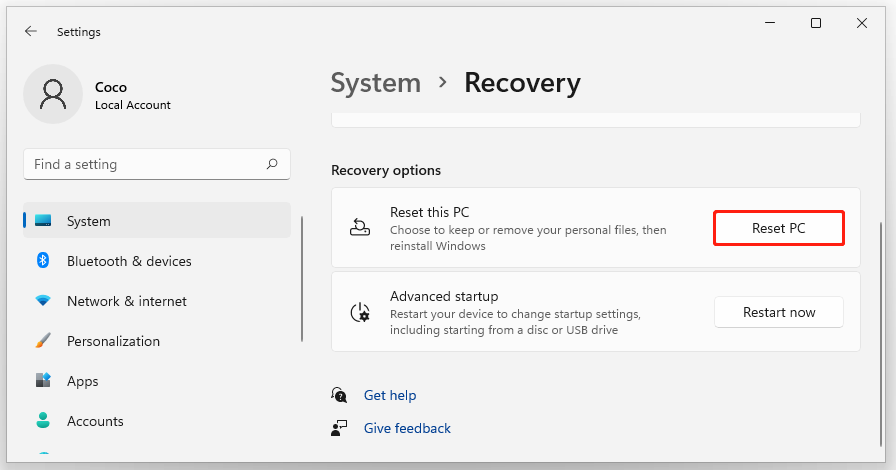
If none of the above solutions work, you may have to consider resetting this PC. By doing so, Windows will perform a fresh installation of all features and settings including Night Light. If you don’t know how to reset Windows 11, this post guide you through detailed steps.
MiniTool Partition Wizard DemoClick to Download100%Clean & Safe

User Comments :