Upgrading the SSD in your MSI laptop is an excellent way to increase storage space and improve performance. If you are considering this upgrade, this post is a valuable resource. Here, Partition Magic carefully explains the steps involved in performing an MSI laptop SSD upgrade.
About MSI Laptop
The MSI laptop is a product of Micro-Start International Co., Ltd, a renowned multinational information technology corporation.
This company specializes in designing, developing, and distributing computer hardware and related products and services such as laptops, desktops, motherboards, graphics cards, all-in-one PCs, servers, industrial computers, PC peripherals, and car infotainment products.
The company produces many laptop series, such as GS series, GT series, GE series, GP series, GL series, GF series, and more.
Normally, MSI will pre-install a 1 TB HDD or a 1 TB HDD & a small SSD on each of their laptops, which may not be enough for users who download many games. As time goes by, users may want to upgrade their hard drives for bigger storage spaces or fast running speeds.
If you also have the same need, this post may help you, in which it shows a full guide on MSI SSD upgrade and MSI hard drive upgrade.
Can You Upgrade the HDD/SSD on the MSI Laptop?
Yes, of course you can. You can upgrade HDD/SSD on the MSI laptop with ease. However, one thing you should note is that different MSI laptop models have different numbers of slots for HDD/SSD. Therefore, it is necessary to check how many slots your laptop has and what type they are.
Here are some possible slot combinations that an MSI laptop may have:
- 1 x M.2 SSD slot, two M.2 combo slots, and 1 x 2.5″ SATA HDD (such as MSI GT76 Titan DT)
- 1 x M.2 SSD slot, 1 x M.2 SSD combo slot, and 1 x 2.5″ SATA HDD (such as MSI GE65 Raider 9SFX, GP75 Leopard 9SE)
- 1 x M.2 combo slot and 1 x 2.5″ SATA HDD (such as GL65 Leopard 9SDR)
- 2x M.2 SSD slot (such as GE66 Raider)
- 1 x 2.5″ SATA slot (such as GF63 Thin, GT70 2OC)
Once you have identified the slot combinations available on your MSI laptop, you may proceed with the upgrade using the following methods depending on your desired goals:
- Upgrade to a larger or faster M.2 SSD for improved read/write speed or increased storage capacity.
- Upgrade to a 2.5” SATA SSD in place of the HDD for enhanced performance.
How to Do the MSI Laptop SSD/Hard Drive Upgrade?
How to do the MSI laptop SSD/hard drive upgrade? I divide the whole process into three parts with detailed steps. If you have the same need, you can do as follows:
Part 1. Do Some Preparation
Before you do the MSI laptop SSD upgrade or MSI hard drive replacement, you need to prepare some essential tools first. They are:
- A new SSD: This new SSD should be big enough and compatible with your MSI laptop. (If your PC only has one 2.5 SATA slot, you can buy a SATA SSD.)
- A suitable Philips screwdriver: You can use it to unscrew your MSI laptop and open its back plate.
- A spudger: You can use it to remove the battery of your MSI laptop and lift the ribbon cable connector.
- An SSD enclosure: You can use it to connect the new SSD to your laptop and then migrate data and OS from the original SSD/HDD to the new SSD.
Part 2. Migrate Data to the New SSD
After preparing all the things for the MSI laptop SSD upgrade, you can continue to migrate the OS from the original HDD/SSD to the new bigger or faster SDD.
To do that, I recommend you use MiniTool Partition Wizard, which is very professional and reliable. It provides the Migrate OS to SSD/HD feature to help you migrate OS to SSD without reinstalling OS and the Copy Disk feature to clone all data with ease.
In addition, this feature-rich tool can also help you format SD card FAT32, rebuild MBR, change cluster size, convert MBR to GPT, resize/move partitions, partition hard drive, recover data from hard drive, and more. Here’s how to do it:
Method 1. Use Migrate OS to SSD/HD Feature
Step 1. Use the SSD closure to connect the new SSD to your computer.
Step 2. Download and install MiniTool Partition Wizard on your PC. Then launch this app into its main interface.
MiniTool Partition Wizard DemoClick to Download100%Clean & Safe
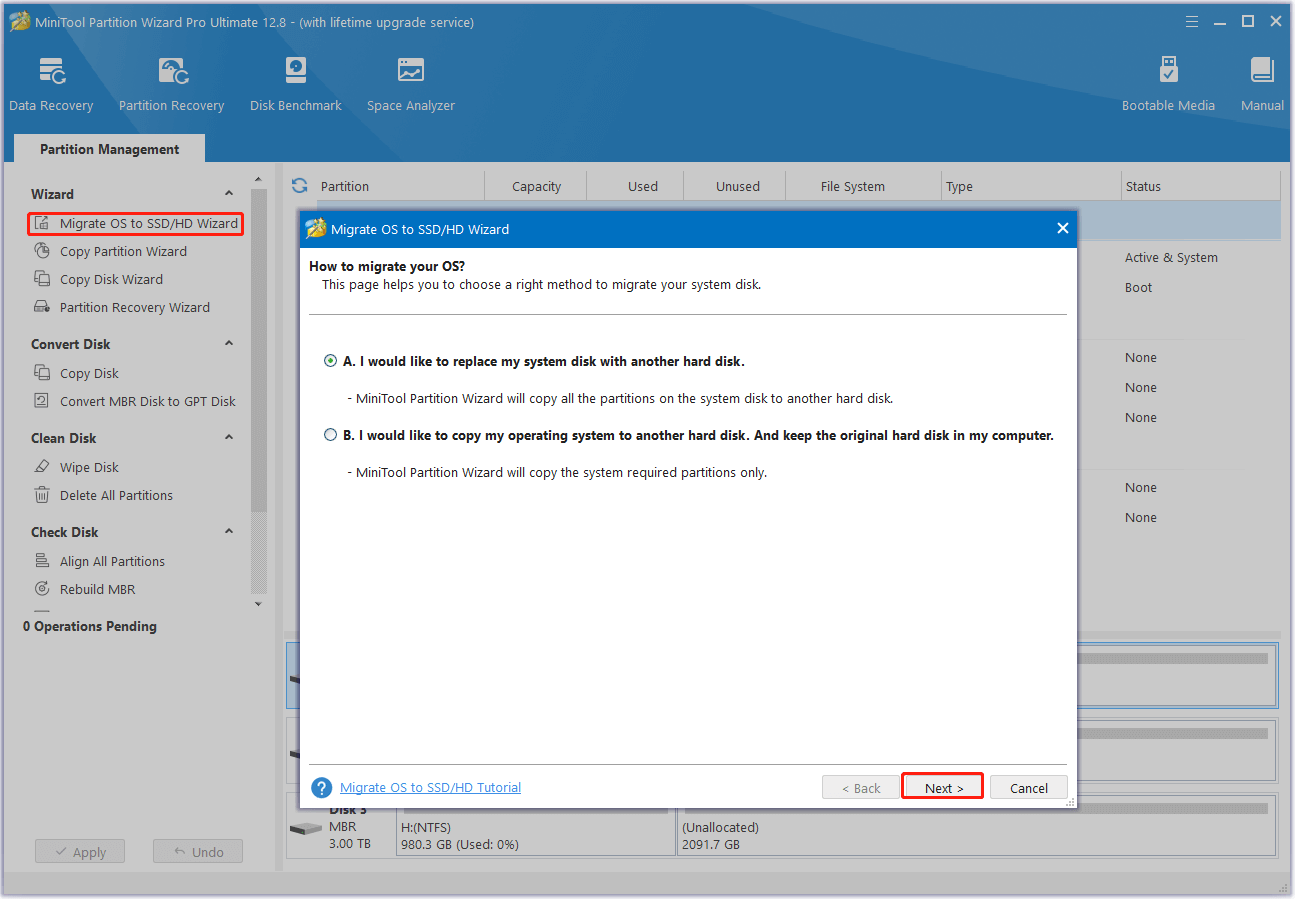
Step 3. Select Migrate OS to SSD/HD Wizard from the left action panel. In the pop-up window, choose an option to migrate the OS based on your needs. Then click Next.
Step 5. In the next window, select the new SSD and click Next. When prompted, click Yes to continue.
Step 6. After that, choose the desired copy options and click Next.
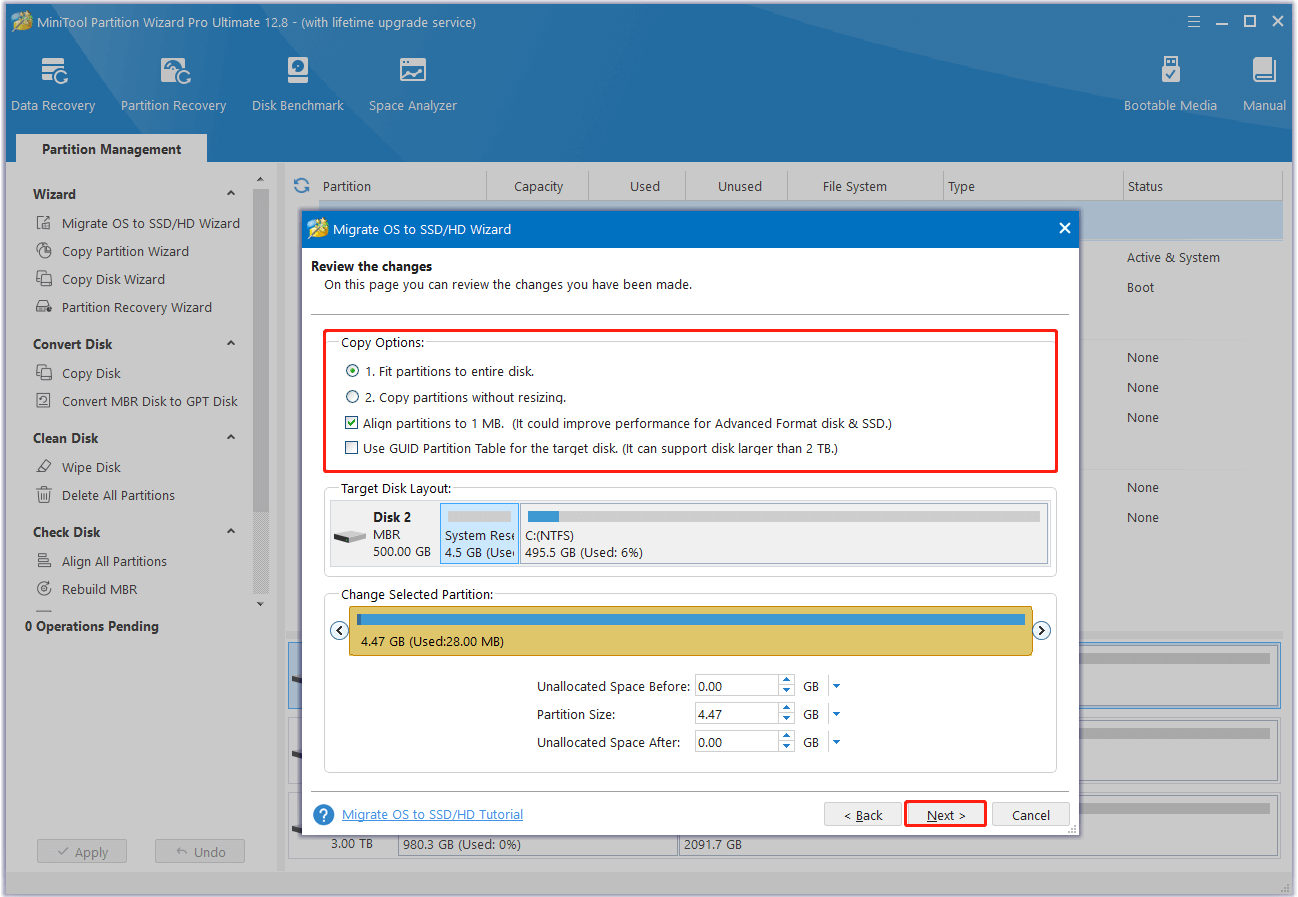
Step 7. Finally, click Finish and Apply to save the pending operation.
Method 2. Use the Copy Disk Feature
Step 1. Connect the SSD externally using a compatible enclosure.
Step 2. Launch MiniTool Partition Wizard to its main interface, and choose the Copy Disk Wizard feature from the left pane. Then, click Next in the pop-up window.
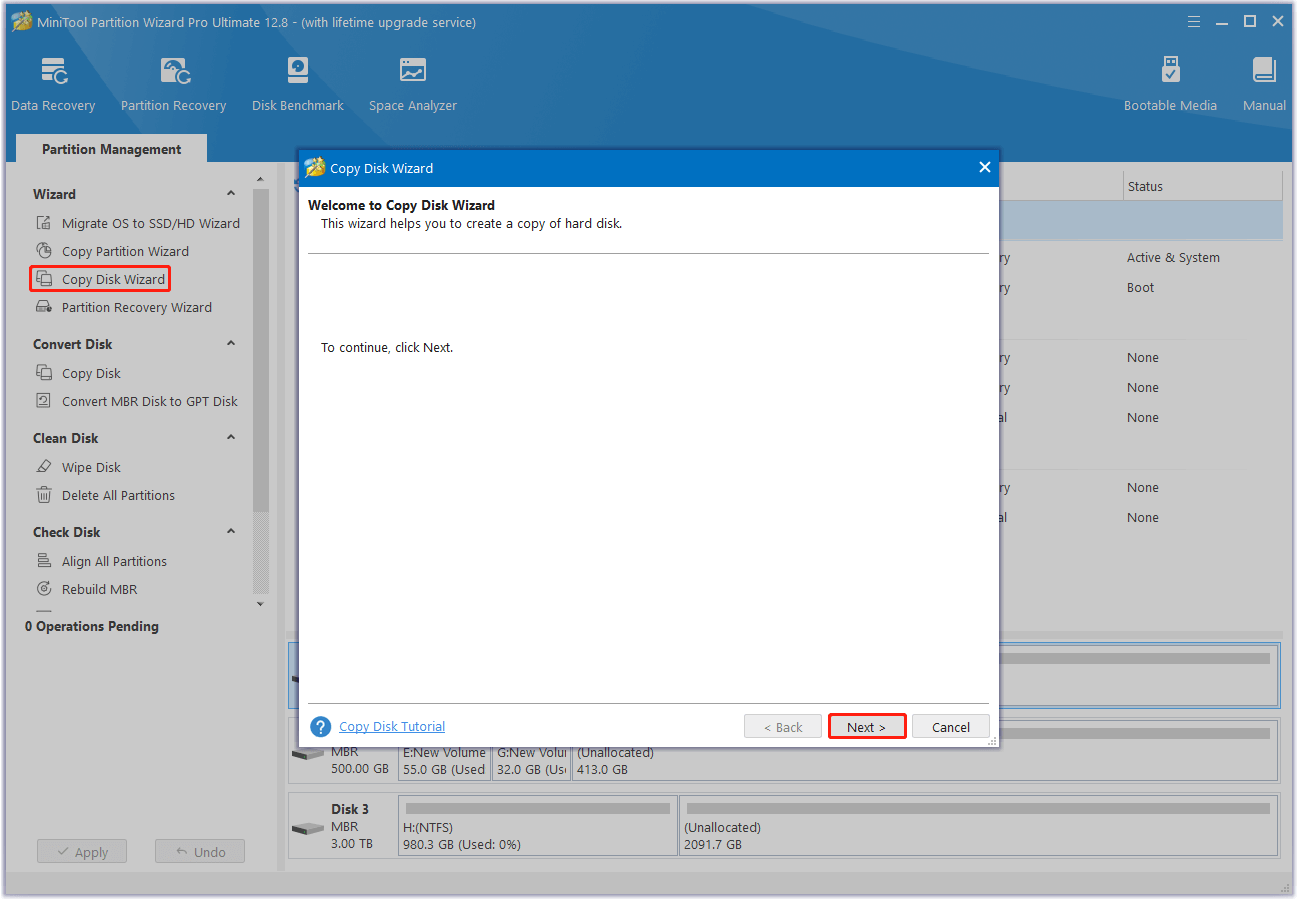
Step 3. In the next window, select the disk to copy and click Next.
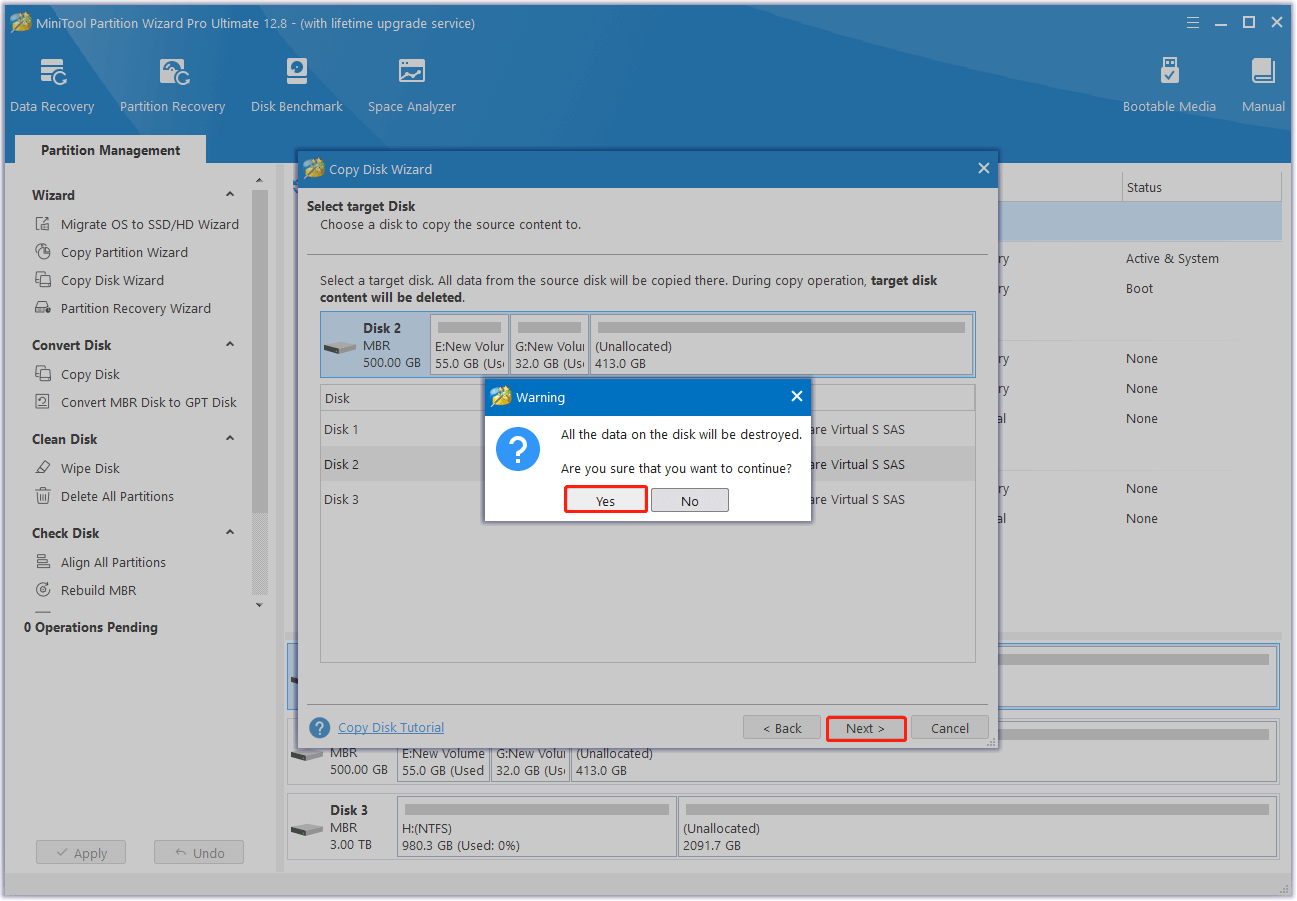
Step 4. Choose the new SSD and press Next. In the pop-up Warning window, tap the Yes button.
Step 5. Set the copy options and change the disk layout according to your preferences. Then, click Next and Finish to continue.
Step 6. After that, tap Apply and Yes sequentially to execute the changes.

Part 3. Replace HDD/SSD with a New SSD
Once you finishing migrate the operating system and data to the new SSD, you can disconnect it from your MSI laptop and shut down your system. Then, do the following steps to do the MSI laptop SSD upgrade or MSI hard drive replacement:
Step 1. Place the MSI laptop bottom side up on the table.
Step 2. Use the Philips screwdriver to unscrew the screws carefully. Then remove the bottom cover properly.
Step 3. Remove the screw that secures the SSD and then take the SSD out carefully. (If you want to replace the HDD with SSD, you just need to take out the HDD from the hard drive tray.)
Step 4. Slide in the new SSD and fasten it with the right screw. Then place back the bottom cover.
In Conclusion
How to perform the MSI laptop SSD upgrade? Now, you may already know the answers. This post provides a step-by-step guide to help you do the MSI laptop SSD upgrade and MSI hard drive upgrade.
In addition, if you encounter any issues while using MiniTool Partition Wizard, you can contact via [email protected]. We will get back to you as soon as possible.
About The Author

Position: Columnist
Charlotte is a columnist who loves to help others solve errors in computer use. She is good at data recovery and disk & partition management, which includes copying partitions, formatting partitions, etc. Her articles are simple and easy to understand, so even people who know little about computers can understand. In her spare time, she likes reading books, listening to music, playing badminton, etc.
User Comments :