Dell Backup and Recovery Windows 10
When it comes to Dell Backup and Recovery (DBaR), some of you may be curious about it. Well then, what is it?
In a nutshell, it is a backup and recovery application for only Dell computers, designed to protect your most important digital documents and memories within a few clicks.
It was preloaded on new Dell Windows 7 and Windows 8 devices shipped before April 14, 2016. Recently, this software has been upgraded to version 1.9 which is only available to systems that upgrade to Windows 10, but systems that ship with Windows 10 will not have DBaR pre-installed.
This is to maintain compatibility with this application. For Dell computer users, this tool is used commonly.
However, many users complained to us that Dell Backup and Recovery needs to be paid. One person said: “I upgraded my computer from Windows 7 to 10 and previously installed Dell Backup and Recovery. But it was missing. And I downloaded a new. A warning appeared, asking me to upgrade to the Premium Edition so as to create a system backup.”
On the other hand, some of you upgrade to Premium Edition but find Dell Backup and Recovery not working, for example, taking a long time, program stuck issue and more. If you also have one of these situations, what should you do? Uninstall it now.
Here, we strongly recommend using an alternative to this tool to back up Windows 10 OS.
MiniTool ShadowMaker – Alternative to Dell Backup and Recovery Windows 10
If you don’t want to use Dell Backup and Recovery and uninstall it, but want to look for a piece of professional, reliable and free backup software to back up your Dell laptop, here MiniTool ShadowMaker is worthy of being recommended.
Developed by MiniTool Solution Ltd., it is specially designed to back up and restore your Windows operating system, partition, hard drive, and files, without Dell backup and recovery problems.
Most importantly, an ideal backup solution should meet these requirements: automatic backup, incremental backup and differential backup.
Fortunately, MiniTool ShadowMaker allows you to create a scheduled backup by specifying a certain time point. Besides, it enables you to create incremental backups and differential backups for the changed data only and it also supports disk space management.
Hot article: 3 Types of Backup: Full, Incremental, Differential – MiniTool
This freeware is compatible with Windows 10/8/7. To protect your Dell laptop, just download it from our website and install it on your laptop for Dell backup and recovery Windows 10.
MiniTool ShadowMaker TrialClick to Download100%Clean & Safe
In the following content, let’s see some details about how to use Dell backup and recovery freeware in Windows 10.
How to Back up Dell Laptop Windows 10
Here is the guide on system backup with the Dell Backup and Recovery alternative.
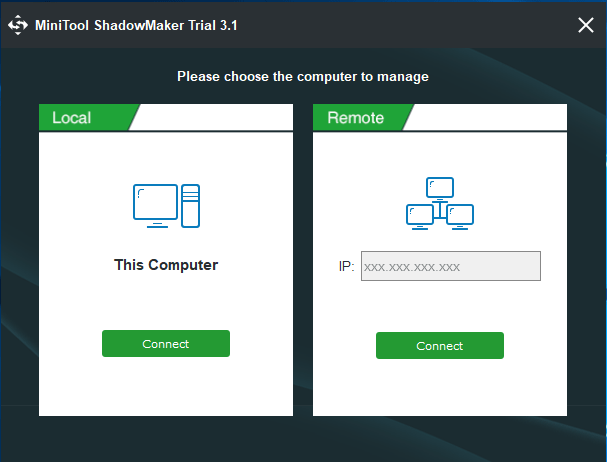
Step 1: Choose a backup module.
Run MiniTool ShadowMaker in Windows 10 to enter a small window where you should choose to manage your local computer. Just click Connect button on the left side to step 2 to begin local backup settings.
Additionally, you can also start a remote backup by typing the IP and clicking the right Connect button to manage the computer in the same LAN.
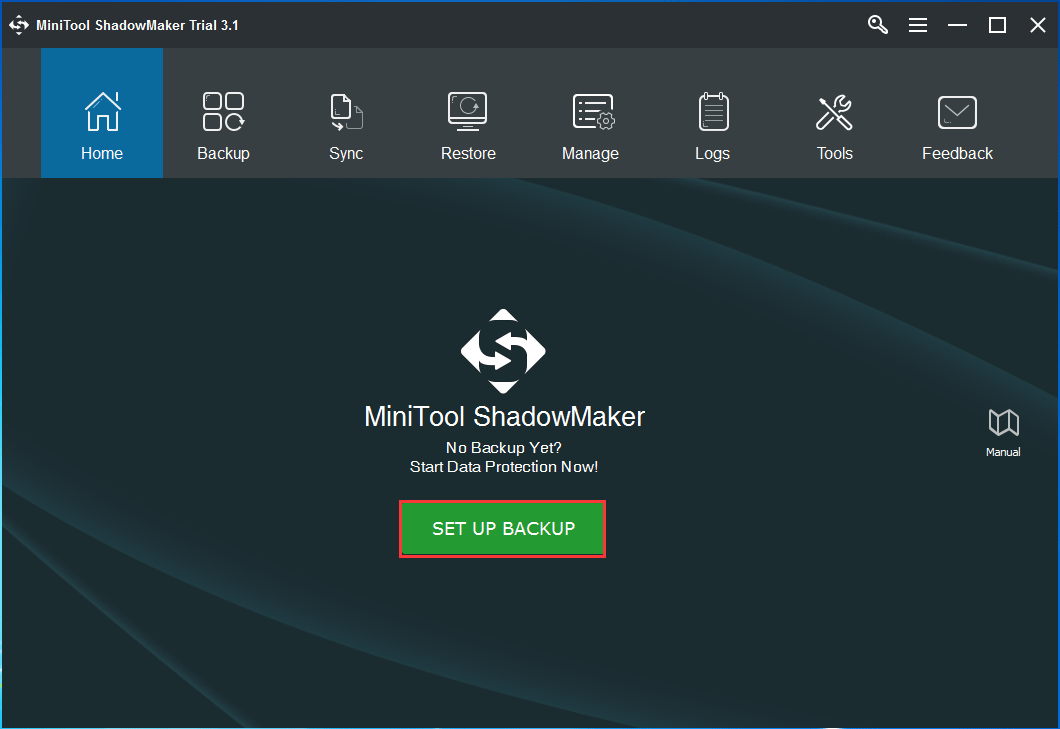
Step 2: Go to the Home window.
Then, this freeware goes to the Home page where you should click SET UP BACKUP button if you haven’t created a backup for Windows 10.
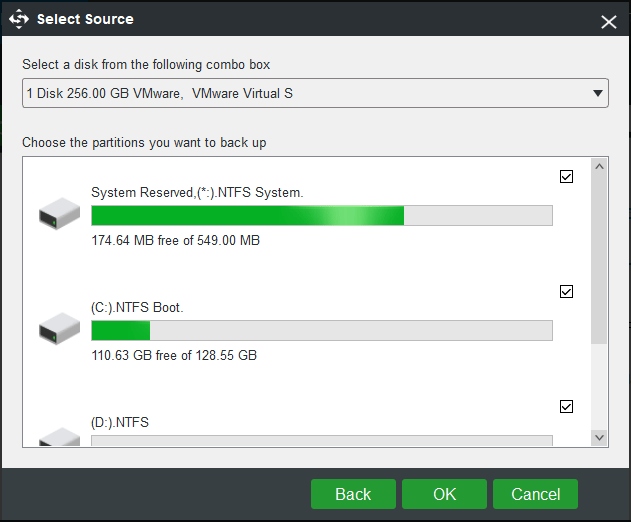
Step 3: Specify the backup source and destination storage path.
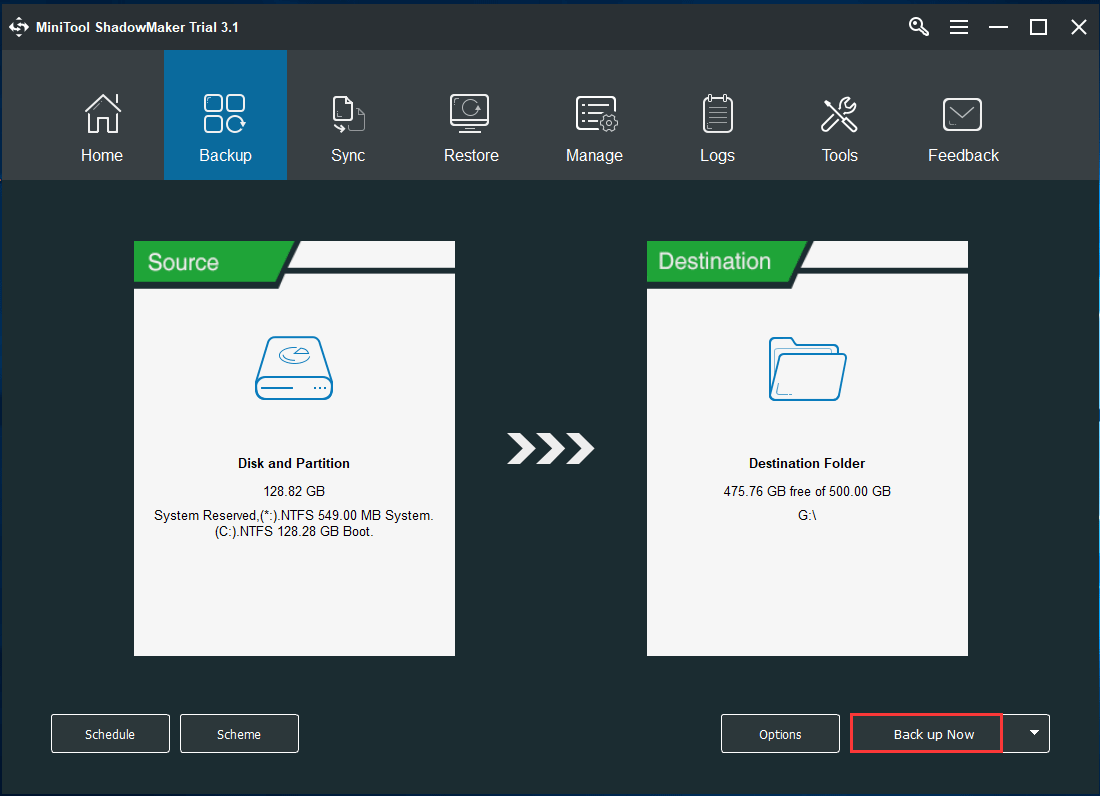
Now you are on the Backup page. Here, you see this Dell backup and recovery freeware has selected system partitions by default. If you want to back up the entire hard drive, just click the Source section, choose one disk and check all partitions.
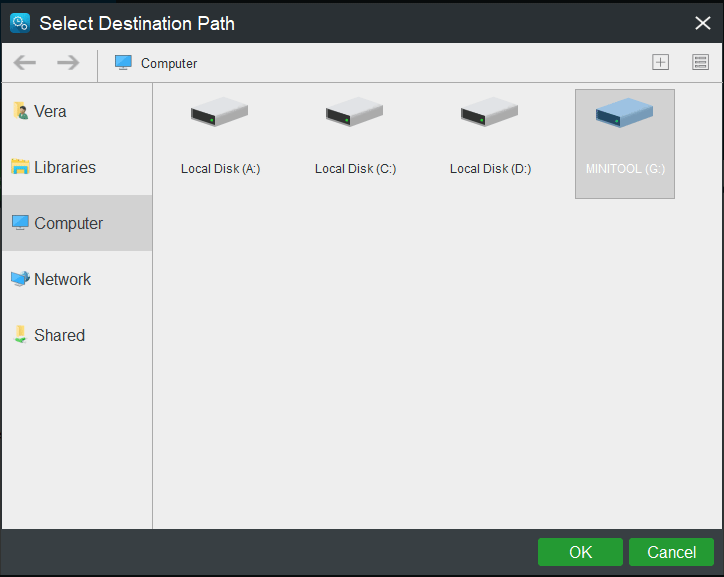
Then, you also need to specify a destination path to save the system backup image file or hard drive image file. Note that you had better back up your Dell laptop to an external hard drive so as to do a recovery with ease in Windows 10.
Step 4: Make advanced settings. (This is optional for you.)
In fact, there are three additional features in the Backup window: Schedule, Scheme, and Options.
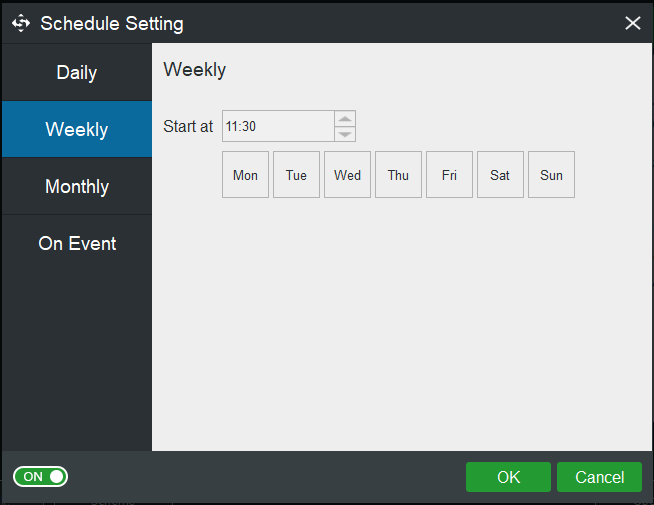
1. Schedule: Four modes are offered including Daily, Weekly, Monthly and On Event. Just click one to specify a certain time point for your Dell laptop to create an automatic backup.
MiniTool ShadowMaker TrialClick to Download100%Clean & Safe
Related article: 3 Ways to Create Automatic File Backup in Windows 10 Easily
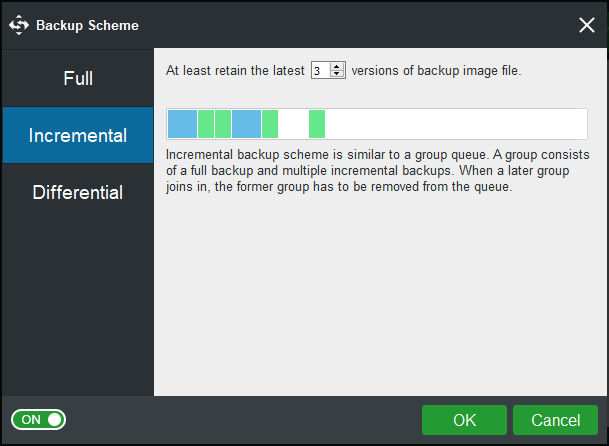
2. Scheme: Switch OFF to ON. Then, you can find the Incremental backup scheme is selected by default. By specifying the numbers of backup image file versions you want to keep, disk space management will be performed when incremental backups are created. Certainly, you can change the backup scheme to Full or Differential.
Related article: The Best Incremental Backup Software for Windows 10/8/7
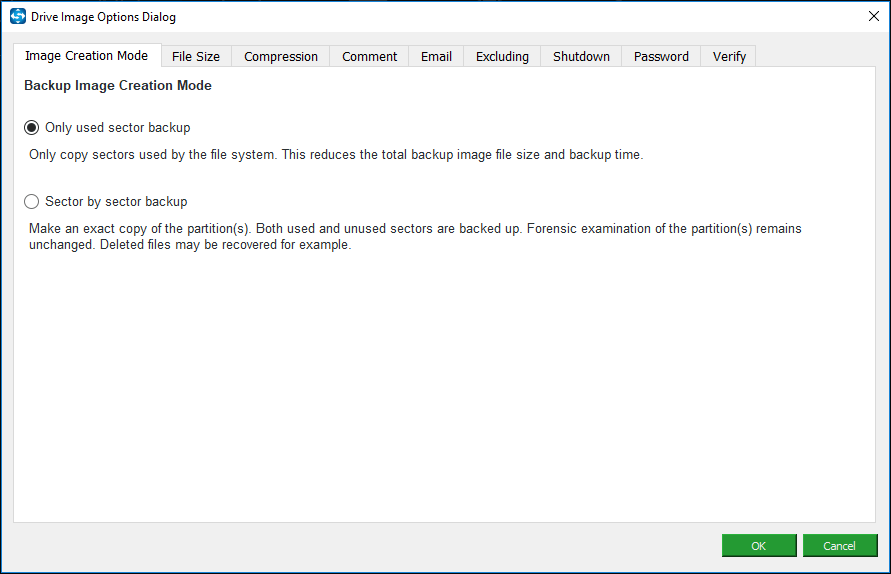
3. Options: This feature allows you to make many advanced settings, for example, choose backup image creation mode, determine compression level, add a comment to a backup, etc.
Step 5: Start backup.
After completing all settings for Dell laptop backup in Windows 10, now it’s your turn to click Back up Now button. Then, view the backup operation in Manage page.
You may also like: The Best Way to Back up Laptop to External Hard Drive in Windows
Now, we have told you how to back up Dell laptop in Windows 10. Actually, some of you are wondering about “Dell backup and recovery Windows 10”. In the following part, let’s see how to restore Windows 10 from an external hard drive.
How to Do Dell Recovery Windows 10
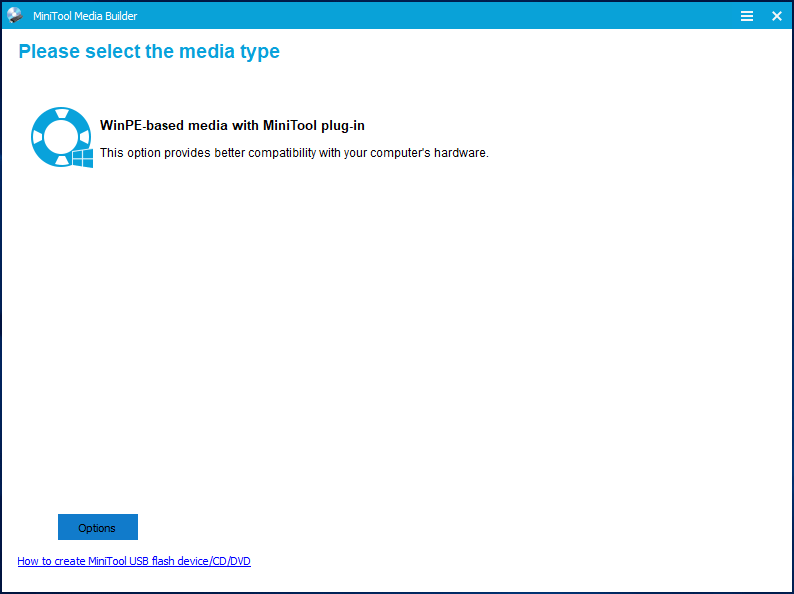
Then, boot your Dell laptop from the bootable disc you have created by changing the boot order. And MiniTool ShadowMaker will automatically run. Now, start the Dell recovery in Windows 10.
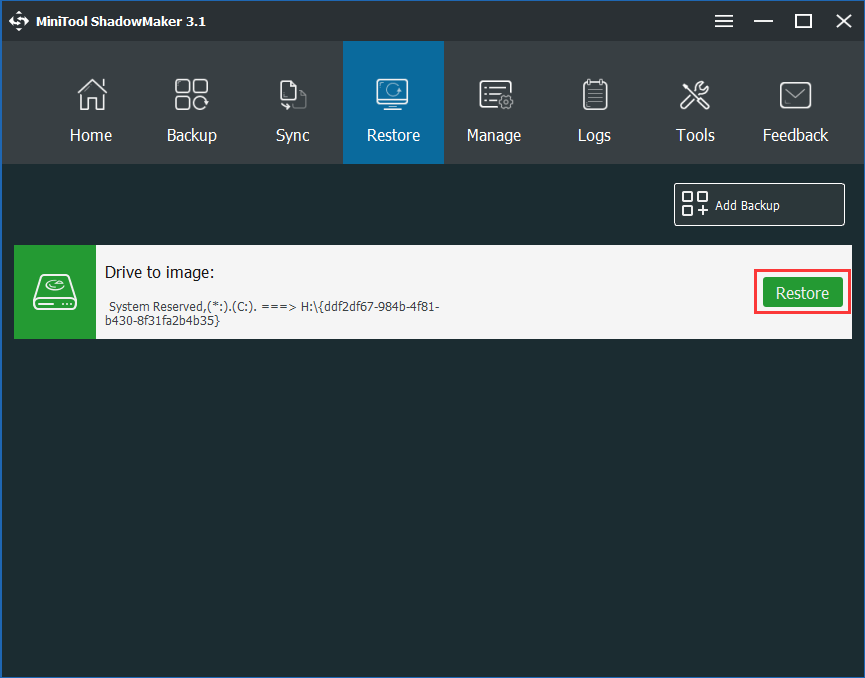
Step 1: Select a backup to do Dell laptop recovery.
Go to Restore window, then you will find the backups you have created are listed here. Just choose the system backup and click Restore button for recovery in Windows 10.
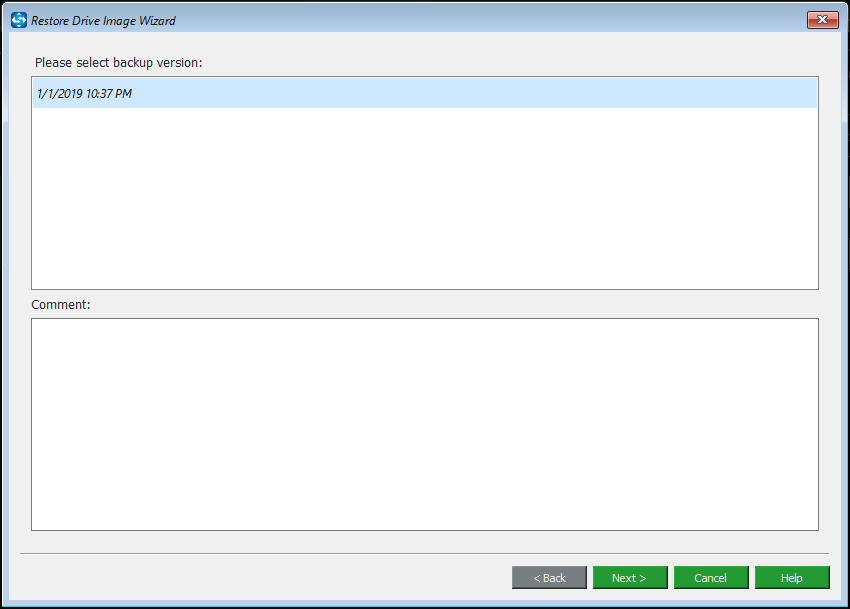
Step 2: Select a version.
Next, the backup time will be shown. Just choose a backup version depending on time and click Next to continue.
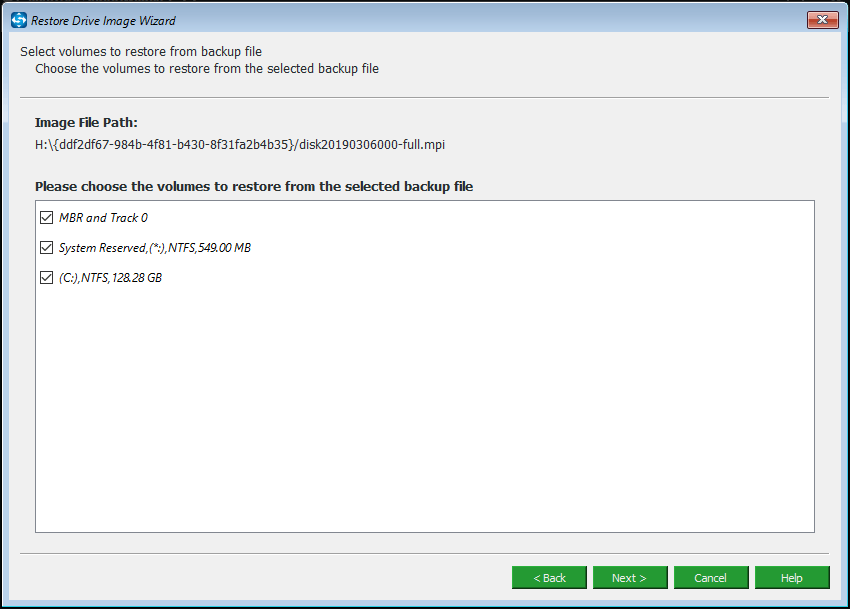
Step 3: Select partitions to restore from a backup file.
All partitions included in the backup file are listed in the following interface and you need to choose the partitions to restore from the selected backup file. If you are doing a system recovery, all system drives should be checked.
Most importantly, MBR and Track 0 must be selected. Or else, your Windows 10 operating system will be unbootable after the recovery.
Step 4: Select a target disk.
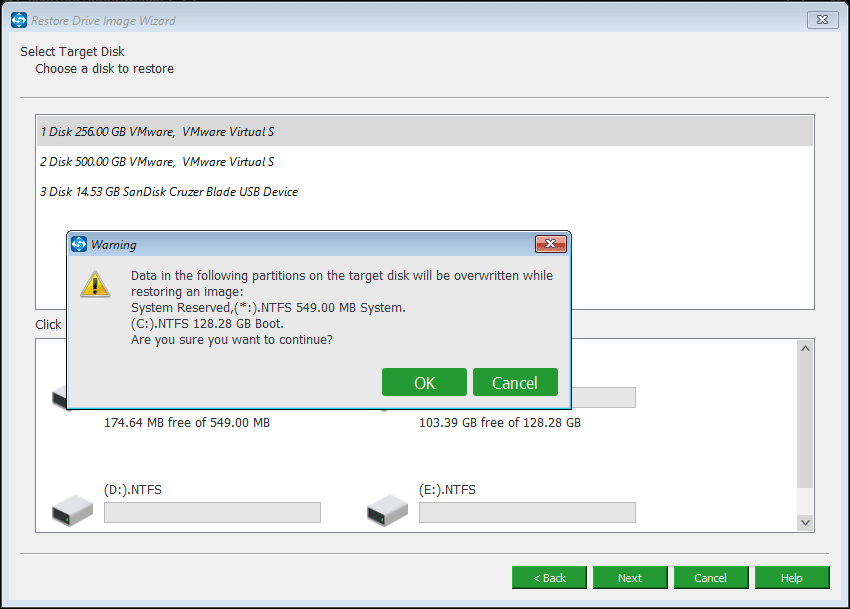
In the following interface, you are asked to decide which disk you want to restore your Windows backup to.
Here, we suggest restoring the system image file to the original system disk. Then, after clicking Next button, a small window pops up to tell you which partition on your target disk will be overwritten while restoring an image. Click OK button to the next step.
Step 5: Begin the recovery process.
Then, this Dell backup and recovery freeware will enter operation process interface. Please wait patiently and after a few minutes, the recovery is finished.
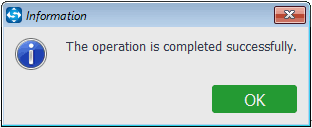
Once system issues happen to your laptop, just use a system backup image file to restore your Dell laptop to its normal state. Within simple steps, Dell laptop recovery can be completed effectively.
Further Reading: Back up Windows 10 Disk via Cloning with MiniTool ShadowMaker
As a matter of fact, in addition to protecting your laptop by means of “Dell backup and recovery Windows 10”, MiniTool ShadowMaker offers another backup solution – disk cloning. This way can help you to quickly copy your Windows 10 system disk to another hard drive.
In the event of system corruption, the target disk can be directly used to boot your laptop without recovery.
Well then, how can you clone Windows 10 disk? Download MiniTool ShadowMaker Trial Edition and install it on your Dell laptop. Then, begin the cloning operation by following the guide below.
MiniTool ShadowMaker TrialClick to Download100%Clean & Safe
Step 1: Run this free alternative to Dell Backup and Recovery in Windows 10. Then, choose a local computer to manage.
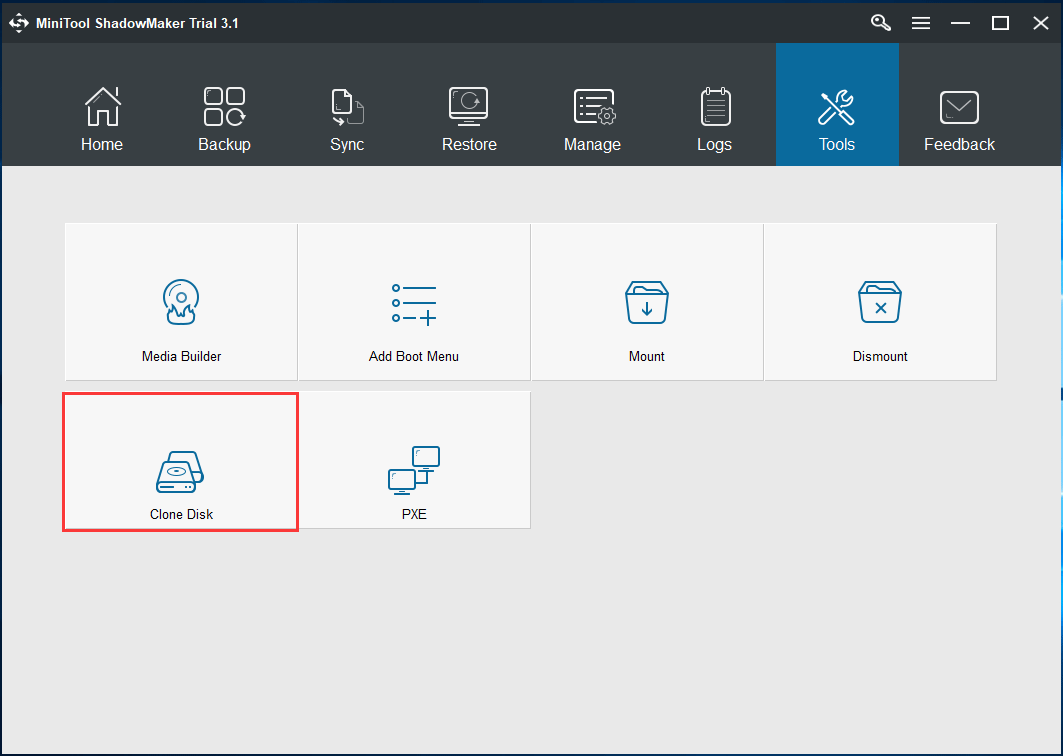
Step 2: Enter Tools window, find Clone Disk to click it.
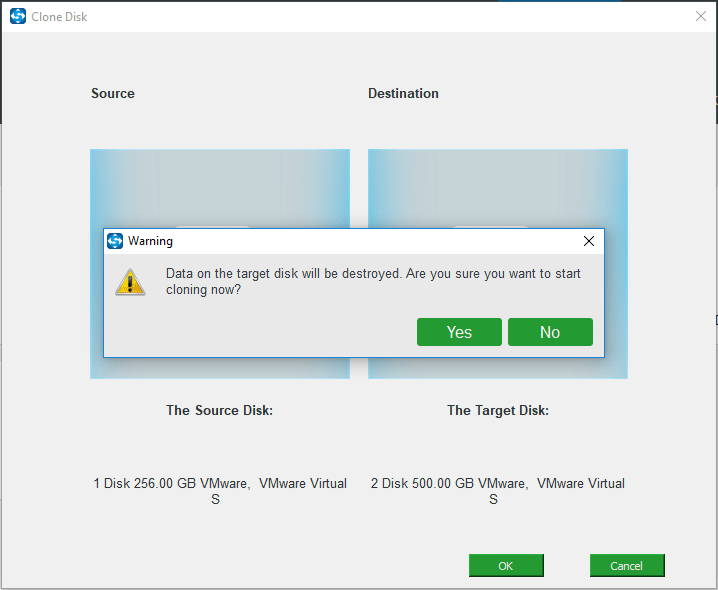
Step 3: Then in the pop-out window, choose the system disk where Windows 10 is installed as the source disk and select another hard drive as the target disk.
• Make sure that the target disk has enough disk space to hold all the source content.
• Cloning process will erase all data on your target disk. Thus, back up important files on this disk in advance.
Step 4: Next, this Dell Backup and Recovery alternative is performing the cloning operation. The copy time is determined by the disk data size and read-write speed. So, be patient.
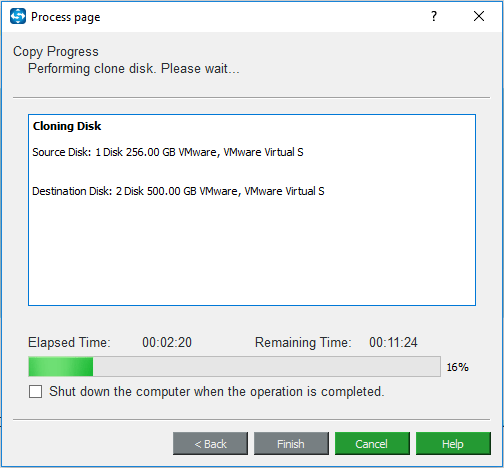
After completing this operation, you will be asked to disconnect either source disk or target disk since Windows operating system marks one disk as offline, as shown below.
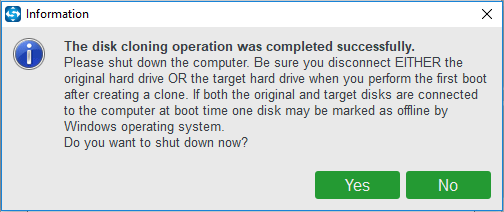
Here for backup, just remove the target disk and put it in a safe place. When Dell laptop OS goes wrong, remove your source disk, connect the target disk to this laptop and boot from it directly. Without system recovery, your laptop can work well.
In conclusion, MiniTool ShadowMaker is quite powerful for Dell backup and recovery Windows 10.
As an alternative to Dell laptop backup and recovery tool, this freeware helps not only to back up and restore system, partition or disk from an image file but also to protect your laptop well via disk cloning. If you are looking for a professional tool for Windows 10 backup & recovery, why not get it to have a try.
MiniTool ShadowMaker TrialClick to Download100%Clean & Safe
Bottom Line
Here is the end of this post. You know what Dell Backup and Recovery is and how to back up Dell laptop in Windows 10 with its free alternative – MiniTool ShadowMaker. Now, it’s time for you to back up your Dell laptop in Windows 10.
If you have some questions while using MiniTool ShadowMaker, don’t hesitate to let us know. Besides, any suggestions for backup & recovery for Dell laptop are also welcome. Just leave your idea in the following comment or send it to [email protected].

User Comments :