How big is your Alienware M17 R5 SSD? Is there a need for the Alienware M17 R5 SSD upgrade? If you are curious about those, you are at the right place. Here, this post from Partition Magic provides a detailed guide to help replace the Alienware M17 R5 SSD. You can take a look.
About Dell Alienware M17 R5 SSD Upgrade
Dell Alienware M17 R5 is a powerful AMD gaming laptop that features a 6000-series AMD Ryzen processor and AMD Radeon graphics card. It offers a sleek design, excellent display, amazing Cherry keyboard, great performance, and long battery life, which make it a stellar choice for gaming and writing.
Alienware M17 R5 is equipped with an M.2 SSD varying from 256GB, 512GB, 1TB, 2TB, to 4TB. If you have an Alienware M17 R5 laptop with a small storage capacity, you may find the laptop full of program and game files after a period of use. In this case, upgrading the SSD is a great way to increase disk space.
How can you perform the Alienware M17 R5 SSD upgrade? The following content reveals the answer for you. Just read on.
Full Guide on Alienware M17 R5 SSD Upgrade Without Reinstalling OS
In this part, we’ll show you the details about the Alienware M17 SSD upgrade without reinstalling the OS. If you want to upgrade your SSD on the Alienware laptop, pay attention to the instructions below.
Part 1: Make Some Preparations Before Alienware M17 R5 SSD Upgrade
To upgrade the SSD successfully, make sure you have all the necessary things prepared.
1. Prepare a Compatible SSD
The most important thing for the Alienware M17 SSD upgrade is to choose a new SSD that is large enough and compatible with the Alienware laptop. There are recommended SSD drives.
- Crucial T500 2TB PCIe Gen4 NVMe M.2 SSD
- Crucial P3 Plus 4TB PCIe M.2 2280 SSD
- Crucial P3 4TB PCIe M.2 2280 SSD
- Kingston KC30000 2TB M.2 PCIe SSD
- Samsung 970 EVO Plus 2TB M.2 NVMe SSD
- Samsung 980 PRO 2TB M.2 NVMe SSD
2. Prepare a Phillips Screwdriver
It’s essential to get a small Phillips screwdriver to dismantle certain panels.
3. Prepare a SATA to USB Cable
It’s used to connect the new SSD to your PC as an external hard drive.
Part 2: Clone All the Data to the New SSD
Before replacing the Alienware M17 R5 SSD, you need to transfer everything from the original disk to the new SSD with disk clone software. This can help you upgrade the SSD without reinstalling Windows. Here, we’d like to recommend you finish this operation using MiniTool Partition Wizard.
It’s a comprehensive partition manager containing a wide range of features. For instance, you can use it to create/format/resize/copy/delete partitions, convert MBR to GPT and vice versa, recover data from hard drives, and more.
Now you can follow the steps below to utilize MiniTool Partition Wizard to clone all the data including the Windows OS from the old SSD to the new one.
Step 1: Connect the prepared SSD to your computer with the SATA to USB cable.
Step 2: Download and install MiniTool Partition Wizard on your PC. Then launch this program to enter the main interface.
MiniTool Partition Wizard DemoClick to Download100%Clean & Safe
Step 3: Select Copy Disk Wizard from the left action panel. Then click Next to continue.
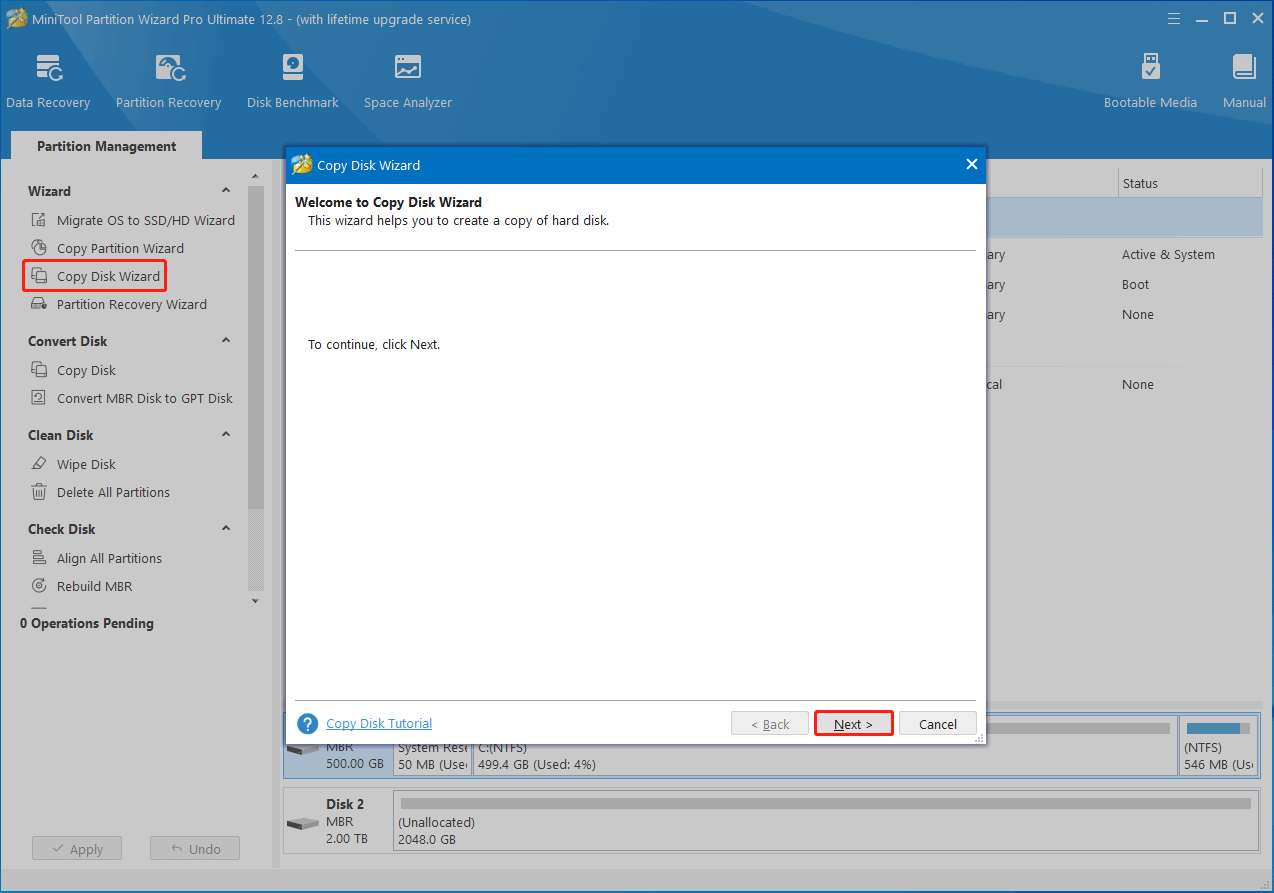
Step 4: In the next window, choose the original disk to copy and click Next.
Step 5: After that, select the new SSD as the destination disk and click Next. If you are warned that all the data on the disk will be destroyed, click Yes to confirm.
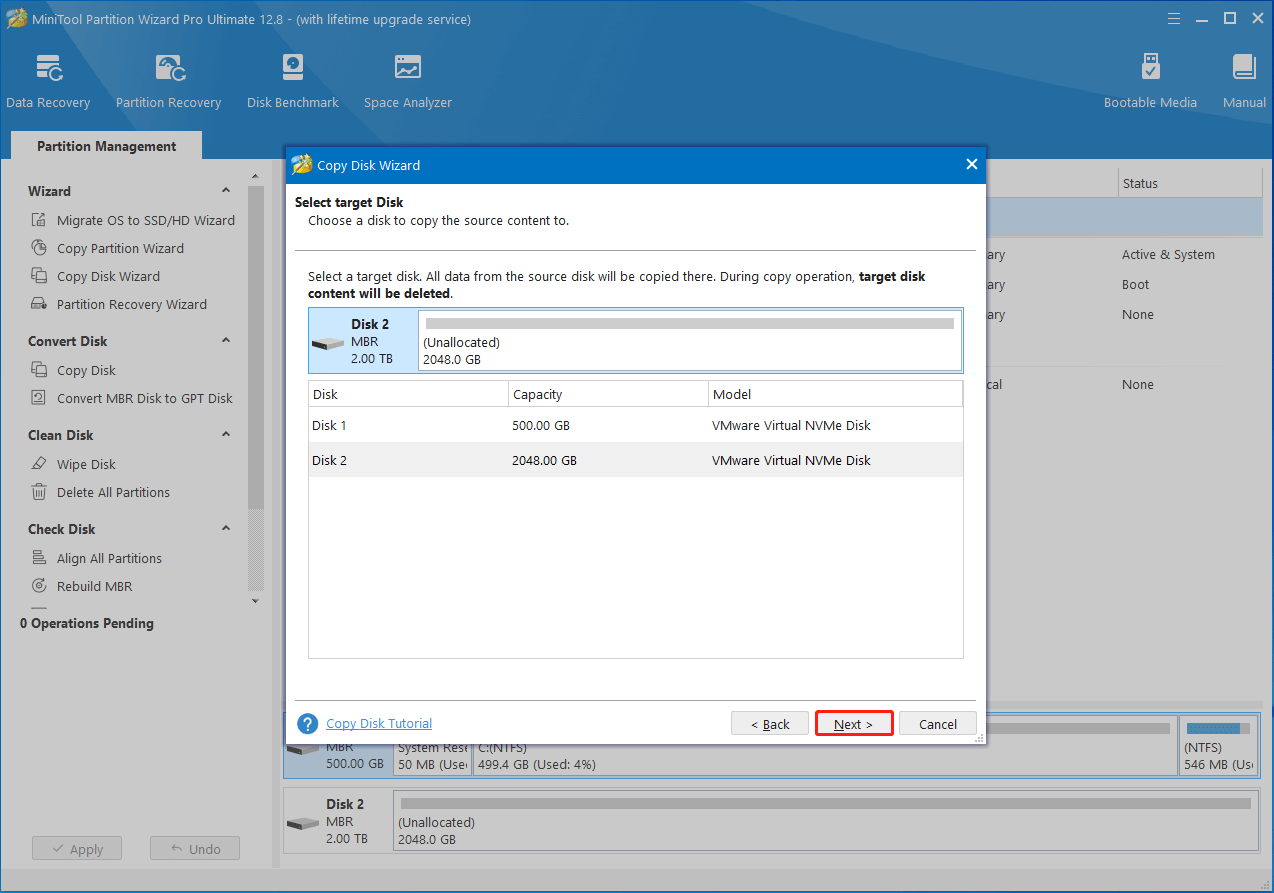
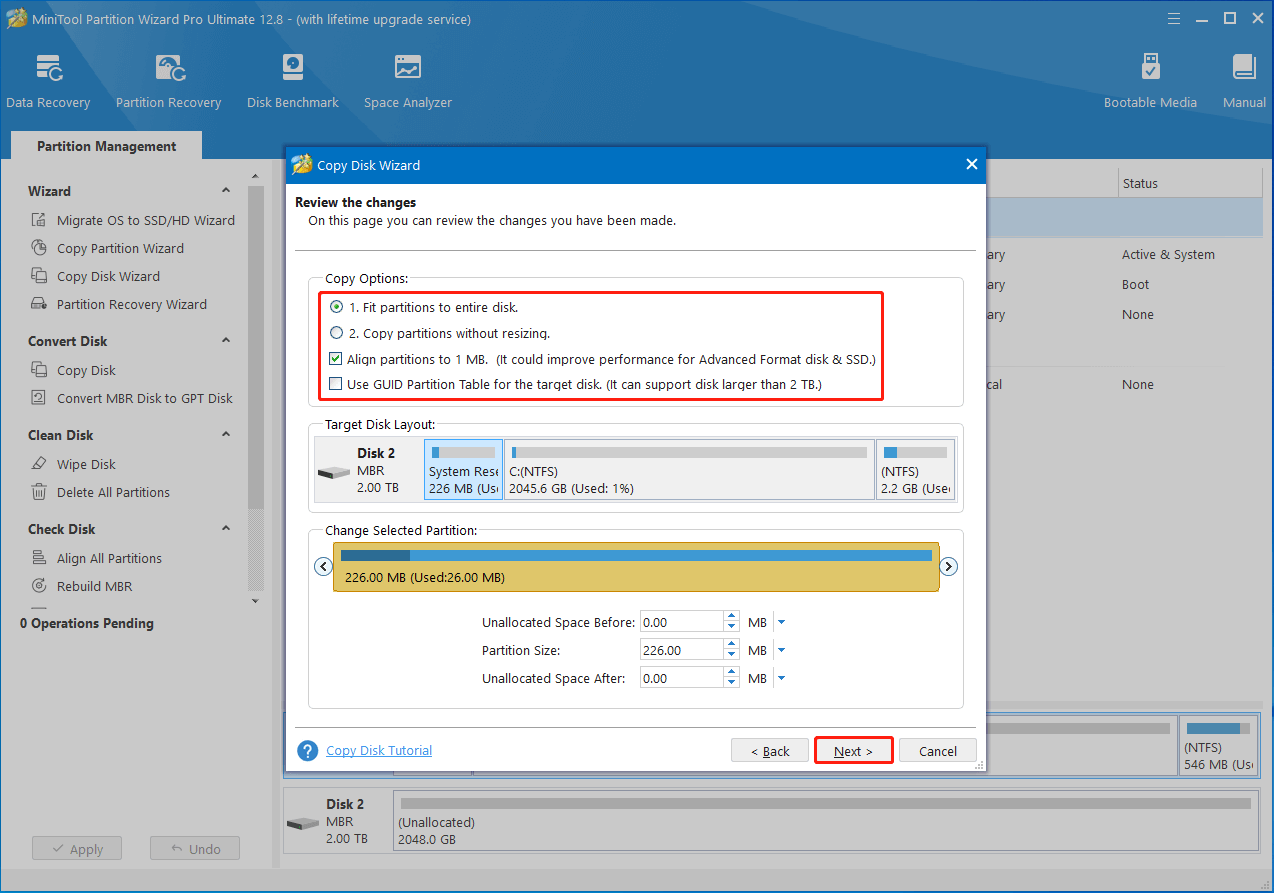
Step 6: In the Review the changes window, choose the preferred copy options. Also, you can configure the target disk layout according to your needs. Once done, click Next.
Step 7: Finally, click Finish and Apply to save the pending changes.
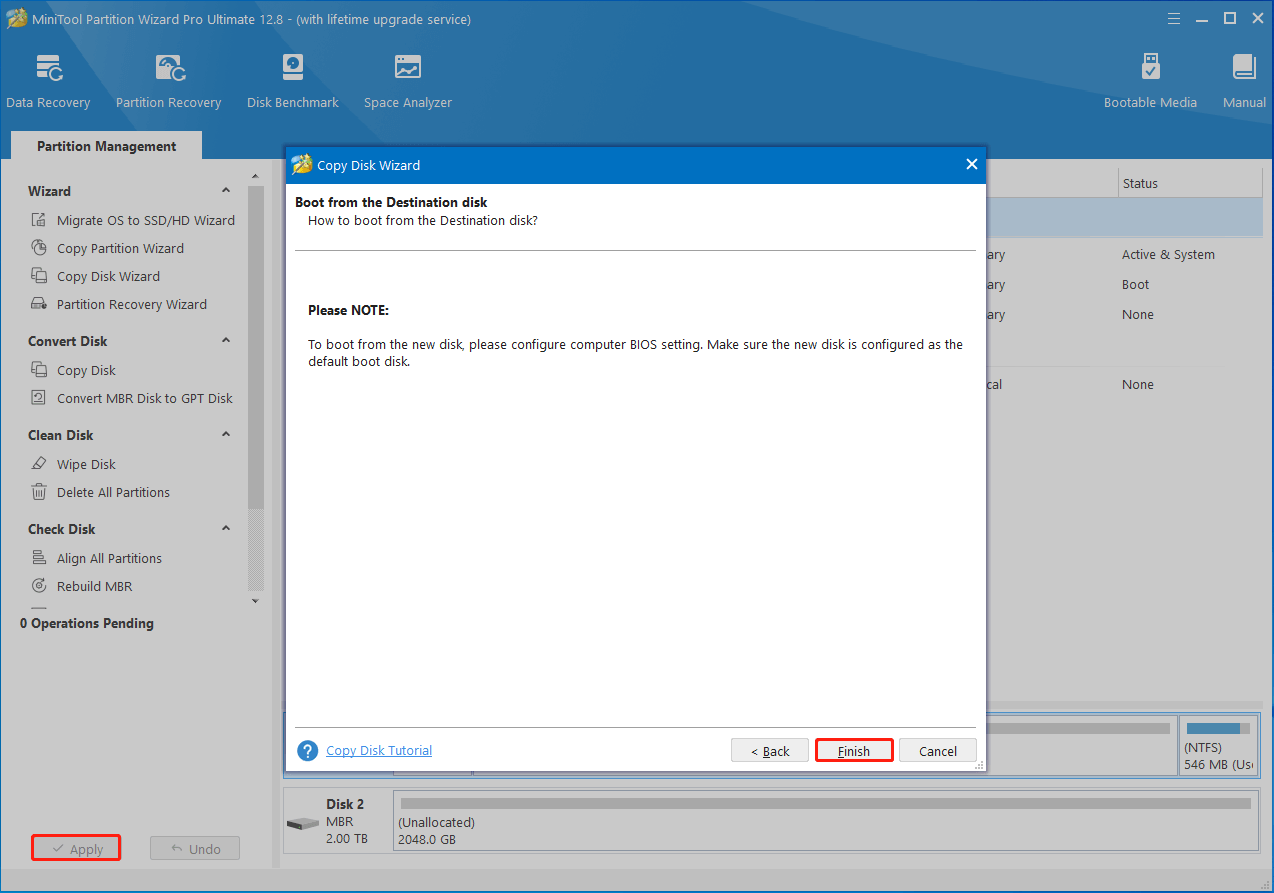
Step 8: Wait patiently until the process ends. Then remove the new SSD from your laptop.
Part 3: Replace the Old SSD with the New One
It’s time to replace the Alienware M17 R5 SSD once you clone the original disk to the new SSD. Here’s how to do this.
- Turn off your Alienware M17 R5 laptop and disconnect its power cord.
- Place the Alienware M17 R5 bottom side up on the table.
- Use a Philips screwdriver to remove the screws that secure the base cover.
- Remove the base cover carefully and gently.
- Find the location of your SSD. Then unscrew the screws fastening the SSD.
- Slide and remove the original SSD from the SSD slot.
- Place the new SSD into the slot properly.
- Use the same screws to secure the SSD. Then install the base cover back with the required screws.
- Reinsert the power cord and turn on your laptop to see if it boots up normally.
To Sum Up
This post is totally about the Alienware M17 R5 SSD upgrade. If you are considering upgrading your laptop SSD, you can refer to the step-by-step guide in this post. For any problems with MiniTool Partition Wizard, contact us via [email protected]. We’ll reply to you as soon as possible.

User Comments :